Modifying Item Lists
Once an ItemList is created, you can easily add and delete items using the Item List Maintenance Viewer.
-
Open the Item List Maintenance ViewerFrom the Eagle Browser Launch bar, type Lists and press Enter.
(Note: You can also access this viewer from Modify Item Promotions (MIP), by clicking Misc and selecting Maintain Item Lists.) .
- In the List Type drop-down, select the type of list you are modifying.
- In the Item List drop-down, select the item list you want to modify and press Enter.
- If you want to add items to the Item List, do one of the following:
- Click Add Item to manually enter items one at a timeUse this option if you know the SKUs of the items you want to include in the list. This option allows you to create an item list, or add to an existing item list, by entering individual SKUs.
Type the SKU to add, and press Enter. Repeat as desired, then press Cancel when done adding items. Note: You can also use the toolbar's Add Item button to add items to an Item List.
- Click Import to import a text file of itemsUse this option to create an item list, or add to an existing item list, by importing a plain text file (must have an extension of .txt) containing a list of SKUs. Each SKU must be on a separate line. This is an example of a text file.
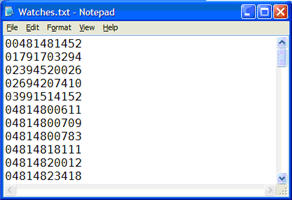
You can create and edit the text file in Notepad, and you must save the text file in C:\3apps\Temp. When you select Import, a dialog displays.
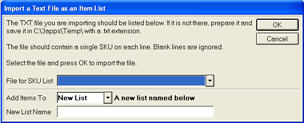
Select the file for SKU list, select whether you are importing into the list that is currently displayed in the grid, or into a new list that you name in the New List Name field. Note: You can also access the import feature by clicking Import (F8) on the toolbar.
- Click Viewer to use the Inventory Viewer to add itemsUse this option to create an item list, or add to an existing item list, by using the Inventory Viewer to select items. Use check boxes to select the desired items and use <Select> to paste them into the current list. If no items are checkboxed, then it will add only the one item that is currently highlighted in the grid.
Note: You can also access the Inventory Viewer feature by clicking View Inv (F9) on the toolbar.
- To delete an item, click the item to highlight it. Then click Delete Item. Use checkboxes if there are multiple items to be deleted.