(Inventory Import Tools users only)
The following procedure describes how to use the Inventory Import Designer window to import a data file that contains Inventory item change information into your Eagle system. Create or obtain (for example, from a vendor) a file that contains item changes. The data in the file can be in a fixed length format or delimited format (tab, comma, or custom). If you aren't creating the file yourself, ask the provider of the file how the data is arranged in the file. If it is custom delimited, you'll need to know what character is used as the delimiter.
![]()
Commas do not import via Inventory Import; they are converted to question marks ("?”). If the data you're importing contains commas in the item description field, Epicor recommends you globally change the commas to some other character (such as a space or semi-colon) before importing.
When importing a date (such as Record Added Date, Last Sale Date, Catalog Date, etc.), it must be in the format of mm/dd/yy. The format mm/dd/yyyy will not work.
Place the data file in a folder (directory) on your PC. The location and name of the file is up to you. But you will need to know where the file is located to use the Inventory Import Designer window.
From the Eagle Browser, click Data Import Menu, then click Inventory Import Designer.
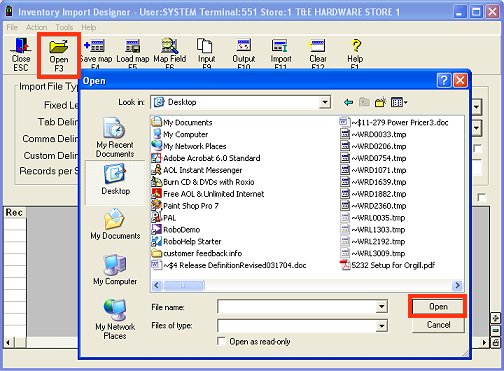
Click Open, browse to the fixed or delimited file you are importing, and click Open.
In the Import File Type area of the window:
Select the type of file you're importing— fixed or delimited (tab, comma, or custom delimited). If you select Custom Delimited, you must also enter the delimiter character in the box that displays. This is the character that divides the data fields.
If there is more than one record in the file that applies to a single SKU, enter the appropriate number in the Records per SKU field, and the system will concatenate the various records into one record per SKU. If there is only one record per SKU, leave this field blank.
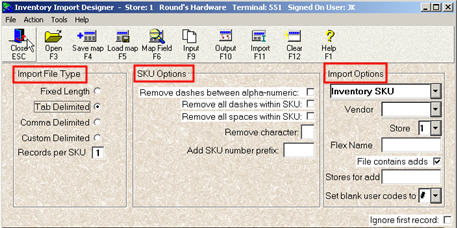
In the SKU Options area of the window, indicate any options you want to invoke:
In the Import Options area of the window, fill in the fields as appropriate.
Stores for Chg (this field only displays if you did NOT click File Contains Adds)
If the first line of the raw data is NOT part of the data you want imported, place a checkmark in the "Ignore first record" box.
Click Input to view the raw data.
Including SKU, map the fields in the data with the fields on the flex report you selected in the Flex Name field. Please note the following:
If you want the system to auto-assign SKUs to the items you're importing, do NOT map the SKU field. When importing, answer Yes to the message "SKU not mapped in Designer. SKU will be generated based on the settings in MIC Options 104 &105. Continue?" (If you answer No, you can't continue using that mapping until you've added SKU to the mapping).
If you are not using auto-assigned SKUs, you must map the SKU "identifier" in the import file to the SKU field, whether the import file identifies the items by SKU, UPC, Manufacture Part Number, or Alternate Part Number.
If you want to Import Alternate Part Numbers for a Primary Vendor, map the Primary Vendor column into the Alternate Vendor Column. For example, if you have a data file that contains SKU, Primary Vendor Code, Alternate Part Number, you would map it as follows: SKU, Alt Vendor, Alternate Vendor Part Number. The same principle applies to the Manufacturer Vendor and its Alternate Part Numbers.
If you are importing Desired GP% from a data file or entering the value as a Constant, it must be expressed as a decimal ONLY (not a whole number), and there can be up to three decimal places after the decimal. For example, a desired gross profit of 49.9% must be entered as 49.9.
Click Map Field.
In the Map Field dialog box, scroll down to the field you want to map. You can type the first letter of the field to search faster. With the exception of the " Constant" field, the field you select must correspond to a field on the flex report you entered in the Flex Name field.
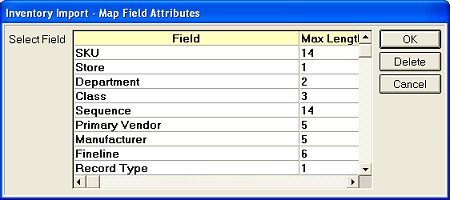
Click OK.
Fill in the fields in the dialog box that displays.

Click on any of the following for more information about a field.
Repeat step 8 until all fields are mapped. If you make a mistake and need to delete a mapped field, use the Delete button in the Map Field dialog box.
Click Output to verify that the information is mapped properly. For comparison, you can click Input to compare your mapping to the raw data.
If there are any problems, repeat step 8 to remap the problem field(s). Then click Output again to verify that the problem has been corrected.
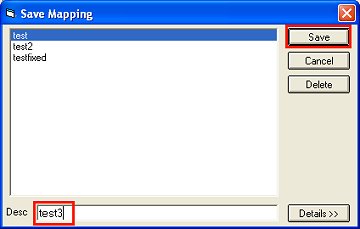
(Optional) You can save the map file for future use, so if you import other data files that are set up the same as the one you just mapped, you can retrieve the saved map instead of having to recreate it. To save, click Save Map. In the dialog box that displays, enter a name for the map in the Desc field, then click Save.
Click  .
The Inventory Import dialog displays.
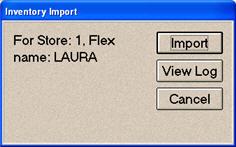
Click Import. As the import executes, a progress bar displays. In a moment, the total number of records imported displays in the last line of the dialog box. If there are no errors, click Cancel to close the dialog.
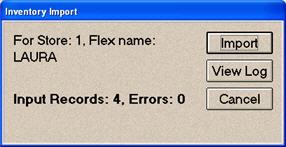
If you received an error, use the following information to troubleshoot the problem.
"The flex name XXX is in use. Please create a new flex name before importing” (where "XXX” is the value in the flex name field in Flexible Inventory Load. This error means you used an existing flex name in the Flex Name field, and your mapping does NOT exactly match. To remedy the problem, you can either 1) correct your mapping so it does match the existing Flex Name, or 2) simply type a different flex name (up to 8 characters) in the Flex Name field.
"
If the Import dialog indicates that errors occurred, as shown here,
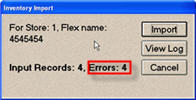
click View Log to view the error log. Scroll to find the entries for the most recent import and review the error messages.
![]()
This log file is used by all the Data Import applications and can get quite large. The system does not automatically delete the oldest entries. You can delete old entries that are no longer needed. Highlight the lines that you want to delete and from the Edit menu, click Delete. Then from the File menu, click Save.
Verify the import was successful in the Miscellaneous Log.
The Miscellaneous Log is accessible via Network Access. It is VERY IMPORTANT that you check this log before proceeding.
Use Flexible Inventory Load (FIL) to view/modify the imported data.
When you are satisfied with the data, finalize it by running the Flexible Inventory Load Report (RFL) with option F. However, if you entered a store(s) in the “Stores for chg” field, the system will queue and run a finalized RFL automatically, one for each individual store you indicated.