You can import budget amounts from Excel files to General Ledger. This feature is only available after your files have been certified. Certification can be achieved by working with Epicor's Professional Services team. You must also make sure that your files are in a specific format. To view the required format, click here.
![]()
MSY option 9030 "Import General Ledger budgets from external files" must be set to Y by an Epicor representative before you can import G/L budgets from Excel.
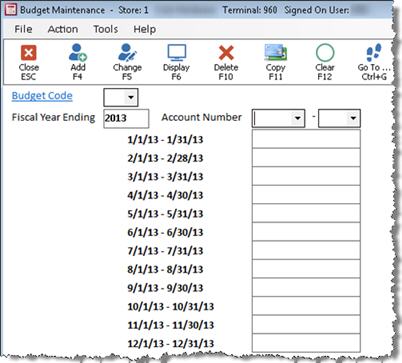
Click Go To, then select Budget Maintenance. The Budget Maintenance Code window displays.
Click Go To. The Go to Menu displays.
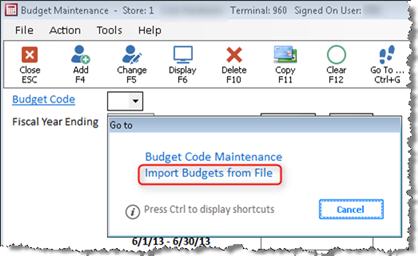
Click Option 2-Import Budgets From File. Before you click Option 2, make sure the budget code exists. If it does not, you must add it in the Budget Maintenance window. When you click Option 2, the following window displays.
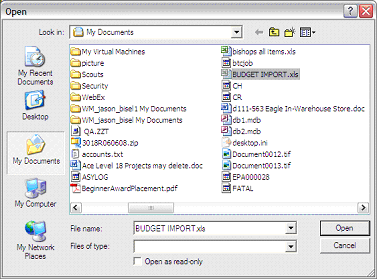
Select the file you want to import, then click OK. The following dialog box displays.
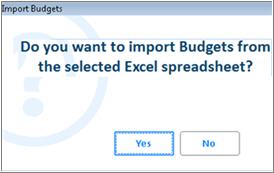
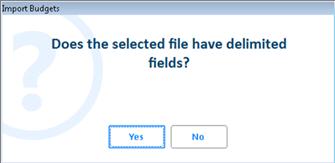
If the file is a txt file or csv file, click No and skip to step 10. If the file is an Excel file, click Yes and continue with steps 7-9 only. The following dialog box displays.
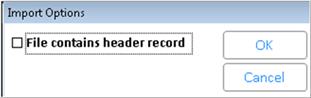
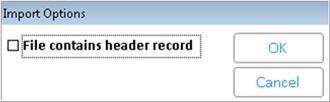
If there are header rows in the file, click the box to select, then click OK. The import begins.
When the import is complete, the following confirmation dialog box displays. If errors are reported on the confirmation, you should view the error log file.

Click Yes or No depending on if you want to delete the import file.
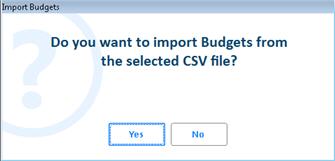
If you clicked No in step 5 because the file is a txt or csv file, the dialog boxes that display may be different. If the file is a CSV file, the first dialog box below displays; click Yes and skip to step 15. If the file is a txt file, the second dialog box displays and continue with step 11.
If you click No, the system assumes the file is a fixed field file. If you click Yes, the following dialog box displays.
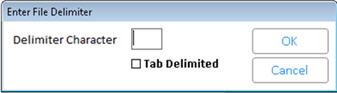
If the fields in the import file are separated by a character, then in the Delimiter Character field, enter the character used to separate the fields. If the fields are separated by a tab, then click the Tab Delimited box to select it.
Click OK, the following dialog box displays.
If there are header rows in the file, click the box to select, then click OK. The import begins.
When the import is complete the following confirmation dialog box displays. If errors are reported on the confirmation, you should view the error log file.

Click Yes or No depending on if you want to delete the import file.