Physical Inventory: Counting with Epicor Worksheets
This job aid describes the process for taking a physical inventory using count sheets generated by the Epicor Eagle™ system. Refer to other job aids if you are using your own forms for count sheets. Do not use this job aid if you are using an RF gun to take inventory.
Before you begin, read the topics in the Getting Started book in online help. From the Contents tab, open the Inventory book, then open the Physical Inventory and Shrinkage book.
QPIP compared to PIP
|
PIP |
QPIP |
|
|
1
Create and print count sheets
-
From the Eagle Browser, click Applications, then click Reports menu. Click Inventory Reports and then click Physical Inventory (RPI).
-
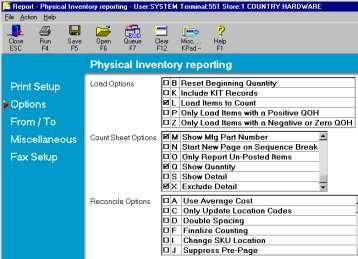
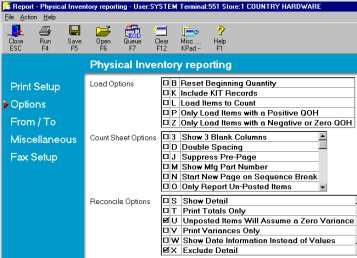
Enter your print options on the Print Setup page, then click Options.
-
At Load Options, select L Load Items to Count.
-
At Count Sheet Options, select:
-
3 - Show 3 blank columns (optional)
-
M - Show mfg part num (optional)
-
Q - Show quantity (optional)
-
X - Exclude detail
-
Click From / To. Usually, enter a department range so that all items in the area you count are loaded and printed. When you finalize your counts, use the same from and to range.
-
Click Run to load items into the count file and to print the count sheets.