(Document Management users only)
Use the following procedure to set up your system to print statements on a laser printer. The flag "Allow the user to print laser statements in RSM" (ID# 900) in Options Configuration must be set to Y (laser statements only) or to C (laser statement collated with tiled invoices). If you will be printing laser statements on blank paper, the flag "Allow Laser Forms" (ID# 915) must also be set to Yes in Options Configuration. Both these flags can only be changed by the Licensing Department or Eagle Advice Line.
Set up Network Report Printing for the printer at which you will be printing laser statements.
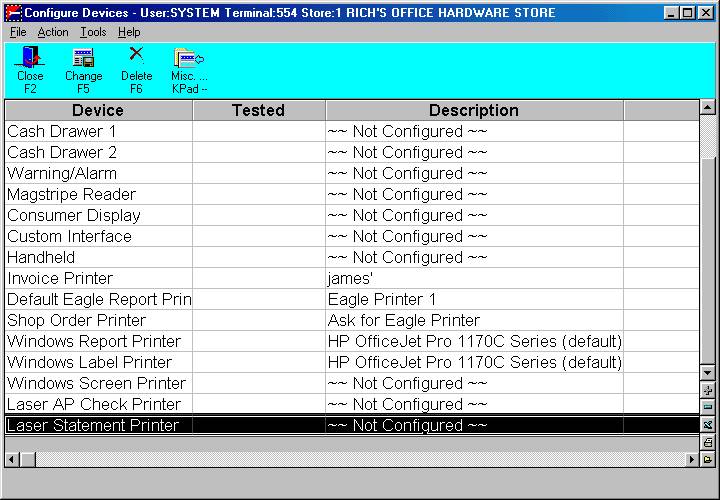
From the PC at which the "Listener" is running, display the Eagle Browser, and click Utilities (in the blue left pane of the window). From the menu that displays, click Device Configuration. The Device Configuration window displays.
![]()
The PC at which you execute the following steps must be the same PC at which you started the "Listener" when you set up Network Report Printing.
If you'll be printing laser statements from a top bin and the collated tiled invoices from a bottom tray, do the following:
Make sure the printer is installed with a driver to support multiple bin printing and has the multiple bin added to the Windows printer properties.
In Device Configuration, click MISC, select option 6 (Paper Bin Detection Mode), and select "New Paper Bin Detection Method." Then close Device Configuration and reopen it.
Double-click Laser Statement Printer (at the bottom of the list of devices).
From the list of printers that displays, select the laser printer to be used and click OK.
From the Laser Statement Printer dialog, click Copies. The Statement Printer Setup dialog displays.
At Statement Format, click on the appropriate statement format (PP if you'll be using pre-printed forms, or LF if you'll be using blank paper).
At Statements Paper Bin:
If you have a multi-bin printer and selected to print statements from a top bin and the collated tiled invoices from a bottom tray in step 3 above, select the bin number that will contain the statements.
If you have a single bin printer, or if you have a multi-bin printer but don't wish to use multi-bin printing (as described in step 3), select "Bin #7 (default bin)."
At Invoice Format, click on the appropriate format (if you plan on printing invoices).
At Invoice Paper Bin:
If you have a multi-bin printer and you selected to print statements from a top bin and the collated tiled invoices from a bottom tray in step 3 above, select the bin number that will contain the invoices.
If you have a single bin printer, or if you have a multi-bin printer but don't wish to use multi-bin printing (as described in step 3), select "Bin #7 (default bin)."
Click OK.
From the Laser Statement Printer dialog box, click TEST to verify the setup is working properly.
If the test statement printed properly, click Yes. If not, click No.
If you clicked "No," verify that you have network report printing set up. Then return to Device Configuration, double-click Laser Statement Printer, click Test, and run another test statement.
When you're returned to the Laser Statement Printer dialog box, click OK to close it.
To verify that statements print properly, run one statement via the Statement Report (RSM) by filling in one account number in both the From and To Cust Number fields.
Once the setup and test is complete, you can run statements from the Reports menu in Eagle for Windows (note: you cannot run laser statements from the Legacy Eagle system). Make sure the Form Type in MPS screen 1 is set to STMT, and be sure to enter a Y in the Laser Statements field on the ![]() page.
page.
![]()
A postal bar code will ALWAYS prints on laser statements.