Use the following procedure to create Representative Groups, so you don’t have to do so manually. Representative Groups consist of a Representative Item and one or more Representative Members.
Create a comma-separated value (CSV) file that lists Items (SKUs) and their associated Representative Items, using the format Item,Representative-Item. The first item in the file must be the Representative Item itself. For example, if you want to create a Representative Group consisting of four SKU numbers 123, 124, 125, and 126, where 123 will become the Representative Item, the CSV file would look like this:
123,123
124,123
125,123
126,123
This will create a Representative Group with a Representative Item 123, and three Representative Members, 124, 125, and 126. This occurs because:
The first item, 123, automatically becomes a Representative Item “Q” (because the Item and the Representative Item are the same)
The second item, 124, automatically becomes a Representative Member “R” for the attribute group 123
The third item, 125, automatically becomes a Representative Member “R” for the attribute group 123
The fourth item, 126, automatically becomes a Representative member “R” for the attribute group 123
Place the data file in a folder (directory) on your PC. The location and name of the file is up to you. But you will need to know where the file is located.
From the Eagle Browser, click Data Import Menu, then click Inventory Import Designer.
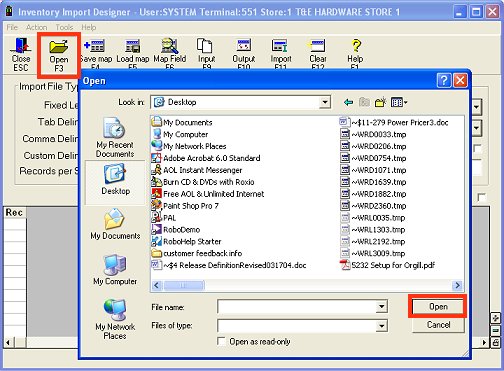
Click Open, browse to the CSV file you are importing, and click Open.
In the Import File Type area of the window, select Comma Delimited.
Leave the SKU Options area of the window
In the Import Options area of the window, fill in the fields as appropriate.
Stores for Chg (this field only displays if you did NOT click File Contains Adds)
Click Input to view the raw data.
Map the first column to SKU, and map the second column to Representative Item Number.
If you make a mistake and need to delete a mapped field, use the Delete button in the Map Field dialog box.
Click Output to verify that the information is mapped properly. For comparison, you can click Input to compare your mapping to the raw data.
If there are any problems, repeat step 9 to remap the problem field(s). Then click Output again to verify that the problem has been corrected.
(Optional) You can save the map file for future use, so if you import other data files that are set up the same as the one you just mapped, you can retrieve the saved map instead of having to recreate it. To save, click Save Map. In the dialog box that displays, enter a name for the map in the Desc field, then click Save.

Click  . The Inventory Import dialog displays.
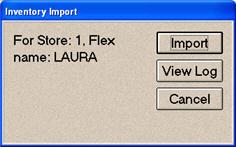
Click Import. As the import executes, a progress bar displays. In a moment, the total number of records imported displays in the last line of the dialog box. If there are no errors, click Cancel to close the dialog.
If you received an error, use the following information to troubleshoot the problem.
"The flex name XXX is in use. Please create a new flex name before importing” (where "XXX” is the value in the flex name field in Flexible Inventory Load. This error means you used an existing flex name in the Flex Name field, and your mapping does NOT exactly match. To remedy the problem, you can either 1) correct your mapping so it does match the existing Flex Name, or 2) simply type a different flex name (up to 8 characters) in the Flex Name field.
"
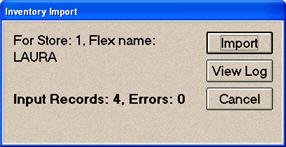
If the Import dialog indicates that errors occurred, as shown here,
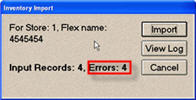
click View Log to view the error log. Scroll to find the entries for the most recent import and review the error messages.
![]()
This log file is used by all the Data Import applications and can get quite large. The system does not automatically delete the oldest entries. You can delete old entries that are no longer needed. Highlight the lines that you want to delete and from the Edit menu, click Delete. Then from the File menu, click Save.
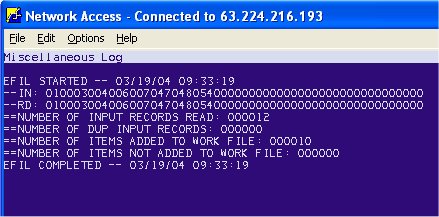
Verify the import was successful in the Miscellaneous Log.