Use the following procedure to create and save a custom SKU list in the Inventory Viewer. You can then recall the list at any time. Saving frequently-used lists of SKUs can make SKU lookup at POS easier. You can even add individual items to SKU lists, which allows you to create a list of items that would not otherwise display using traditional viewer lookup methods.
Saved lists can also be used as PO templates: you can enter order quantities for items in the list, and then simply click Select to paste those order quantities into a purchase order.
A QuickTip video about Custom SKU Lists is available. To view QuickTips, go to http://www.activant.com/eagle-customer-support/, and click Training Browser. When the Training Browser displays, click Videos in the left pane, and then click Quick Tips.
![]()
Custom SKU Lists with less than 1500 items are stored on the Eagle server. If you want to create a Custom SKU List with more than 1500 items, you must save the list as a file on a PC in the network.
From the Eagle Browser, click Inventory Menu, then click Inventory Viewer (or simply type INV in the Launch bar and press Enter). The Inventory Viewer displays.
Multistore: In the Store box, select the store for which you want to look up items.
To add items to the grid by range, click Lookup. The View By dialog box displays.
Use the up or down arrow keys to highlight a lookup method, and click OK.
Note: If you're looking up items by class, fineline, or vendor and you don't know the code associated with it, you can simply type in an equal sign (=) followed by the name of the class, fineline, or vendor. Once you've located the correct one, click on it, and press ENTER.
To narrow your search, select the appropriate information in the drop-down box(es) that display.
Click Refresh. The items that meet the criteria you selected display.
To add individual items to the grid (as opposed to by range):
Click Misc, click Custom SKU List, and then click Create SKU List.
When asked if you want to clear the grid, answer No if you want to retain any items already displayed in the grid.
In the "Add SKU to the grid" box, type the SKU, and click OK.
Type the next SKU and click OK, or click Cancel to close the box.
To import a list of SKU from a CSV file on your PC (note that the CSV format has to be Store, SKU and optionally Quantity):
Click Misc, click Custom SKU List, and then click Import SKU List.
Browse to the CSV file on your PC, and click Open.
Save the list you just created, as follows:
Click Misc, then click Custom SKU List. The Custom SKU List dialog displays.
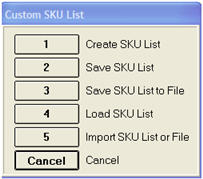

If the Custom SKU list you created is less than 1500 items, click Save SKU List. If the List you created contains more than 1500 items, click Save SKU List To File.
In the Desc box, enter a name for the list. Or, if you want to replace an existing list, click the name of the list you want to replace.
Click Save. If you're replacing an existing list, you'll get a warning message. Click Yes to replace.
![]()
You can combine SKU lists. Display a saved list, click Misc, select Custom SKU List, and select Load SKU List. Select the list you want to combine with the first list, and click Open. When asked if you want to clear the grid, answer No. Now that both lists are combined on the screen, save the new combined list.