
(Multistore users)
If you have “letter” stores (stores A, B, C, etc.), use this procedure if you want the system to display your “letter” stores as two-digit numbers. The system assigns a fixed number to them; in other words, you cannot assign your own numbers. If you decide to use this feature, the system will present your "letter" stores as follows:
|
Store |
Will be presented as |
|
A |
10 |
|
B |
11 |
|
C |
(not supported) |
|
D |
12 |
|
E |
13 |
|
F |
14 |
|
G |
15 |
|
And so on (A=10, B=11, D-M=12-21, O-Z=22-33, a-s=34-52, v-z=53-57) |
|
The following are some important notes and limitations regarding the Two-Digit Store feature:
If you print the store number on invoices and receipts (option 5490 ”Print store number next to document # on invoices and receipts” is set to Yes), you must use Flex Forms in order for the two digit store number to print. Without Flex Forms, the untranslated, single character store number prints.
Reports must be run with the Large Format field set to Yes, which in turn requires using laser printers. In addition, queued reports must be changed so that the Large Format field on the Setup page is set to Yes. To do this for all queued reports at once, display the End-of-Day Queue Maintenance window, simply click Misc and select ”Set Large Format report field." Then click OK in the dialog box that displays.
ReQuest and ODBC do NOT have the store translated – so output or queries display/print the single-digit store number (for example Store A, not Store 10).
All data imports (Inventory Import, Price Import, Catalog Import) which include Store in the incoming data must use the single-character store value. For example, the incoming data must specify store A, B, D, etc., not store 10, 11, 13, etc. This same limitation applies to the incoming store number in ESTU and in any other import that includes Store.
RF applications don't show the two-digit numeric store. For example, RF shows store A rather than store 10.
iNet OrderPro hasn't been changed to show the two-digit numeric store. For example, the following OrderPro screens show store A rather than store 10: Accounts Documents list (which lists A/R transactions), History list (which lists QuickRecall documents), Online Statements (which show store on each statement detail line), and Quotes and Orders list.
A/R Statements – the store value prints on the detail line of statements. If you want the two-digit store numbers to print, you must use Laser Statements. If you are currently using a preprinted form (rather than plain paper), you'll need preprinted statement forms that support a 2-digit store. You'll need to take this into consideration in timing your cut-over to a numeric store presentation.
Note: you can print a test statement from Device Configuration’s ’r;Laser Statement Printer’ field. This field recognizes the setting in option 8701 "Store number format," and prints the test form accordingly for a one-character or two-character store. If you are using plain paper for laser statements, the Statement Report (RSM) looks at option 8701 and adjusts the spacing on the print line and the rendering of the vertical lines accordingly.
When creating/maintaining a Store Group, you must enter comma separators between stores.
To activate this feature:
Set option 8701 ”Store number format” to B ("2-digit store 1-57") in Options Configuration.
Change your end-of-day queues so that they print in Large Format. Click here for the procedure.
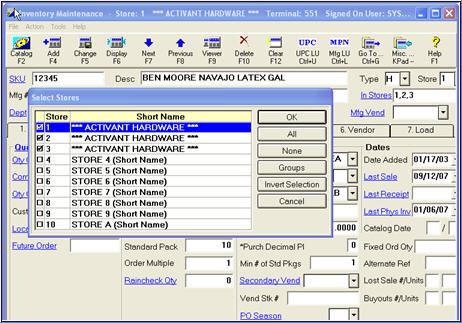
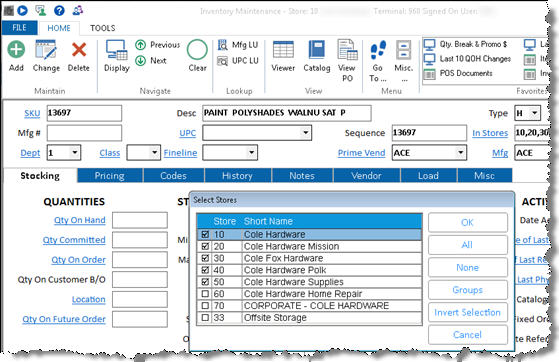
In Inventory Maintenance, when you click in the "In Stores" field, the Select Stores dialog displays, listing the stores on the system. If an item is displayed, the stores in which the item exists will be checked.


The buttons on the right allow you great flexibility in selecting and de-selecting stores:
The All button places a checkmark next to all stores, making it easy to add/delete to all stores. Then you can simply un-select any stores you don't want to include.
The None button leaves all stores unchecked, making it easy to add/delete to only the few desired stores. After Clicking None, simply select the desired stores.
The Groups button displays a list of Store Groups. Select a group to have all stores in that group checked. The system first un-selects any selected stores and then checks the stores that are in the selected Store Group.
The Invert Selection button automatically de-selects the stores that are currently selected, and selects the stores that are currently not selected. In other words, Invert Selection toggles the checked boxes between the stocked-in stores and the not-stocked-in stores. This allows you to more easily add an item to those stores in which the item is not currently stocked. For example, if you have 20 stores on the system and an item is stocked in 14 out of the 20 stores, you can simply click Invert Selection to select the 6 stores in which the item is not stocked, and then Click Add to add the item to these stores. This saves you from having to figure out which 6 stores the item is not stocked in.