Before reading this section, make sure options and security bits are set correctly.
There are three ways in which the Item Weblink Maintenance viewer can be accessed:

In Classic Eagle the Weblinks Setup cannot be accessed directly form IMU, MCR or MVR. So unless you use “N Series” method 2 or 3 needs to be used to setup Weblinks.


Once you have accessed Weblinks, the Item Weblink Maintenance viewer will appear.

To add a Weblink, click Add.
To change a weblink, highlight that line and click Change.
To remove a Weblink, highlight that line and click Delete.

You can add and maintain the Weblinks in their applicable viewer. For example, in the Inventory Viewer use the Misc Menu choice “Add Weblink" to add a weblink for the highlighted item, or use “Maintain Item Weblinks” to access the Item Weblink Maintenance Viewer where you can see Weblinks for all items. The same functionality is available in the Customer and Vendor Viewers.
This describes how to link specific customers to a specific URL’s. Customer specific URL’s are always setup one item at a time. You can only have one weblink per customer.
From Customer Maintenance (MCR), with the desired vendor displayed go to FILE -> Configure -> Maintain Customer Weblinks. The Customer Weblink Maintenance viewer will display.
Click Add.
If a customer has multiple jobs, a job dialog will appear. Enter a job to set up a weblink for only that job, otherwise enter the weblink for the main account. If a job has no job specific weblink defined, it will show the weblink for the main account.

In the "Caption" field, enter the label you want the link to have in MCR.
Enter or paste in the URL that this specific customer should link to.
Use the “Test” button to make sure the link is functional and brings up what you’d expect.


Vendors and Customers both have a “Use Map” button in their weblink setup. Use this button to have the system create a MapQuest link. The link Defaults to the vendor/customers address, but can be changed. Once the link it created it is static – meaning that if the vendor / customer changes their address the map link will have to be recreated.
This describes how to link specific vendors to a specific URL’s. Vendor specific URL’s are always setup one item at a time. A vendor can only have a single weblink.
From Vendor Maintenance (MVR), (with the desired vendor displayed) go to FILE à Configure à Maintain Vendor Weblinks. The Vendor Weblink Maintenance viewer will display.
Click Add.
In the "Caption" field, type the label you want the link to have in MVR.
Enter or paste in the URL that this specific vendor should link to.
Use the “Test” button to make sure the link is functional and brings up what you’d expect.


Vendors and Customers both have a “Use Map” button in their weblink setup. Use this button to have the system create a MapQuest link. The link Defaults to the vendor/customers address but can be changed. Use the “Map Type” flag to select if you want a standard map, satellite map or hybrid. The “Show Traffic” flag allows you to have MapQuest show traffic conditions.Once the link it created it is static, meaning that if the vendor/customer changes their address the map link will have to be recreated.
This describes how to link specific items to specific URL’s. Item specific URL’s are setup one item at a time. An item can only have one specific weblink at a time.
Because item specific weblinks are setup one at a time this should not be used if you have access to vendor or store specific data that has the SKU build into the link in a structured way. For example www.acehardware.com/product/XXX (where XXX is the Ace SKU). How do use structured web data is covered later in this document.
From IMU, with the desired SKU displayed go to FILE à Configure à Maintain Item Weblinks. The Item Weblink Maintenance viewer will display.
Click Add.
In the "Caption" field, type the label you want the link to have in IMU.
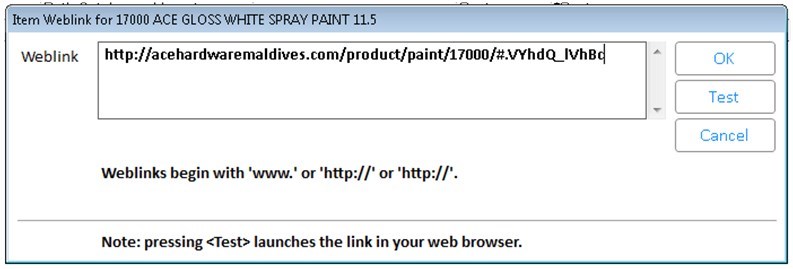
Enter or paste in the URL that this specific SKU should link to.
Use the “Test” button to make sure the link is functional and brings up what you’d expect.


For all different applications the image Weblinks (ending in .jpg, .png or .gif) are special. By default images are displayed in an Eagle web panel dialog, instead of being launched in a web browser. Option 1640 allows the user to specify if they should be shown in your web-browser window or a dialog window.
If structured web-data is available for all (or most) items for a specific store their links can be setup all at once, provided the web address is predictable. Predictable means that the address is constant, with as only variation the “Item number”, “Manufacturers part number” or the “Primary UPC”) of the item. An example of when this would be the case is when the customer has and iNet store linked to their Eagle Store.
This weblink will show for ANY item in the selected store.
For example, if Store 1 has images of all its items available online and the URL is always www.store.mystore.com/images/largeimagexxxxx.jpg where xxxxx is the item number of the SKU as you have it on your system. So for example the image for item 12345 can be found at URL: www.store.mystore.com/images/largeimage12345.jpg.
Type WEBLINKS into the Eagle Launch Bar and select “All items for a Store”.
When asked supply the store for which you want to setup the weblinks.
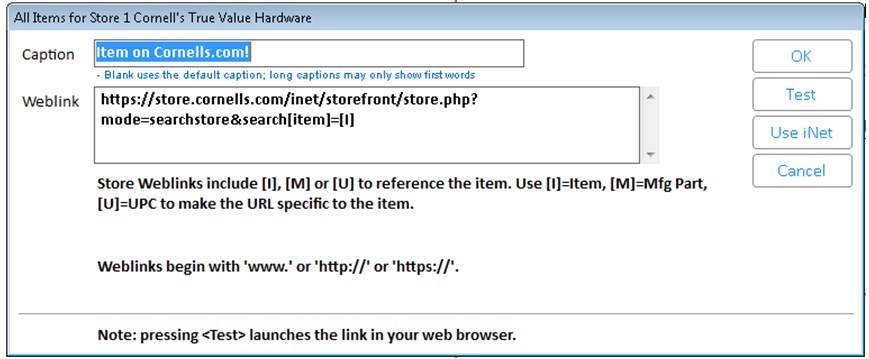
In the "Caption" field, type the label the link should show in IMU.
Enter the URL of the predictable web address. For the flexible part of the address you can replace the flexible piece of the web address with one of these three “tokens”.
[ I ] = item number or alternate part number
[ M ] = manufacturer part number
[ U ] = primary UPC code
(In our example the user would enter “www.achmesupply.com/images/largeimage[I].jpg” into the “weblink” box.)
Use the “Test Item” button to test if the link leads to the desired webpage. If you used a token [I], [M] or [U], you will be asked to enter an item / mfg part# or UPC to be used during the test.


The <USE iNet> button opens a wizard that creates an iNet link for you. If you have iNet, use that button. Just type in the store URL when asked; typically store.mystore.com.
If structured web-data is available for all (or most) items for a specific vendor their links can be setup all at once, provided the web address is predictable. Predictable means that the address is constant, with as only variation the “Eagle Item number”, “Manufacturers part number” or the “Primary UPC”) of the item.
This weblink will show for ANY item that has the selected vendor setup (primary, mfg, alternate etc.)
For example, if vendor ACME Supply has images of all its items available online and the URL is always www.achmesupply.com/images/largeimagexxxxx.jpg where xxxxx is the item number of the SKU as you have it on your system. So for example the image for item 12345 can be found at URL: www.achmesupply.com/images/largeimage12345.jpg
Type WEBLINKS into the Eagle Launch Bar and select “All items for a Vendor”.
When asked supply the vendor for which you want to setup the weblinks.
In the "Caption" field, enter the label the link should show in IMU.
Enter the URL of the predictable web address. For the flexible part of the address you can replace the flexible piece of the web address with one of these three “tokens”.
[ I ] = item number or alternate part number
[ M ] = manufacturer part number
[ U ] = primary UPC code
(In our example the user would enter “www.achmesupply.com/images/largeimage[I].jpg” into the “Weblink” dialog box.)
Use the “Test Item” button to test if the link leads to the desired webpage. If you used a token [I], [M] or [U], you will be asked to enter an item / mfg part# or UPC to be used during the test.

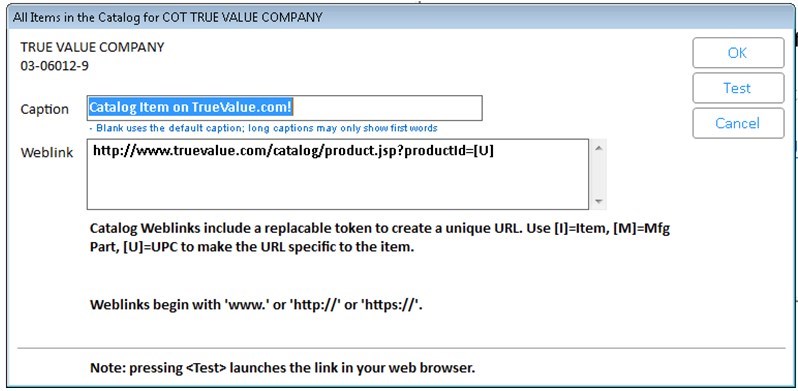
If the web-data is available for all (or most) items for a vendor that has a catalog setup on Eagle, these links can be setup all at once, provided the web address is predictable.
Setup works exactly like the “All Items for a Vendor” link setup discussed above. But where “All items for a Vendor” link setup needs the item to exist in IMU, the catalog link just needs the item to exist in the catalog.
Vendor links will pull up the item by its vendor part number as defined in IMU for that vendor. Catalog links will pull up the item using the item number as it is in the catalog.


In order to remove / delete this weblink, blank out the Weblink (URL) field and hit OK.
The True Value catalog code compensates for the dash that is sometimes in the item number the catalog (but not on the True Value website.
The Inventory Import Tool can map the "Weblink" field–This means a list of item specific Weblinks can be quickly mapped and imported. Item specific Weblinks can be used to point to any URL (Web address) related to the item. An example of how this could be used is to have the item specific Weblink point to a PDF with the product's manual or to a picture of the item on the manufacturer’s website.
