Ingenico Signature Capture Pad Setup
REQUIREMENTS
The Ingenico ISC250 signature pad requires Eagle for Windows Release 21.1 or higher. Please verify that your system is running Release 21.1785.74 or higher. The instructions below assume that your system has been previously configured for signature capture at Point of Sale, and only includes instructions for how to install the USB driver and download the base application into the device.
INSTALL DRIVER UTILITY SOFTWARE
Use the procedure below to install the USB driver software that works with the Ingenico ISC250.
Note: Do not plug in the signature capture during this procedure. You must first install the driver software.
-
From the PC, go to C:\3apps\Catapult\Drivers\ingenico\USBCDC.
-
Double-click UsbDrvInstall.exe.
-
On the Welcome to the UsbDrvInstall Setup Wizard splash screen, click Next.
-
At Select Destination Location, leave it at the default setting, and click Next.
-
Click Install.
-
Click Finish.
-
Plug the ISC250 into the USB port on the PC, and make sure the power supply is also connected to the USB cable. Windows automatically locates and installs the driver.
-
Once the new hardware wizard automatically adds the device, go to the Windows Hardware Device Manager and verify what com port is assigned to the pad.
-
Locate the Ports section and note the com port number assigned.
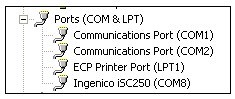
The USB driver install is now complete.
- Continue to the next section to download the software onto the signature capture device.
DOWNLOADING SOFTWARE TO THE ISC250
Please note that download times may vary, but will take approximately 15-20 minutes. Once the download is successful, you will no longer be able to download the software again unless a new version is available in Device Configuration.
- Verify the isc250 device is powered on, and plugged into the USB port on the PC.
- From the Eagle Browser, click Utilities, then click Device Configuration.
- From Device Configuration, select Signature Capture 1
- Click Device.
- Select “Ingenico isc250, RBA 3.0” from the list, and click OK.
- Click OK again. Note: Do not perform a test at this point as the signature capture will not work until you configured the Debit/Credit Pad and select a com port number. You may test it once all steps are completed below.
- From Device Configuration, select Debit/Credit Pad.
- Select Device.
- Select “Ingenico isc250, RBA 3.0” from the list, and click OK.
- Click Port.
- Select the correct com port that was assigned during the driver install, and click OK.
- Click the Download button.
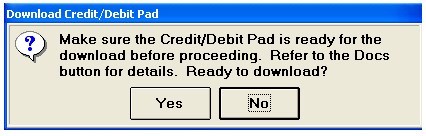
- Click Yes.
- When prompted, press <Enter>.
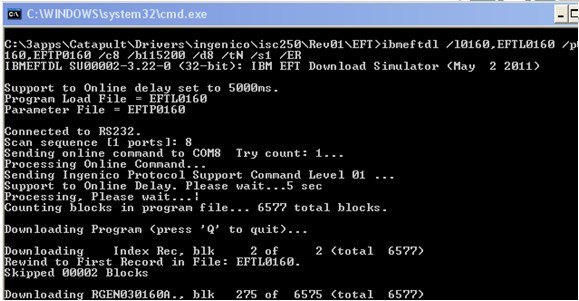
The download begins, the screen below is an example of what displays on the PC. Wait while the download occurs--this can take up to 15-20 minutes.
Once the initial download is complete, the Key Injection menu displays on the isc250 pad.
- Press the + button on the key pad, which moves the highlight to 3 – No Key Injection, then press the green Enter button.
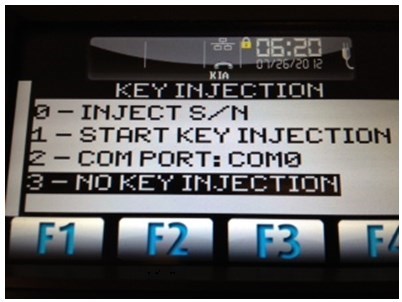
- At the Delete KIA Prompt, press the green Enter button again.
The pad will begin to reboot, this process may take a few minutes.
Once the pad completes the reboot, it will default to the Epicor logo screen.
The device is now ready for testing.
TESTING THE ISC250 DEVICE
- From the Eagle Browser, click Utilities, then click Device Configuration.
- Select Debit/Credit Pad.
- Click Test.
- On the isc250 pad, click Credit. You will then be prompted to swipe a card.
- When the pad displays “please wait for the cashier,” click the Total link on the PC screen. The pad will respond with “Amount OK?”
- Click Yes on the pad. The pad will respond with “Processing please wait.”
- Click Authorization on the PC screen. The pad will respond with “Approved.”
- When the prompt “Did the test work?” displays on the PC screen, answer Yes. The test is now complete.