A/P Electronic Payments
A/P Electronic Payments are created through the normal ‘Print Checks’ process Vendor Payments, but instead of printing a live check, a file (in the banking industry standard NACHA format) is created to be sent to the bank to electronically process the payment directly to the vendor’s bank account. An e-mail is sent to the vendor to let them know the payment is being processed, and what invoices are being paid.
Set-up
MSY Option 9013 – “Allow A/P Electronic Payments” must be set to ‘Yes’.
Option 9011 – “Execute separate check runs for bank codes assigned” must be set to ‘Yes’. This tells the check-payment process to look at the Bank Code set up in MVR when processing checks.
MSY Option 1328 – “Generic Export using Integrator is enabled on system?” must be set to ‘Yes’. This allows the use of the Integrator to move the ACH file from Eagle to your PC.
Security: MSE # 1095 – Ability to access and change the vendor’s ACH information: when this is set to ‘Yes’, the Accounts Payable tab of Vendor Maintenance (MVR) will have a link to ‘ACH’, which, when clicked, will allow the user to add or change the vendor’s ACH information.

The company Federal ID number must be entered in ACON – it is required for the ACH file that is sent to the bank.
ACH Bank Code
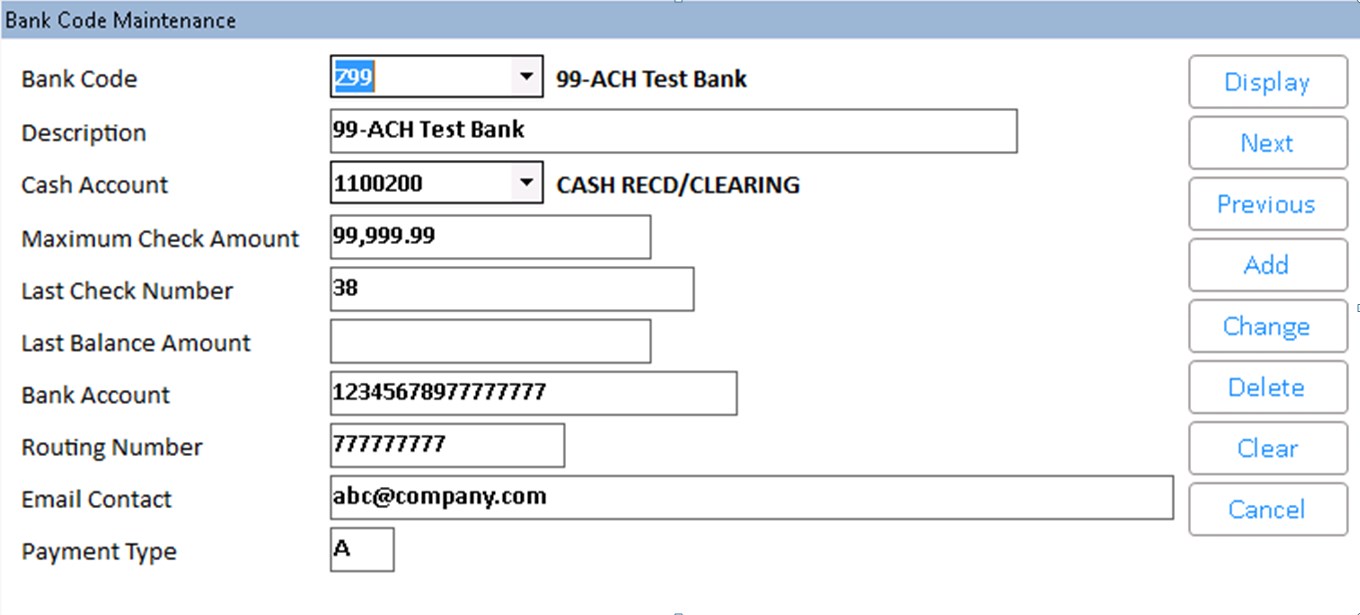
A new Bank Code will be added to process ACH payments. The set-up includes the bank’s routing number and the account number from which the payments will be withdrawn. This can be the same bank that you write paper checks from, but it will have to be a unique Bank Code in Eagle that tells the system these are ACH payments only. This Bank Code must be entered on the Accounts Payable Tab of the Vendor record, and will be entered during the check-printing process.

The Email Contact is actually an e-mail address at your company, which will be the ‘From’ e-mail address when vendor e-mails are sent out with payment information.
The Payment Type A designates this bank code for ACH payments only. When using a bank code with Payment Type A, checks will not print, and an ACH file will be created when payments are posted.

The ACH bank cannot be the default bank set up in ACON.
Vendor ACH Information
Vendor Bank Code – this field is on the bottom left of the Accounts Payable Tab in Vendor Maintenance (MVR). Enter the ACH Bank code to designate that Eagle will create ACH payments for this vendor.

ACH payments will not be processed unless you have a Federal ID # entered in the Accounts Payable tab.
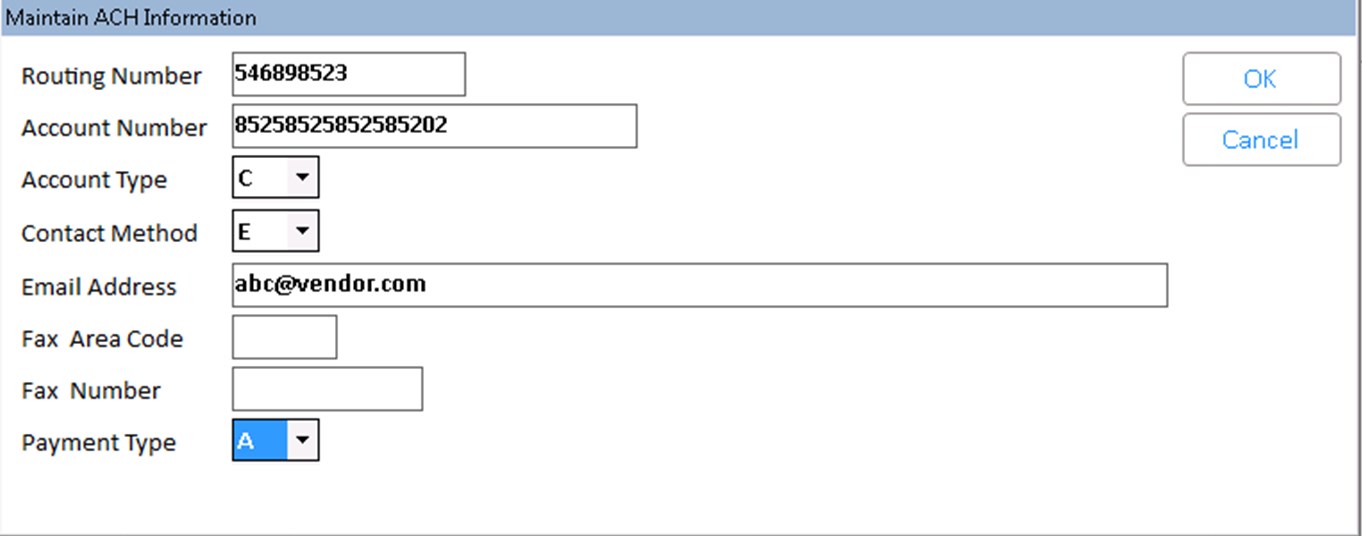
Under the Bank field, click the ‘ACH’ link, and a screen will appear to add and/or edit the vendor’s ACH information:

- Routing number – 9-digit Routing number for the Vendor’s bank that will receive the ACH payment
- Account Number – Vendor’s bank account number to send ACH payments to – alpha-numeric 17 digits.
- Account Type – Determines if the account is a checking or savings account. Valid values are S (savings) or C (checking). Default is C.
- Contact Method – Determines if payment information is sent via e-mail or fax. Valid values are E (email) or F (fax). Default is E
- Email address – email address to send the payment alert
- Fax Area Code and Number – fax number to send the payment alert
- Payment Type – Valid values are A (ACH) or C (Check). The default is C. ‘C’ can be used in a situation where we need to print a live check for a normally-ACH vendor.
ACH Process:
Select Invoices to pay in APMU. When you choose to print checks, the Bank Code will determine if this is an ACH check run.
If:
- The Bank Code is set up for ACH
- The Vendor is set up with the Bank Code and ACH information,
Then:
- Checks will print for the ACH Vendors, but they will be marked VOID
- ROCK report will be created for each check payment.
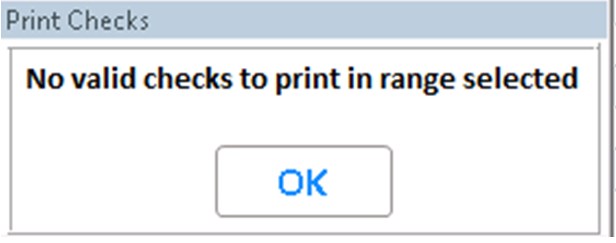
If you get this message when trying to print checks for an ACH bank:

Then check the following:
- You have selected invoices to pay that are for vendors who have the correct bank number assigned.
- The vendors selected have Federal ID number assigned.
- The vendors selected have an email address entered in the ACH Information dialog of Vendor Maintenance (MVR).
To print checks for non-ACH vendors, proceed with the check-printing process and use a non-ACH bank.
Posting of the checks will do the following for ACH vendors:
- An ACH file will be created and stored in /u1/RQ/AP/XFER. The file will be named ‘ACH’, the Store number, the Julian date, then a sequential number, in case there are more than one file per day: example: ACH1082001
- An e-mail will be sent to the vendor e-mail address in MVR, including the payment number and dollar amount, and the invoices being paid.
In AVIQ, a Payment Type column has been added; it will display ‘ACH’ when the check was an ACH payment, and it will be blank if it was a normal paper check.

To move the ACH file from the Eagle to a PC, we will use the Eagle Integrator as follows:
Integrator Set-Up:
On a back-office PC, navigate to C:\3apps\Catapult\3spimp.exe. Right-click and select ‘Create Shortcut’. This will create a shortcut for the Integrator on the desktop.
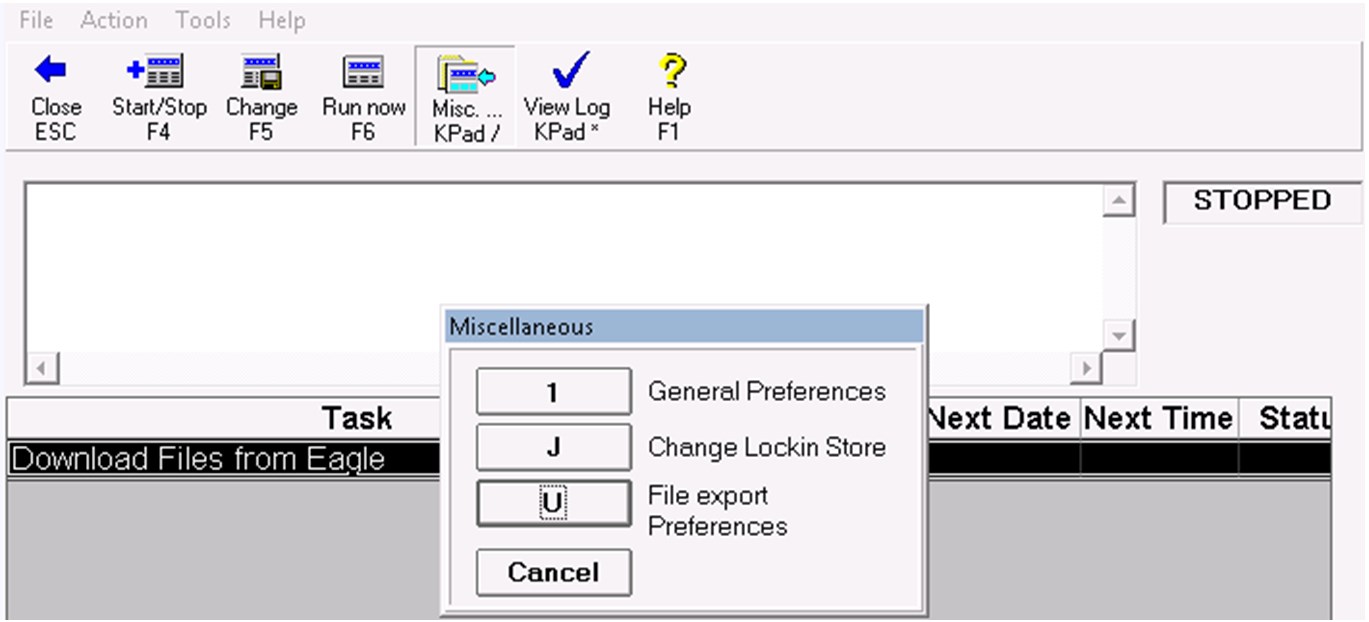
Double-click on the shortcut to open the Integrator, and press Misc –Option U File Export Preferences.

When your ACH file is created (when APPC is run), the file will be in the /u1/RQ/AP/XFER directory on the Eagle; so enter that path in Eagle Path 1. In Client Path 1, enter a directory on the PC to move the ACH files to. In this example, we chose this Temp file.
After checks are posted, and the ACH file is created, open the Integrator, and press F6 to Run Now. The log will appear in the Integrator, telling you that the file was moved.
Once the file is on your PC, it can be sent to your bank for payments to be processed.
dspot" href="javascript:TextPopup(this)" id="a20" dataid="POPUP


