Use this job aid procedure to manually count your inventory using Epicor-generated worksheets. You should review Physical Inventory and Shrinkage in this online help Getting Started material before performing a manual count.
Note: If you are using and RF gun to count inventory, use the XYZ job aid instead.
There are advantages to QPIP when you have a smaller inventory count to perform:
Physical Inventory Posting (PIP) |
Quick Physical Inventory Posting (QPIP) |
|
|
To create and print count sheets:
From the Eagle Browser Applications > Reports menu, select Inventory Reports and then Physical Inventory (RPI).
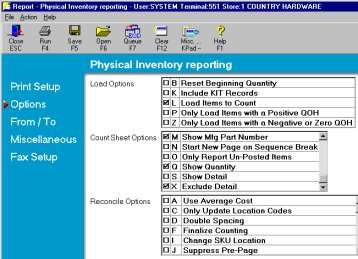
Enter your print options on the Print Setup page, then select Options.
At the Load Options prompt, select L Load Items to Count.
At the Count Sheet Options prompt, select one of the following:
3 - Show 3 blank columns (optional)
M - Show mfg part num (optional)
Q - Show quantity (optional)
X - Exclude detail
Click From / To.
Note: Usually, enter a department range so that all items in the area you count are loaded and printed. When you finalize your counts, use the same from and to range.
Click Run to load items into the count file and to print the count sheets.
Using the count sheets you created in the previous section, count the items.
Be sure to enter a count for every item on the count sheet: either the on-hand quantity that was counted or a zero if none were found.
If using QPIP, do the following:
From the Eagle Browser Applications > Inventory menu, select Physical Inventory Posting (PIP).
From the toolbar, select QPIP.

Type the SKU and enter the quantity.
Press Enter or click OK.
Repeat steps 3 and 4 for all items on the count sheet.
Note: To save time, do not post a SKU if the count is the same as the beginning quantity. You can use the system to automatically post a zero variance when you finalize the count.
If using PIP, do the following:
From the Eagle Browser Applications > Inventory menu, select Physical Inventory Posting (PIP).
Click Display.
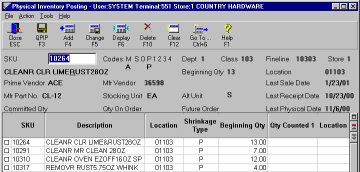
Note: For each SKU, type the quantity counted and location code. Use the mouse to click the field you want to update or use the arrow and enter keys to move to the field.
After all counts have been entered, click Change.
From the Eagle Browser Applications > Reports menu, select Inventory Reports and then Physical Inventory (RPI).
Enter your print options on the Print Setup page, then select Options.
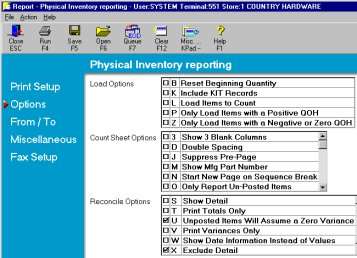
At the Reconcile Options prompt, select:
D - Double spacing (optional)
F - Finalize counting
U - Unposted items assume zero variance
X - Exclude detail
Click From / To.
Note: Enter the same range you used when creating and printing the count sheets (in section 1 above).
Click Run.
The finalized RPI report from the previous section should match, line for line, with the count sheets.
You can fold the final sheets so that the posted count can be laid beside the hand written count and quickly compared to verify the correct count was posted.