The Eagle Mobile+ Physical Inventory module helps you maintain accurate, detailed, and up-to-date inventory data.
Be sure to customize and review the session settings before performing the counting By Item and From List processes. Once you exit, the system reverts to the defaults. Use Options Configuration in Eagle to set your configuration preferences.
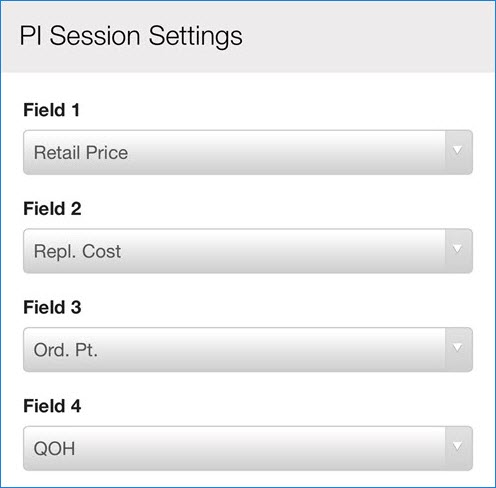
Before starting the physical inventory count, verify the settings that affect the displayed information. Your security level determines whether you will be able to make changes.
To configure the session settings:
From the Eagle Mobile+ Main Menu, select Physical Inventory > By Item.
Select Settings.
To update the values, tap on the required Field and select the necessary option.
Select Done.
Use the MPIP Shrinkage drop-down list to determine the shrinkage type used for shortages.
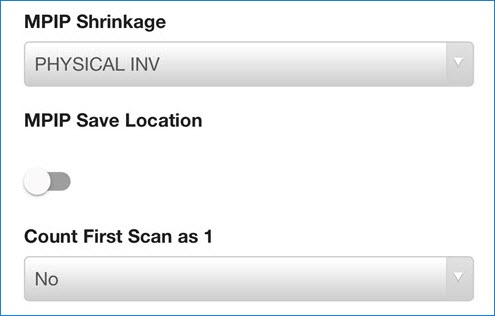
Toggle the MPIP Save Location option to retain the location code that was most recently entered.
Set the Count First Scan as 1 to one of the following:
No - If the option is set to No, you will need to enter the count manually.
Yes - If set to Yes, the application will display the SKU number and enter a counted quantity of ‘1’.
QOH - If set to QOH, current Quantity on Hand will display in the Count field.
Important: If you change the session settings, tap Save to ensure they are updated.
Specify the number of locations, labels and label format in the corresponding fields.
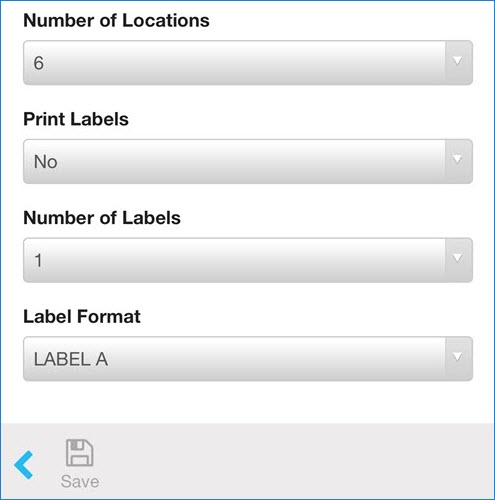
Define the printing labels process in the Print Labels field.
Select Save.
From the Eagle Mobile+ Main Menu, select Physical Inventory > By Item.
On the Physical by Item screen, enter the item number. You can scan the item's barcode, type the item's SKU number, or enter the item's UPC code.
Tap the magnifying glass to search.
The four fields set up in Session Settings display on the Physical by Item screen.
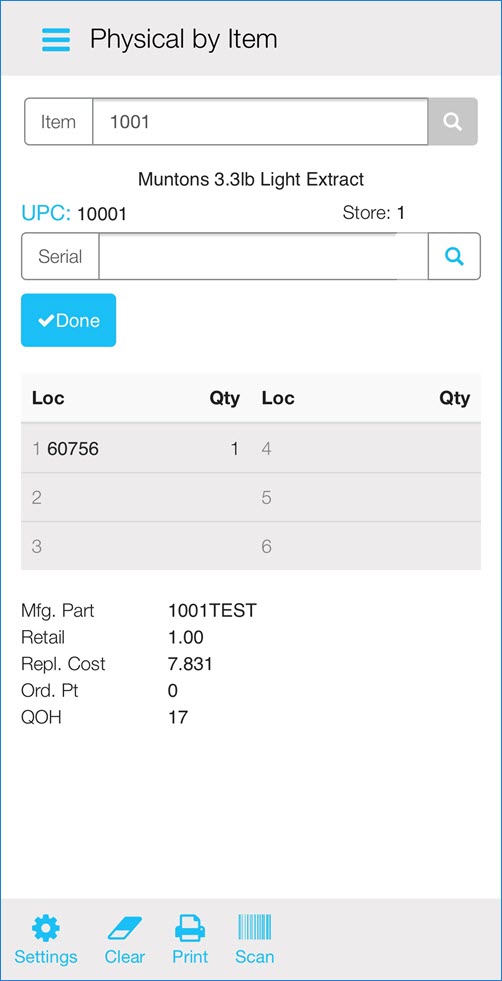
Note: If you have set your device up to Count the First Scan as 1, continue scanning the items to count. If you have already counted an item during this count cycle, the system displays the Replace field here. Enter the new count and use Replace to adjust the previous count.
Scan the item Serial Number.
Note: If the SKU is associated with the scanned Serial Number, the application displays Serial already counted. If not, the system displays Serial found, but for another item or Serial not found.
Select Add to add the existing serial number to the item.
Select Print to print a label.
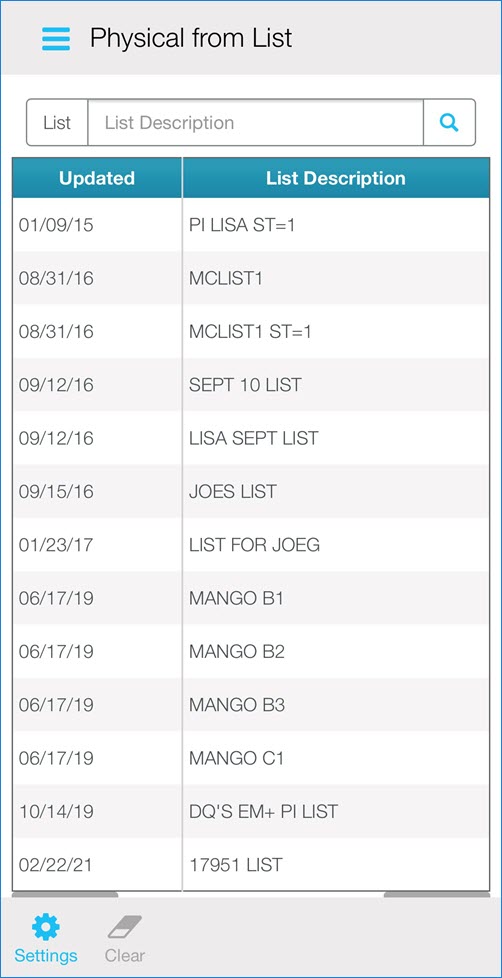
From the Eagle Mobile+ Main Menu, select Physical Inventory > from List.
The Physical from List screen displays all the lists assigned to employees for counting. Select the list to view the uncounted items.
The Review List screen displays uncounted items from the selected list. Select the item you want to count.
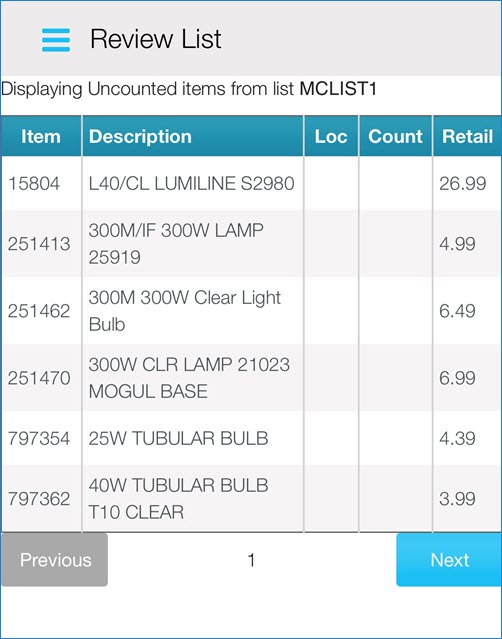
Enter the Location and the Count. Tap Add to add a new count, or Replace to replace an existing count that you entered previously.
Select Print to print a label.