Using Part
Lists for Physical Inventory
The Directed Counts work flow uses Part
Lists to create a list of parts
to be counted. You then assign those lists to the stores required to do
the count, and assign the list to a counter(s). The counter(s) uses Eagle
Mobile "Physical from List" to take the count for the parts
on that list. A manager then monitors and reviews the count’s progress
in Physical Inventory Posting (PIP). When the count is complete, the manager
reconciles and finalizes the count list(s) with the Physical Inventory
Report (RPI).
Options Setup
- Option 1100 "Eagle Mobile on System"
must be set to Yes to use Directed Counts.
- Option 9585 "Inventory Part
Lists Enabled" must be set to Yes to use Directed Counts.
- Option 1155 "Mobile Use Physical Inventory
with Count List" must be set to Yes to use Directed Counts.
- You can set option 1158 "Mobile Physical
Inventory Display finalized items in Count List" to determine
what items appear in Eagle Mobile.
- This option applies when using an Part
List in Eagle Mobile Physical Inventory, Physical Inventory Posting
(PIP), and the Physical Inventory Report (RPI) to take, review,
and finalize a physical inventory. Furthermore, this option is
only relevant if you are counting and finalizing portions of the
part
list over time, versus counting the entire list and finalizing
the entire list at once.
- If you set this option to Yes, parts
in the list which have been counted and finalized by RPI, and
are still in the list, appear as uncounted and can be counted
again. They display on the Eagle Mobile unit when using "Physical
from a List" and allow you to enter a count. They appear
in PIP with "Count Status" showing "N/C" (not
counted) until a count has been entered in Eagle Mobile.
- If you set this option to No, parts
in the list which have been finalized by RPI appear as counted/finalized
and cannot be counted again. They do not display on the Eagle
Mobile unit when using "Physical from a List." They
appear in PIP with "Count Status" indicating "Final"
so that you can track the progress of the count.
- To reset the finalized flag, display
the Part
List Maintenance windowFrom the Eagle Browser Launch bar, type Lists and
press Enter.
, display the appropriate list, click Misc,
and select “Reset Finalized flag to No.”

- Make sure you have Terminal Licenses for the physical
inventory function of Eagle Mobile by checking option 7060 "Eagle
Mobile Physical Inventory Terminal Licenses." You can also check
what terminals are licensed by doing the following in Options Configuration:
click Misc, and select "Review Licenses."
Security Setup
- Set security bit 954 "Ability to access part
lists" to Yes for all users whom you want to be able to create
and maintain part
lists.
- Set security bit 960 "Ability to change part
lists created by another user" to Yes for all users whom you
want to be able to modify lists created by other users. Bit 960 applies
to all types of changes except adding a part
to the list.
- Set security bit 962 "Ability to add parts
to a list created by another user" to Yes for all users whom
you want to be able to add parts
to lists created by other users. Note: For store managers, bit 960
would be set to Yes, but bit 962 would be set to No.
- Security bit 12 "Add/Change/Delete data in
all stores" should be set to Yes for all users whom you want
to be able to create and distribute lists to stores. If you want to
limit store managers to assigning counters to only their store’s lists,
set bit 12 to No.
- Set Security bit 1116 "Ability to add or
delete items from a Count Sheet that is Locked" to Yes for anyone
who would be allowed to add or delete items from a Locked List. The
default is No.
- To notify store managers when Physical Inventory
Lists have been distributed, set up the following:
- So that the system generates “Count List Received”
alerts for the store managers, set Option 3315 “Record ‘Count
List Received’ alerts” to Yes.
- Then, in each store manager’s Eagle
Alerts profile, set the entry for Count List Received alert
to Y.
Using Directed Counts
Step 1: Manager creates a physical inventory count list
A manager can generate a list in various ways.
- Create an Part
List using the procedure in the topic "Creating
Item Lists in the Part
List Viewer." Make sure the List Type is set to Physical
Inventory.
- Create a count list by pressing the Add button in PIP, entering
the item to be counted, and repeating the process until the list is
complete.
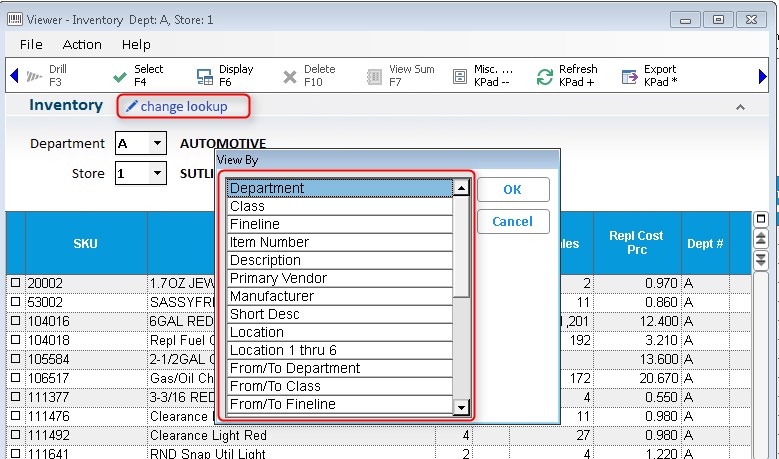
- Create a count list using the Physical Inventory Posting (PIP)
<Count> button located on the toolbar:
- Click on the
 button located on the
PIP toolbar, then select "Create Count List Item Viewer."
button located on the
PIP toolbar, then select "Create Count List Item Viewer."

- Select the Department, or choose a different lookup by clicking
on "change lookup" and making the desired selection.
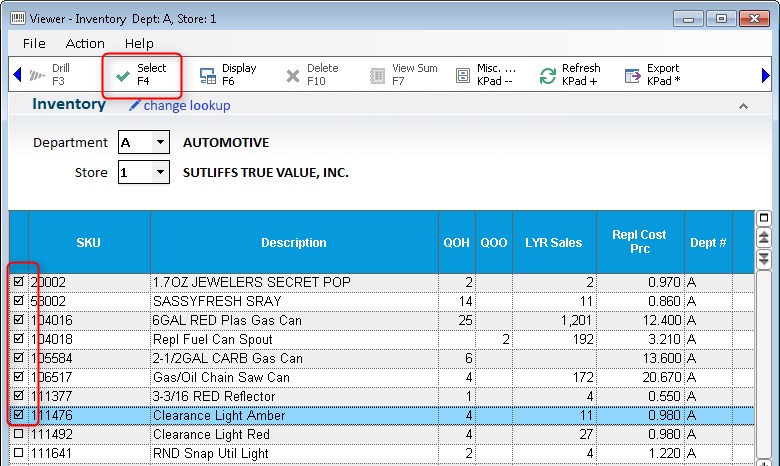
- Using the check boxes, select the parts
you wish to load into the count list. You may also right click
on the check box column and select 'Load and select all'. When
you are done, click on "Select"
- Name the list. You may also add a comment which will be visible
in the Part
Lists Header Viewer.

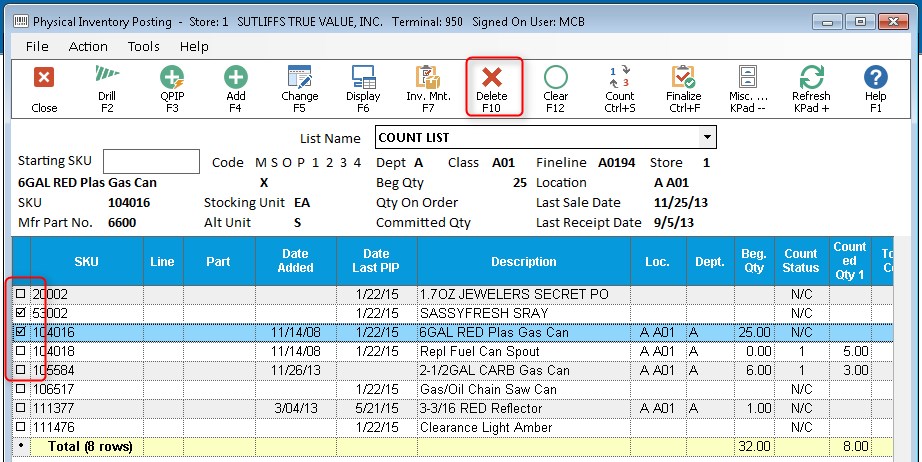
- The selectedparts
will be loaded into the grid. If you wish to delete specific parts,
simply click the check boxes and then click "Delete".
Step 2: Manager distributes list to the stores

If you are assigning the list to be counted
in Eagle Mobile, this section is optional. However, assigning the list
to a specific user is required in order for that list to appear on the
mobile device.
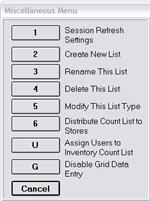
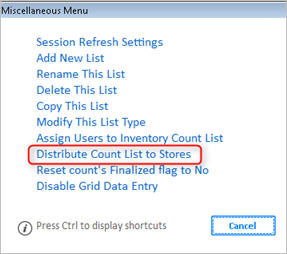
Once the manager has created the part
list and is ready to finalize/distribute the list for store use, they
use the "Distribute Count List to Stores" function, which can
be found in the Misc menu of both Item List Maintenance Viewer, and in
PIP (this option is only available in multi-store systems).
- In the Item
List Maintenance ViewerFrom the Eagle Browser Launch bar, type Lists and
press Enter. The Item List Maintenance
viewer displays., display the appropriate
list, then click Misc menu and select “Distribute Count List to Stores”
(this option is only available on multi-store systems with option
1100 "Eagle Mobile on System" set to Yes).
- In the dialog that displays, use the check boxes
to select the store(s) that need to do a physical count for that list.
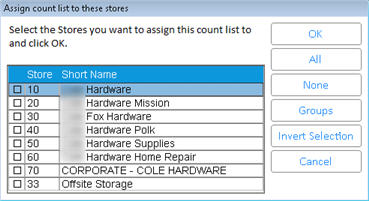
- Click OK.
For each store selected,
the system generates a copy of the list, and sends an alert to each store’s
manager notifying them a count list has been received. For each store
receiving a count list, the store number is in the list name. For
example, “Wrangler Jeans” would become “Wrangler Jeans ST=1” for store
1, “Wrangler Jeans ST=2" for store 2, etc.
Step 3: Store manager is alerted that they have a list to count
The store managers receive the alert "Count List Received,"
telling them the list name and who assigned it to them. The manager then
continues to step 4.
Step 4: Store manager assigns list to users or Mobile user
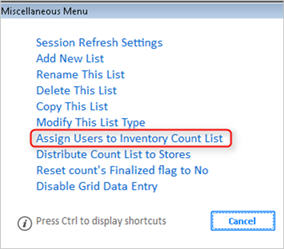
Assigning list to Users:
- Display the Part
List ViewerFrom the Eagle Browser Launch bar, type Lists and
press Enter.
(Note: You can also access this viewer from
Modify Item Promotions (MIP), by clicking Misc and selecting Maintain
Item Lists.) ,
and select the list that is ready to be assigned.
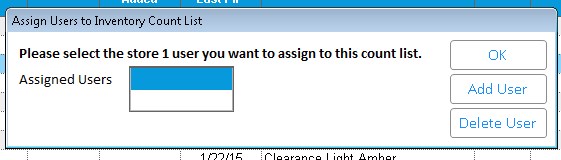
- Click Misc, and select "Assign Users to
the Inventory Count List."
- In the dialog that displays, add or delete users
as necessary. To add a user, click Add User. In the User selection
dialog that displays, select the user you want to assign from the
drop-down list, and click OK.

- Repeat this process for each user you want to
assign to count the list.
Assigning List to Mobile
User:
- In the Physical Inventory Posting screen, click on the button and choose "Assign
List to Mobile User."
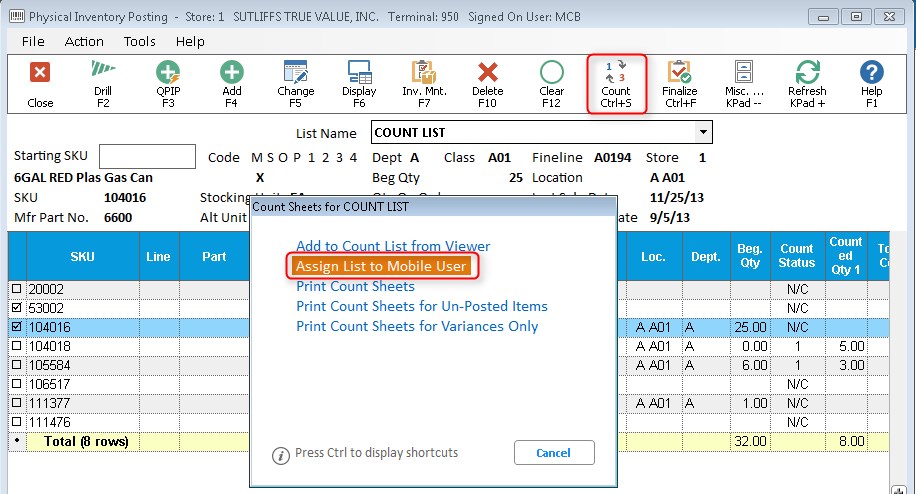
- Select the user from the list that displays. You may also click
on "Add User" if you wish to add a user at this point.
- Click "OK"
Step 5: Users count parts
- Once the list has been assigned, the Manager
notifies you, an employee, that you have a list to count (or you will
find out the next time you run Eagle Mobile “Physical from a List”).
- Log on to the Eagle Mobile application.
- From the Eagle Mobile main menu, select the
function “Physical from a List.” This displays all the lists which
have been assigned to employees for counting.
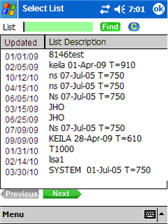
- Click the list you were instructed to count.
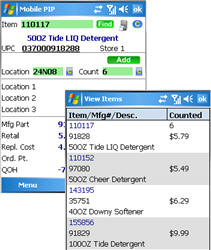
The Item count screen displays. You can now begin scanning and counting
parts.
Parts
on the list can be scanned, key entered, or selected from the “View
Items” screen.
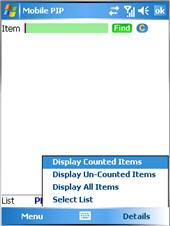
- You can click the Details menu and select one
of three display options to either display all parts
on the list, all un-counted parts,
or all counted parts.

If option
1158 "Mobile Physical Inventory Display finalized parts
in count list" is set to No, then any items that have already been
finalized by RPI do not appear any more. If 1158 is set to Yes, then parts
already finalized by RPI appear as uncounted.
- Once you have counted all parts
on the list, exit the Eagle mobile application and inform your manager.
Step 6: Manager reviews counts
At any point, a manager can review the progress of the count in the
Physical Inventory Posting Viewer, as follows:
- From the Eagle Browser, type PIP in the launch
bar and press Enter.
- From PIP, select the appropriate list from the
drop-down, and click Display (F6).
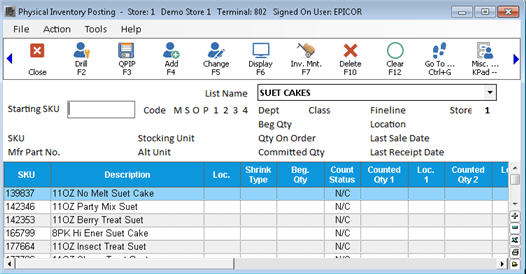
A row for each of the parts
in the list displays. If a
part has not been counted, it is displayed with a Count
Status = N/C for “not counted.” Any rows with a Count Status = N/C
cannot be modified until a count has been entered in Eagle Mobile.
If option 1158 "Mobile
Physical Inventory Display finalized items in Count List" is set
to Yes, parts
in the list which have been counted and finalized by RPI and are still
in the list, appear as uncounted and can be counted again. They display
on the Eagle Mobile unit when using "Physical from a List" and
allow you to enter a count, and they appear in PIP with "Count Status"
showing "N/C" (not counted) until a count has been entered in
Eagle Mobile.
Note: If you finalize the
RPI report with option F and G, it deletes parts
from the part
list as they are finalized. Once all parts
are counted and Finalized from an Part
List, it is removed from the system.
If option 1158 is set to
No, an part
that has already been counted and then finalized with RPI appears as “FINAL.”
If an part
is currently being counted, it shows the count quantity.

Never
use RPI Reconcile Option G ("delete items from Item List as they
are finalized") when option 1158 is set to No in Options Configuration.
Step 7: Manager finalizes counts
When all parts
have been counted, and the counts appear accurate, the manager finalizes
the counts to the inventory file, as follows:
- Display the Physical
Inventory Posting (RPI) report.
- At Reconcile Options, place a check mark by
option F (finalize) and any other desired options.
- On the From/To page, select the Part
List you want to finalize. If you select an Item List and leave the
“Exclude (Y/N)” field set to N, the system only finalizes items that
are on the specified Item List and ignores all other items in the
count file. Conversely, If you select an Item List and set the "Exclude
(Y/N)" field Y, the system ignores all items on the specified
Item List, and only finalizes items within the specified From/To range.
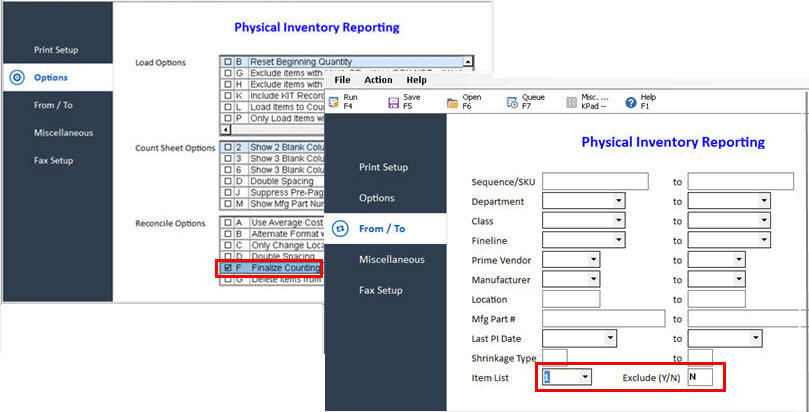
- Click Run to run the report.