If you have decided to set up multiple Accounts Payable directories, be aware of the following as you set up Accounts Payable (A/P):
You will have to print separate checks for each directory.
If you will be writing checks on separate bank accounts, you’ll need to set up a different bank code (in the Bank Code Maintenance window) for each bank account.
The terms codes you set up (in the Terms Code Maintenance window) are system-wide, and therefore can be used across all stores.
If you set up multiple A/P directories, you must set up your payroll directories the same way (if you use Epicor’s Payroll application).
If you want to be able to print separate checks for a particular vendor, you do not need to set up multiple A/P directories to accomplish this. In a single directory, you can print separate checks for a vendor, as long as you set up more than one A/P account in your chart of accounts. Then, when you select invoices for payment, you specify an A/P accounts.
Click Misc, select 3-Add/Delete/Change Store, then select 3-Change a Store.
In the Change a Store dialog, select a store, and click OK.
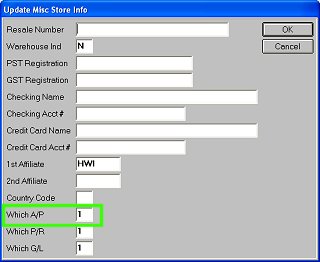
In the Update Store dialog, click Misc. The Update Misc Store Info dialog displays.
In the Which A/P field, enter the A/P directory you will use for this store, and click OK. For example, enter 1 for store 1, enter 2 for store 2, etc. Note that you can have multiple stores in the same directory; i.e. stores 1 and 2 may have the same A/P directory, stores 3-6 may have the same A/P directory, etc.
Click OK in the Update Store dialog.