Use the following procedure to set up the options that control how the Pick/Pack/Ship (PPS) / Customer Order Management (COM) applications work. This procedure assumes the Licensing Department has activated the following options in Options Configuration:
Option 76 "Advanced Order Entry on System" (COM users only)
Option 74 "Use Pick/Pack/Ship flow in Order Entry" (PPS users only)
"Special Orders Allowed in RPOS" must be set to Advanced Order/Special Order
At Subsystem, select AOE - Advanced Order Entry from the drop-down list. At Options, select All from the drop-down list. Click Display. All of the AOE options display in the grid.
Click in the Current Value column of the first option in the grid that you want to change.
Click the arrow that displays, select your response in the window that displays, and press ENTER.
For a definition of each option, click here.
Repeat steps 5 and 6 for the rest of the options in the grid.
Click Change.
Set up the following general options that also affect PPS/COM:
(ID# 79) Using Enhanced Forms on System
(ID# 102) Return to Header Screen After Each POS Transaction
(ID# 110) Display Backorder Prompt
(ID# 190) Display Qty NA Warning Message
(ID# 2849) Print locations on Laser Receiver (RRP)
(ID# 5148) Print QRPRINT using Enhanced Forms
(ID# 8619) Print Orders and Special Orders to the receipt printer
Click Change.
One final option you need to set up can only be accessed via Network Access. Do the following:
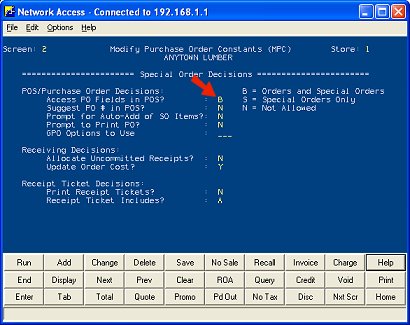
From Network Access at the Function prompt, type MPC and press <Enter>. The Modify Purchasing Constants screen displays.
Press <Next Screen>. In the field "Access PO Fields in POS," type a B and press <Change>.