Custom Fields Tab
(Epicor Compass™ users only)
The Custom Fields tab--currently available in Customer Maintenance (MCR),
Inventory Maintenance (IMU), and Vendor Maintenance (MVR)-- has two sub-tabs:
- User Defined Fields, for creating and updating
user-defined fields
- Customizable Fields, which are Epicor-defined
fields that you can customize
User-Defined Fields
- Display the Customer Maintenance window, Inventory
Maintenance window, or Vendor Maintenance window.
- Click the Custom Fields tab, and then click
the UDF Maintenance hyperlink. The User Defined field Maintenance
window displays.
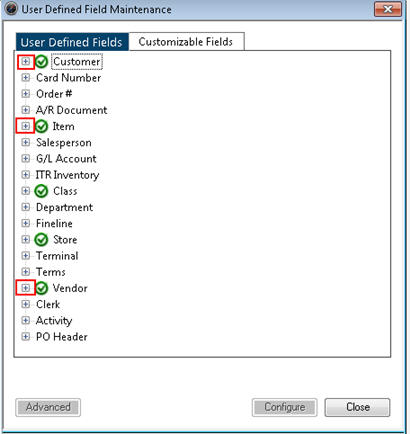
- From the User Defined Fields tab, click the
plus sign next to Customer, Item, or Vendor, to expand that folder.
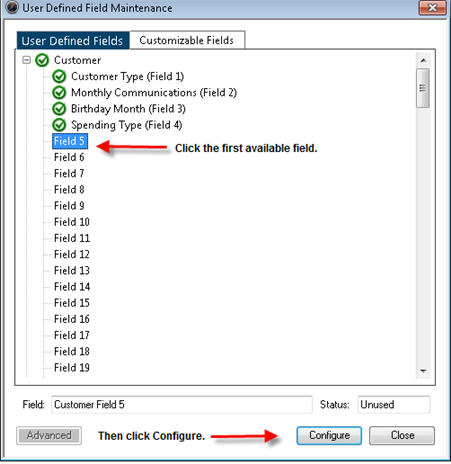
- Click a "Field" that has not been
customized (configured) yet. In this example, fields 1 through 4 are
already configured, so you'd click Field 5. Then, at the bottom of
the screen, click Configure.
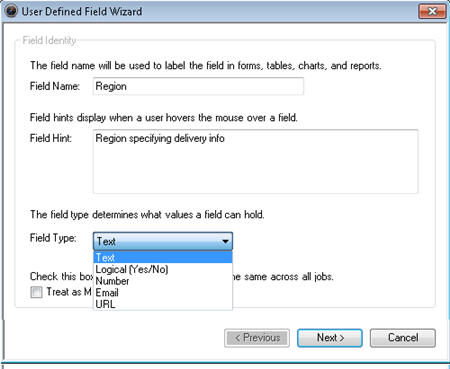
- In the Wizard that displays, enter the field
title at Field Name, a hint (if desired) at Field Hint, and specify
the type of data this field will contain at Field Type. If the new
field's values should be the same across all jobs (or across all stores
if using Item or Vendor), click the Treat as Master box. Then click
Next.
- On the next screen, click Next to accept the
default ("Don't care") for Required Case, or select a different
option. Then click Next.
- On the next screen, select a Validation Type.
If you choose to select field value from a custom list, or from a
code/description, you will create the custom list or the codes/descriptions
in the next screen.
- Click Next, then click Finish to complete the
configuration process.
Customizable Fields
- Display the Customer Maintenance window, Inventory
Maintenance window, or Vendor Maintenance window.
- Click the Custom Fields tab, and then click
the UDF Maintenance hyperlink. The User Defined field Maintenance
window displays.
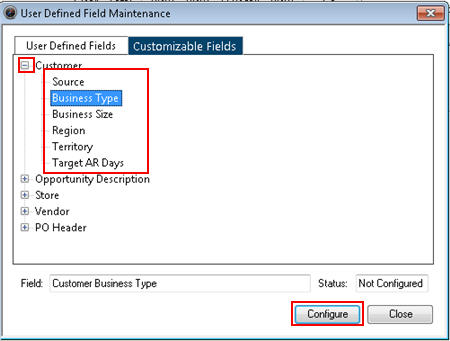
- From the Customizable Fields tab, click the
plus sign next to the relevant category, select a field, and click
Configure.
In the Wizard that
displays, enter the field title you want to use at Field Name, a hint
(if desired) at Field Hint, and specify the type of data this field
will contain at Field Type. If the new field's values should be the
same across all jobs (or across all stores if using Item or Vendor),
click the Treat as Master box. Then click Next.
- On the next screen, click Next to accept the
default ("Don't care") for Required Case, or select a different
option. Then click Next.
- On the next screen, select a Validation Type.
If you choose to select field value from a custom list, or from a
code/description, you will create the custom list or the codes/descriptions
in the next screen.
- Click Next, then click Finish to complete the
configuration process.