Deleting Items from the Inventory Viewer
You can delete multiple items at a time by using the Inventory Viewer.
Read the three sections below in the order presented. The first and second
sections explain what you should do before attempting to delete items.
The third section is the actual procedure for deleting items.
Before You Delete Items
Deleting an item can affect sales history and other information. You
should not delete an item until after running year-end reports. If you
delete an item prior to year-end, the sales history information reported
by other inventory reports (such as Reports RIV, RIS, RSH, RPH, RIH, and
RPA) will be inaccurate. Prior to deleting an item, you must check other
functions to see if that item exists. If the item does exist, you must
first delete the SKU from that function before you delete the SKU from
Inventory Maintenance. Check the following functions (from Network Access
or from the Inventory Maintenance window):
IAD
Inventory Adjustment
FIL
Flexible Inventory Load
MPO
Modify Purchase Order
PIP
Physical Inventory Posting
QPIP
Quick Physical Inventory Posting
MPH
Modify Physical Inventory Shrinkage History
POS
Transactions (any saved POS transactions, such as orders, estimates,
bids, special orders, and transfers)
Item
Price Changes (Go To menu)
Alternate
Part Number (Vendor tab)
Modify
Item Promotions (Go To menu)
Modify
Kits (Go To menu)
Modify
Tally Cross Reference (Go To menu)
Required Options and Security
The options and security bits listed below affect your ability to delete
items from the Inventory Viewer. After reading the information below,
you may want to review these settings in Options Configuration and Security
Maintenance before attempting to delete items in the Inventory Viewer.
- The new option 8617 "Allow Delete in Inventory
Viewer?" must be set to Yes to enable the Delete feature in the
Inventory Viewer.
- The new security bit 777 "Ability to Delete
in Inventory Viewer?" must be set to Yes for the signed-on user
to see the delete button in the Inventory Viewer, even if option 8617
is set to Yes.
- The existing security bit 224 "Delete inventory
items" must be set to Yes for the signed-on user to be able to
delete in the Inventory Viewer.
- The existing option 3037 "Allow deleting
items in Inventory Maintenance if QOH is not zero" is checked
during the delete; if this bit is set to No, you cannot delete items
that have a quantity on hand.
- The existing option 3038 "Give warning if
deleting an item that has any quantity > 0" is also
checked during a delete, and if set to Yes, the system may deliver
a warning depending on the item’s quantity on hand.
- If you have a multi-store system, and you want
to delete items across stores, you must have the following existing
security bits set to Yes:
- Security Bit 6 "View data in all stores"
- Security Bit 12 "Add/Change/Delete data
in all stores"
Deleting Items from the Inventory Viewer
- From the Eagle Browser, click Inventory Menu,
then click Inventory Maintenance. From Inventory Maintenance,
click Viewer.

The
Delete button only displays in the Inventory Viewer if you have launched
the viewer from Inventory Maintenance.
- Look
up the desired range of items from which you will be deleting.
- Multistore: In the Store field above the grid,
indicate the store(s) from which you want to delete items, or select
All Stores.
- If checkboxes aren't already displayed in the
far left column of the grid, right click on any column heading and
select Checkboxes.
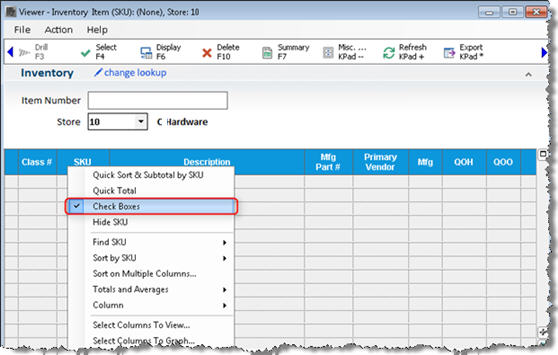
Click the checkbox next
to the items you want to delete. (Note: you can also use the down-arrow
key and spacebar to place or remove checkmarks)
- Click Delete.
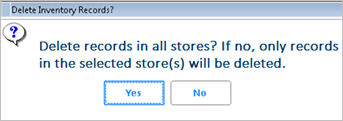
- Multistore:
If prompted, select Yes to delete records in all stores, or select
No to delete records in just the store specified in the Store field
of the Inventory Viewer. (Note: the prompt does not display if you
selected All Stores or a Store Group in step 3, or if you don't have
security bits 6 and 12 to delete items from all stores.)
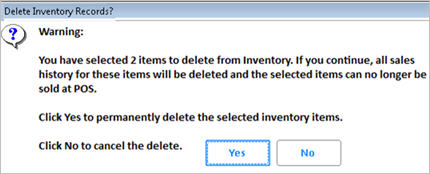
- To proceed with the deletion, click Yes in the
warning box.
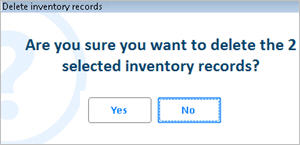
- To proceed with the deletion, click Yes in the
second warning box.

The
Inventory
Maintenance Changes Viewer stores a record of every change made in
Eagle for Windows Inventory Maintenance, including deleted items.