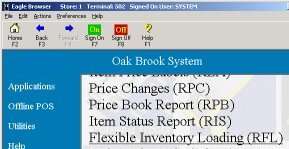
Access Radio Frequency and Count Items
This task is performed in Network Access or on the RF Terminal.
1
Access RF
At the RFMENU, select 2. Shelf Manager.
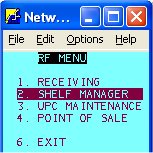
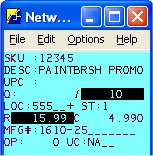
2
Access Shelf Manager
The Shelf Manager constants display. If you answer Y to a mode, you can set the constants for that mode.
![]()
-
Enter an "I" in the LOCATION MODE field if you want to auto-increment locations. This means each subsequent item you scan retains the previous item's location incremented by the amount you specify in option 2936 "Shelf Manager increment value for Location Mode I" in Options Configuration.
-
Enter an "S" in the LOCATION MODE field and set option 3052 "RF Shelf Manager multiple location codes" to Yes in Options Configuration if you want to add location codes directly to Inventory Maintenance.
-
Enter an "M" in the PIP MODE field if you want to automatically display the multiple location window every time an item is displayed. If option 2938 "Shelf Manager-Default location(s) in PIP count screen with IMU locations" in Options Configuration is set to Yes, the multiple location window displays the current locations from Inventory Maintenance.
-
Enter an "S" in the PIP MODE field if you are entering multiple items in the same location and want the RF to save the location of your previous entry (you won't have to rekey the location for each subsequent item).

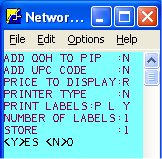
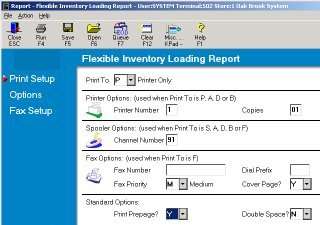
3
Setting Constants and Options
You can set the following options for any of the different modes.
![]()
These options can also be set up in Options Configuration, so that you don't have to enter them every time you use RF Shelf Manager. Once you've set them up in Options Configuration, simply press <Next Screen> to bypass these options in Shelf Manager.
-
Add QOH to PIP: Yes or No (Y = add items to PIP, N = add to FIL)
-
Add UPC Code: Yes, No or Prompt
-
Price to Display: Retail or Promo
-
Printer Type: P=PS-1001; M=MP5033, Q=QL320, N=Network Printer
-
Print Labels (This consists of three fields.):
-
-
Yes, No, Prompt or Always
-
Small or Large size label (if using a network printer, this field can be set to L, S, A, B, or C depending on which RF "flex-label format" in Options Configuration you want to use)
-
Print Price Yes or No
-
-
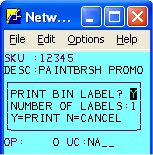
Number of Labels: Enter a value between 1 and 9. (This value is only used if PRINT LABELS is set to A - Always.)
-
Store: Displays the store number