Print Labels Using "Add to Label Manager"
(Streamlined Labels users) Use the following procedure if you clicked the "Labels" button from an application, and you want to add the designated items to the Label Manager.
- In the application from which you want to print labels, use check marks to select the desired items in the grid.
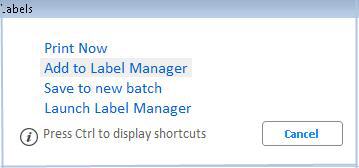
- Click Labels.
- From the menu that displays, select Add to Label Manager.
- In the Save to Label Mgr Options dialog that displays, fill in the fields, and click OK to save the labels in the Label Manager. The Label Manager automatically launches after you click OK.
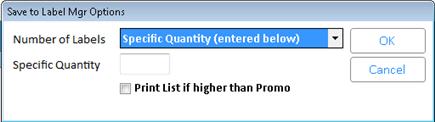
Number of LabelsChoices are "Specific Quantity," IMU # of Labels to Print", “Quantity on Hand,” “Quantity on Order”, or “Quantity on Hand + Quantity on Order.”
If you select “IMU # of Labels to Print," the number of labels to be printed per SKU is taken from the Number of Bin Labels” field on the Codes tab of Inventory Maintenance. If the value in Inventory Maintenance is “N,” the system uses the quantity entered in “Specific Quantity,” and if that field is blank, the system uses a quantity of 1.
Specific Quantity If you set the “Number of labels” field to "Specific Quantity (entered below),” enter the number of labels that you want the system to print per SKU.
Print List if higher than PromoThis check box displays if Modify Item Promotions (MIP) is the calling application. If you place a check in this box, and the List Price in Inventory Maintenance is higher than the MIP Promotion Price, the label fields for Promo Price and RBL\RLA Price to Print are populated with the List Price from Inventory Maintenance. If you don't place a check in this box, the MIP Promotion Price is used.