(Andersen Windows Import users only)
Use the following procedure to create an Anderson Windows Import transaction in Point-of-Sale.
Start a transaction in POS, such as an order, special order, quote, or sale.
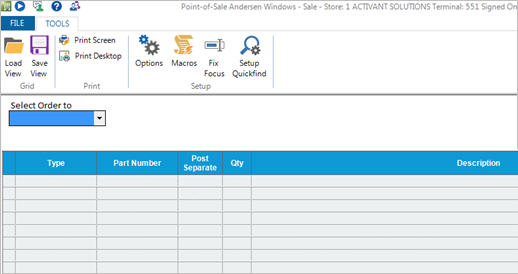
With your cursor in the Item (SKU) field, click Menu, and select Andersen Windows. The Andersen Windows Posting window displays.
(Optional) If you want to customize the options for this order, click Misc, and then click Options. In the Anderson Windows Order Import Options dialog box that displays, change any of the fields you want, and click OK to close the box.
For a definition of each field in the dialog box, click here.
(Optional) If you want to select which categories of accessories will display for this transaction, click Misc, and then click Select Accessory Inclusions. In the dialog box that displays, click the box to the left of the accessories you want to display, and click OK to close the box.
(Optional) if you want to select the order in which items will post from Andersen IQ to POS, click Misc, and select "Sort Current Order."
In the Select Order to Process field, click the arrow and select an Andersen order from the drop-down list. This list includes new IQ quotes added since the POS session began.
If you know you want to process the order without making any modifications to it, click Fast Post. Answer Yes or No to the Delete Input File question that displays (typically answered Yes).
If you want to make any modifications to the order, proceed to the next step.
Click Start. The first item on the Andersen order displays.
If any accessories display in the grid, you can
Click in the box to the left of the accessories you want to print on the transaction.
Click on any description you want to modify, type the new description, and press ENTER. A checkmark automatically displays in the box so the accessory will print on the transaction.
Click Next SKU to proceed to the next item on the transaction.
Repeat steps 8 and 9 until you have gone through all the items on the transaction. If you want to move back and forth through the items, you can click Previous or Next, as necessary. When you've reached the last item on the order, the following message displays:
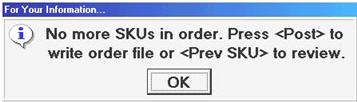
Click OK.
Click Post. If the Delete Input File? dialog box displays, answer yes if you want to delete the input file, or no if you do not. Typically you'll answer this question Yes.
Click Close. The Andersen transaction displays in the POS window.
Proceed as you normally would to finish the transaction.