Use the procedure below to use Electronic Check Conversion (ECC) in Point-of-Sale.
Ring up the items on the transaction as you normally would.
Tab to the Check field.
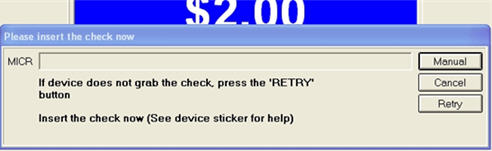
Press Enter. The total amount of the sale is automatically posted in the Check field, and a dialog displays.
![]()
If the amount of the check is less than the total purchase amount (i.e. you are receiving more than one form of tender), you can enter the check amount manually before pressing Enter.
Insert the check into the MICR device (or into the receipt printer if you use the Epson 6000iii). If the device doesn't take hold of the check, adjust the check if necessary and press Retry to try again.
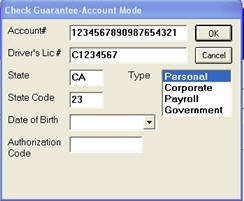
If the check is unreadable or damaged, press Manual to manually enter the MICR data. When you are returned to the POS totals screen, enter the check number. Note: All manually entered checks will automatically be converted to Check Guarantee and cannot be processed as ECC.
When the next dialog displays, enter the customer's drivers license number. If you pressed Manual in step 5, you must also manually enter the routing and account information.
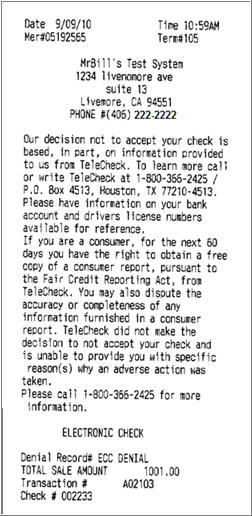
If the ECC request is declined based on the personal information provided, the following warning message displays:
In addition, a Decline Receipt may print. The remainder of the steps below do not apply to a declined ECC request.

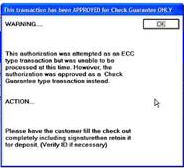
This dialog displays regardless of whether the check is approved via ECC or regular Check Guarantee.
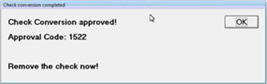


![]()
All ECC transactions are required to have VOID printed on the check and because the check is processed through the customer's account and thus cannot be re-used.