Before you begin creating advanced rainchecks, you must set up the advanced raincheck options in Options Configuration.
Display all POS Options in the Options Configuration window.
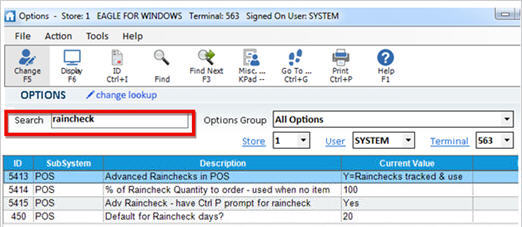
Enter raincheck in the Search field, and press Enter.
Alternatively, you can press change lookup and right-click on the Description column, and select "Filter on Description." In the box that displays, select Contains, type "raincheck" in the blank box, and click Apply Filter.

The raincheck options display in the grid.

Click in the Current Value column of the option "Advanced Rainchecks in POS." Click the arrow that displays. Click Y - Rainchecks tracked and used in suggested ordering.
Click in the Current Value column of the option "% of Raincheck Quantity to order-used when no item level %." Click the arrow that displays. Enter the percentage of raincheck quantities you want the system to order (assuming not all rainchecks will be redeemed), and click OK.
Click in the Current Value column of the option "Default for Raincheck days?." Click the arrow that displays. Enter the default number of days for which you want rainchecks to be redeemable (you can later change the number of raincheck days on a raincheck-by-raincheck basis), and click OK.
Click in the Current Value column of the option "Have Control-P prompt for raincheck." Click the arrow that displays. Select Yes if you want clerks to be able to press Control-P (or the Promo button) to redeem a raincheck. Select No if you want clerks to only be able to redeem a raincheck by clicking Menu, and then clicking Sell Raincheck Item.
Click Change on the toolbar.