Use the following procedure to sell an item that has a serial number. The serial number automatically prints as a descriptor line on the receipt or invoice. Items that have serial numbers must have an "S" in the Tally field on the Codes tab of Inventory Maintenance. At POS, the system prompts you to enter the serial number of the item, or to select the serial number from a list that you set up in Inventory Maintenance. Click here for the procedure for setting up serial number lists.
Note: The security bit associated with selling items with serial numbers is bit 655– Allow adding serial #'s during Receiving or at Point-Of-Sale. This bit also controls whether a list of existing serial numbers displays at POS, allowing the clerk to select one.
In POS, enter the SKU and the quantity you are selling, and press Enter.
![]()
You can also sell the item by entering its serial number in the Item (SKU) field and pressing Control-U.
You can also sell the item by scanning a barcode of the serial number, and then pressing Enter. If you use this method, skip to step 5 below.
If you have set up a list of serial numbers for the item, the list displays. Do one of the following:
Use the Down Arrow to select the appropriate serial number from the list, and press Enter.
If the serial number is not in the list, select Add and type the serial number (note: you must have security bit 655 to do so). If there are no available serial numbers on file and you do not have security bit 655, a comment window displays in which you can enter the serial number.
If you don't know the correct serial number, press Escape to post the item without a serial number.
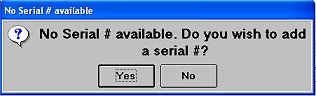
If you haven't set up a list of serial numbers for the item, POS asks you if you want to add a serial number. Press Enter (Yes). Then type the serial number and press Enter.
To assign a serial number to an item you posted without one or with an incorrect one, or to assign multiple serial numbers to the same item, do the following:
Press Change (F5), enter the line number of the appropriate item, and press Enter.
![]()
(Optional) If you aren't sure which item(s) needs a serial number assigned to them, press Menu (- on the keypad), and select E– Find Items without Serial # Assignment.
Press Menu (- on the keypad), and select E, Assign Serial Number.
Select a serial number and press Enter, or press Add to add one, and follow the prompts (note: you must have security bit 655 to add a serial number. If there are no available serial numbers on file and you do not have security bit 655, a comment window displays in which you can enter the serial number). If the item already had a different serial number posted, you will be asked if you want to "replace previously selected serial # with this one?"
To assign another serial number to the same item, press Change (F5) again, enter the line number of the item, and press Enter. Press Menu (- on the keypad), and select E, Assign Serial Number. Select the serial number and press Enter, or press Add to add one, and follow the prompts (note: you must have security bit 655 to add a serial number. If there are no available serial numbers on file and you do not have security bit 655, a comment window displays in which you can enter the serial number). When the message "Replace previously selected serial # with this one?" displays, select No, and press Enter. The additional serial number posts on the transaction.
Finish the transaction as you normally would. You can invoice the transaction when you have assigned a serial number to all relevant items.