Use the following procedure to set up stores as a distribution center (DC) or as a retail location. This procedure assumes you have already set up any desired Store Groups, and a vendor record for each distribution center.
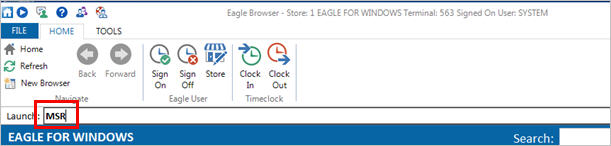
From the Eagle Browser launch bar, type MSR and press Enter.
From the Options Configuration screen that displays, click Misc.

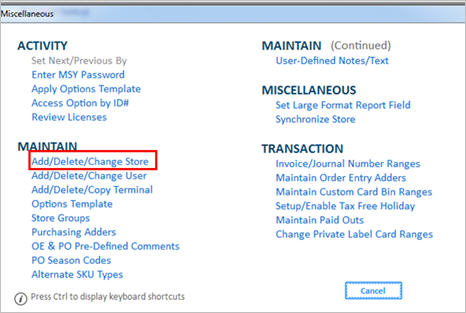
From the Miscellaneous dialog, select Add/Delete/Change Store.
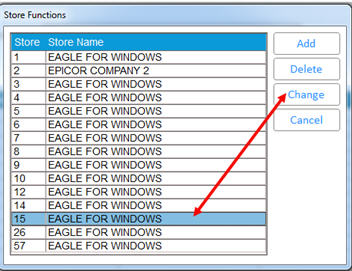
From the list of stores that displays, highlight the store you want to change, and click Change.
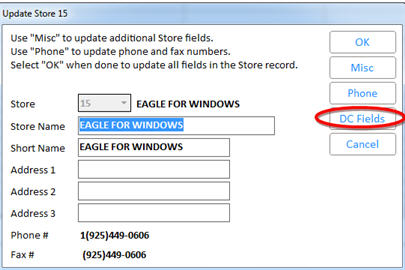
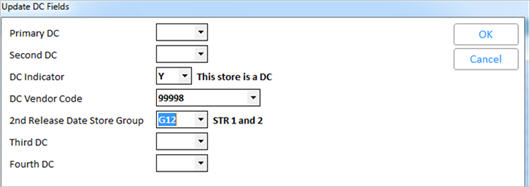
From the Update Store dialog, click DC Fields.
Change the DC Indicator to Y.
At DC Vendor Code, enter the vendor code that you set up for this DC.
At 2nd Release Date Store Group, enter a store group that includes all the stores that should receive a forced shipment from this DC if the second release date is reached. (Note: Even if you will not be using the 2nd release date feature, you should enter the appropriate store group)
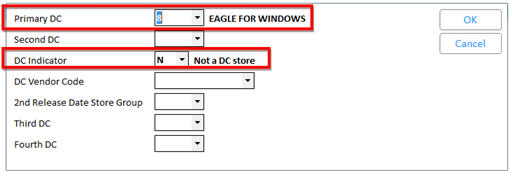
If the location you are setting up is a retail location, do the following:
At Primary DC, enter the warehouse that normally supplies this location.
If you have more than one DC, you may populate the other DC assignments as well.
Set the DC Indicator to “N.”
Click OK to return to the Update Store screen, and click OK again to save your changes and exit.