Batch Print Archived Documents (QRPRINT)
Use this report to reprint archived documents. You can also select to
print batch invoices instead of the system automatically printing them.
Use QRPRINT Option B “Batched Invoices Only.” If you use an enhanced form
for invoices, set option 5148 “Invoices printed from report QRPRINT uses
an Enhanced Form” to Yes. Otherwise, set to No to print standard laser
invoices. If you have set option 5148 to Yes, the Device Configuration
of this listener PC must be set up for Enhanced Forms. The printer entered
in the “* Invoice” row of Device Configuration is where these invoices
will print. The enhanced form that will be used to print the invoices
is defined in option 7543 "Enhanced Form for invoice documents.”
- From the Eagle Browser, type QRPRINT in the
Launch bar, and press Enter. Alternatively, you can click Reports-->POS
Reports-->Batch Print Archived Documents.
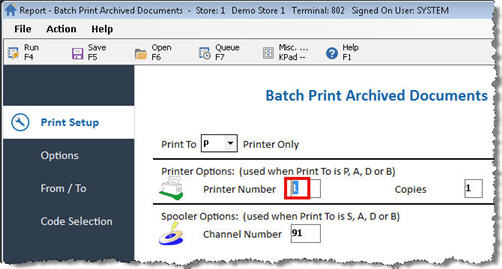
- From the Print Setup page, if option 5148 “Invoices
printed from report QRPRINT uses an Enhanced Form” is set to Yes,
then in the Printer Number field, enter the MPS Print Number of the
Listener PC (on MPS screen 2To view MPS screen 2, click Network Access (or
Secure Access) from the Eagle Browser, and press Enter. At Login,
type M and press Enter. From the Function prompt that displays, type
MPS and press Enter. Click Next Screen.
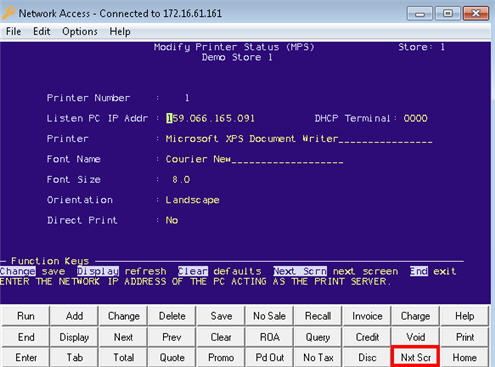 )
that points to the laser printer where you want the invoices to print.
If you have set option 5148 to No, the invoices will print to the
printer whose name is entered for the Listener PC (on MPS screen 2
in the Printer field). If you have set option 5148 to Yes, the Device
Configuration of this listener PC must be setup for Enhanced Forms.
The printer entered in the “* Invoice” row of Device Configuration
is where these invoices will print. The enhanced form that will
be used to print the invoices is defined in option 7543 "Enhanced
Form for invoice documents”.
)
that points to the laser printer where you want the invoices to print.
If you have set option 5148 to No, the invoices will print to the
printer whose name is entered for the Listener PC (on MPS screen 2
in the Printer field). If you have set option 5148 to Yes, the Device
Configuration of this listener PC must be setup for Enhanced Forms.
The printer entered in the “* Invoice” row of Device Configuration
is where these invoices will print. The enhanced form that will
be used to print the invoices is defined in option 7543 "Enhanced
Form for invoice documents”.
- On the Options page, select the option that
reflects what you want to print on the report: Only A/R transactions,
Charge Transactions, Batched Invoices (PPS / Customer Order Management
users), Log Activity, or only Transactions with a Pharmacy SKU.

- On the
 page, you can specify
a range of Document Numbers, Customer Numbers, or Document Dates,
if desired. If you have a multistore system, you can also specify
a Store, or select All Stores.
page, you can specify
a range of Document Numbers, Customer Numbers, or Document Dates,
if desired. If you have a multistore system, you can also specify
a Store, or select All Stores.
- On the
 page, you can include or exclude by Account Code, Balance Method,
and Terms Code, if desired.
page, you can include or exclude by Account Code, Balance Method,
and Terms Code, if desired.
- Click Run (F4) to run the report, or Queue (F7)
to include it in an end-of-day queue.