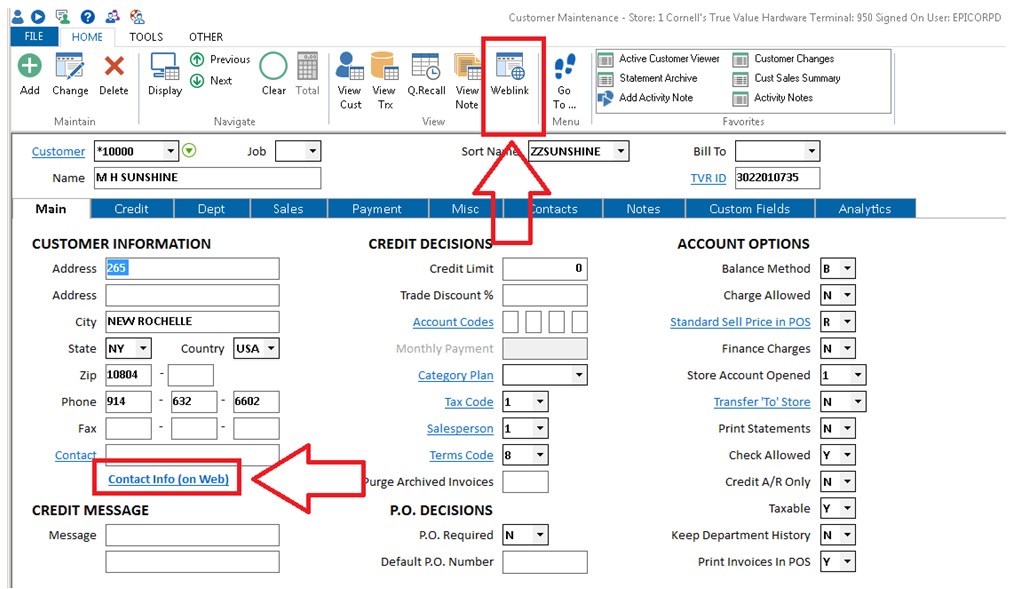
Using Weblinks
Once a weblink is set up for a customer it can
be invoked by:
- Clicking
the link on the main tab.
- Clicking
the button in the toolbar.
- Hitting
Ctrl-W.
- Invoke
it from the FILE à“All
Actions” menu.
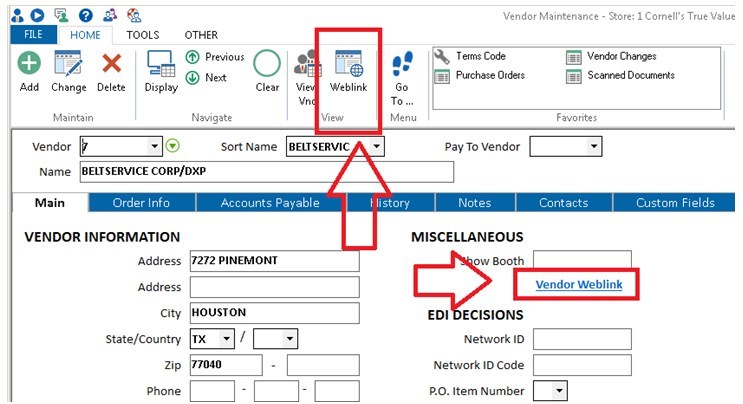
Viewing a Weblink set up in Vendor Maintenance (MVR):
Once a weblink is set up for a vendor it can be invoked by:
- Clicking
the link on the main tab.
- Clicking
the button in the toolbar.
- Hitting
Ctrl-W.
- Invoke
it from the FILE à“All
Actions” menu.
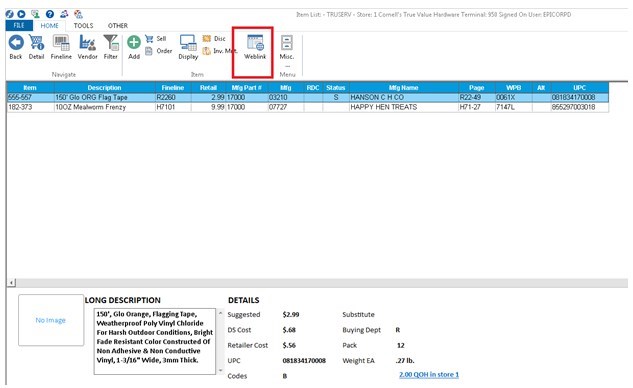
Viewing a Weblink set up in Item Maintenance (IMU):
Once a weblink is set up for an item it can be invoked by:
- Clicking
the link on the main tab.
- Clicking
the button in the toolbar.
- Hitting
Ctrl-W.
- Invoke
it from the FILE à“All
Actions” menu.
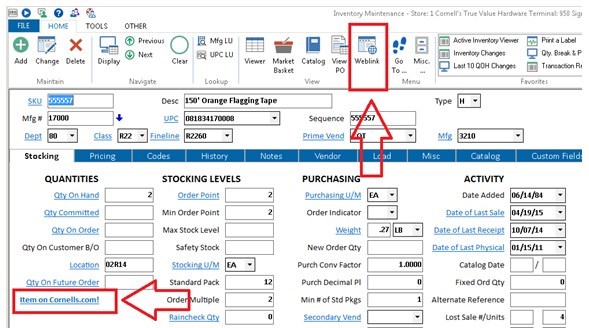
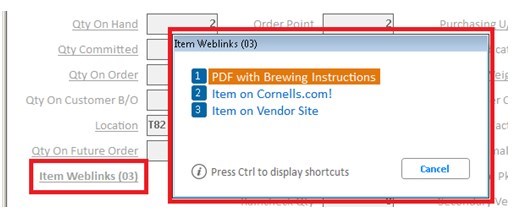
If an item has more than one weblink (for example a “vendor
specific”, a “store specific” and an “item specific” weblink) a sub-menu
will allow the user to select which weblink to follow.

If
an item already has a regular “Eagle Image” or “Catalog Image” that shows
in IMU associated with it, the “weblink link” on the main screen will
not show anymore. It can however still be accessed by using the “Weblink”
button. The same goes for a Style Color Size Image and a classic Eagle
URL.
Viewing a Weblink set up in Catalog (CAT)
Once a Weblink is setup it can be invoked by:
- Clicking
the button in the toolbar.
- Hitting
Ctrl-W.
- Invoke
it from the FILE à“All
Actions” menu.
If an item has more than just the catalog specific weblink
(for example the item could have an item specific weblink as well) a sub
menu will appear allow you to select which weblink to follow. See option
1639 as it determines which weblinks show in the catalog.
