Configuring and Updating eConnect
Installing
eConnect for the First Time
Using eConnect.msi or the Full CD Installer, to the following to install
eConnect:
Double click the
eConnect.msi to run the initial installation on each PC.
Select
the PC that will be your eConnect Manager (Master) Console.
Open the eConnect
Console from the Epicor symbol on the task bar.
From This Station
tab, click Configure. From the Configure
window, click the Network tab.
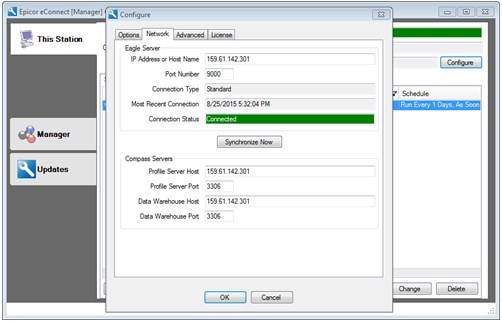
Verify that the
correct IP address for your Eagle server is listed, and that the connection
status is green and says “Connected.”
For Compass Updates,
fill in the Compass Server information, typically it is the Eagle
Server IP address.
Note: This
is required for any clients that do not currently have Compass installed.
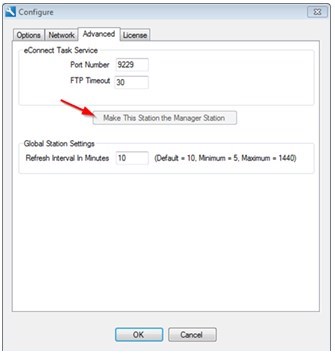
From the Advanced tab,
click Make This Station the Manager Station.
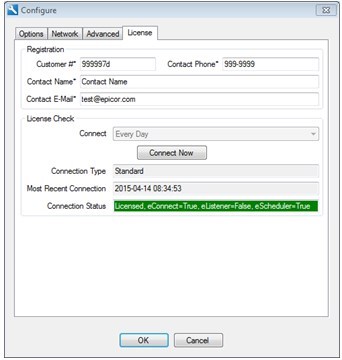
- From the License tab,
enter your customer number and contact information, and then click
Connect Now.
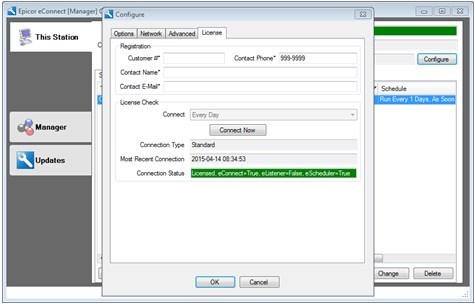
- Within a few minutes,
the Status indicator should become green to indicate valid license
and Eagle connectivity.
Updating eConnect
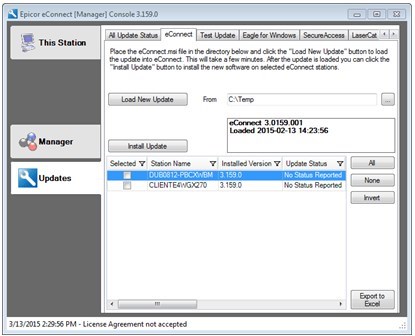
Copy the MSI file to the C:\Temp\ directory
on your eConnect Manager Console.
Go
to Updates/eConnect and do the following:
- Click
Load New Update, then click Accept at the License Agreement. The
update takes several minutes to load and display in the list.
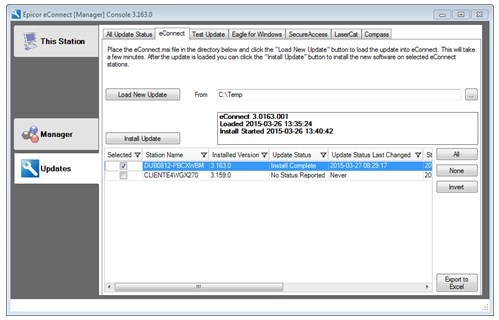
Click the ALL button
on the right or select the desired stations to update.
Click Install Update,
select your desired Schedule, and then click OK.

- Within 20-30 minutes
of the scheduled run time, the Stations list should indicate that
all stations have updated.
The
eConnect Tabs
This section
describes in detail the various tabs in eConnect.
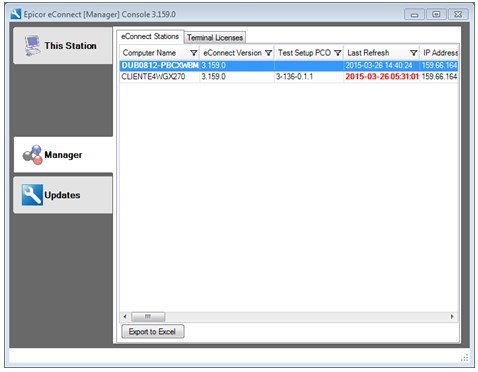
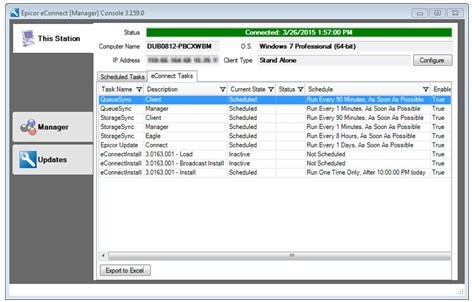
The Manager tab
The Manager
tab self-populates with useful information about each of your eConnect
stations. If desired, you can export information from the Manager tab
to Excel. Most information is self-explanatory, but the red time stamp
means that a station has not checked in since that time stamp. A station
name in bold blue text designates the current Manager Console.
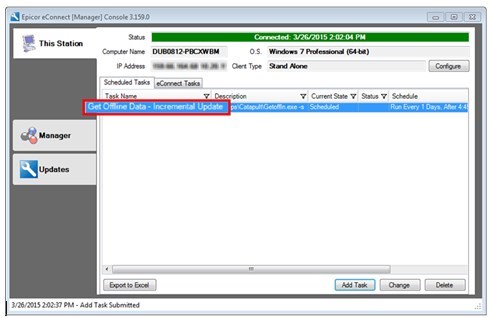
This Station Tab – eConnect Tasks
This tab
logs everything done by this eConnect station. On the eConnect Manager
Console, you can see what was broadcast to be done for the other stations.
This can be handy in confirming the scheduling of specific tasks.
eScheduler – The Scheduled Tasks tab
eScheduler
does not require a user to be logged onto the Windows machine, and currently
supports the Offline refresh (download) for Offline POS data files only.
If POS stations are not left powered on at night, Epicor suggests using
the Offline Master / Client model using at least one Master per location
which is left on at night to process the files for the local Clients.
See the Eagle for Windows online help topic entitled “Standards for Master/Client
Setup” to configure this model, which also lowers the nightly bandwidth
requirements of each remote location.
To
Add, Change, or Delete eSchedules:
- From This Station, on
the Scheduled Tasks tab, select the desired action (add, change, or
delete).
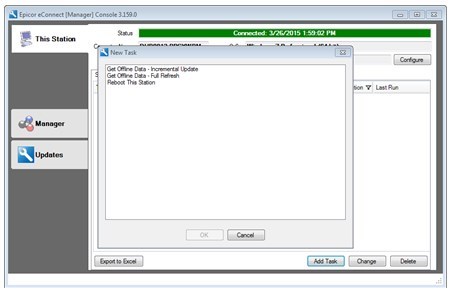
- Select your Offline
Refresh choice and click OK to display the
schedule screen.
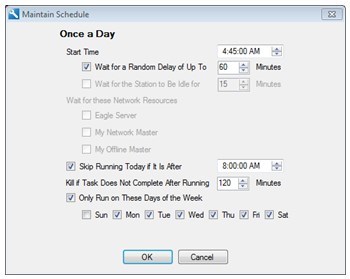
- Once
you have made your scheduling choice and clicked OK, within a few
minutes your schedule displays in the Scheduled Tasks.