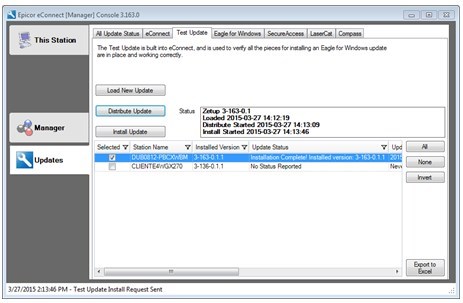
The Status will add “Distributing…” and then the Status will change to “Distribute Started <date> <time>.” Wait at least 10 minutes from the <date> <time> status.
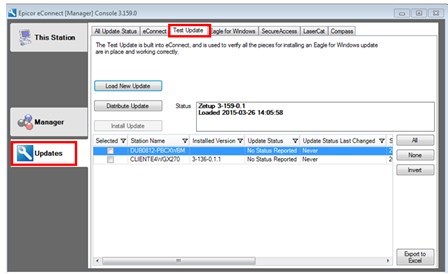
Select the desired stations using the boxes on the left or the buttons on the right.
Click Install Update and select the desired scheduling.
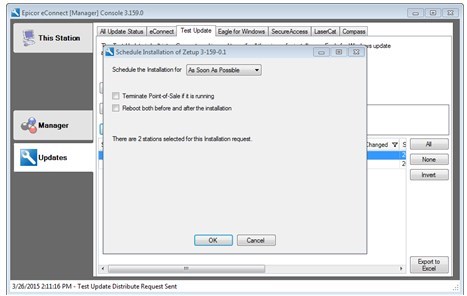
The Status will add “Installing…”and then will change to “Install Started <date> <time>.”
The Stations will now reflect the Test Setup PCO on each station and show that they all updated.
Copy the entire Eagle for Windows CD onto your eConnect Manager Console, or place it into its CD drive.
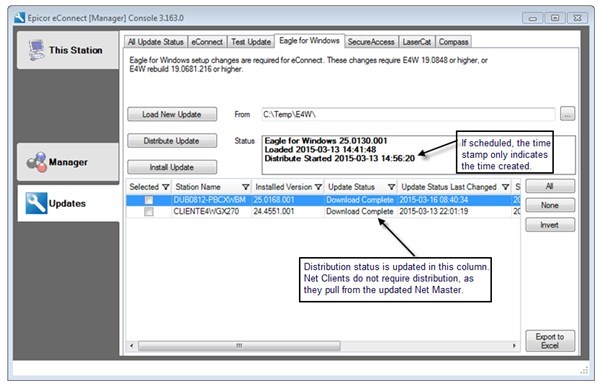
From the eConnect Manager console, on the Updates/Eagle for Windows tab, enter the path to the Eagle for Windows software in the From field.
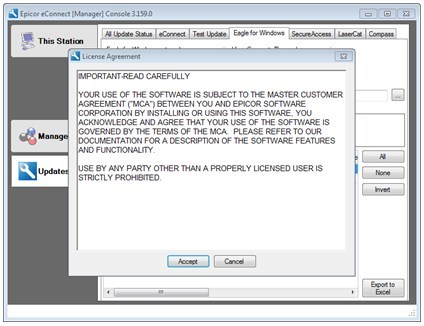
Press Load New Update and accept the Software License Agreement.
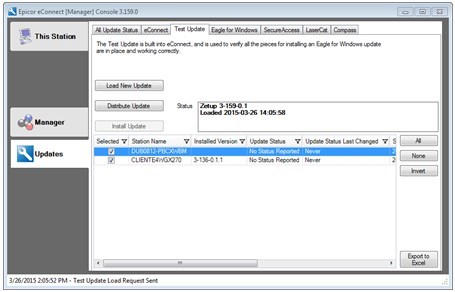
The Distribute Update button becomes enabled.
Click the ALL Button on the right or select the desired stations to which to distribute the first schedule. Keep in mind that each Stand alone and Net Master Eagle for Windows station will be downloading a 700MB file, so select appropriately for your network bandwidth.
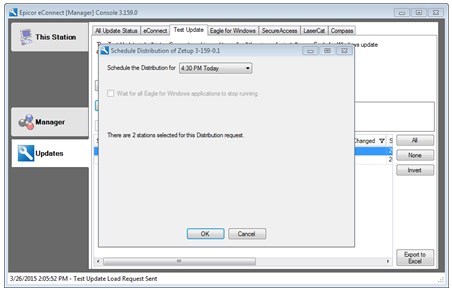
Click Distribute Update to display the scheduling window.
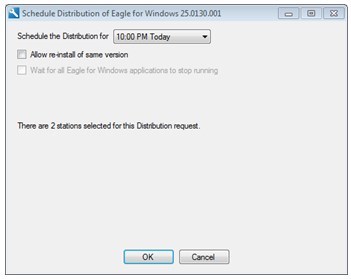
Select the desired schedule and then click OK.
Note – you can schedule the distribution process multiple times and it can span several evenings if necessary.
Do NOT distribute updates to stations during business hours because this process dramatically slows down the network. If necessary, you can distribute updates to stations over several nights.
Check the “Update Status” column to verify the download for all terminals was “Completed” or “Skipped.”
Install the new server software on the Eagle Server. You must do this BEFORE proceeding with the Eagle for Windows install.
Once the Eagle server has been updated with new software, return to the eConnect Manager Console and initiate the install for all clients using the “As Soon As Possible” schedule option.
![]()