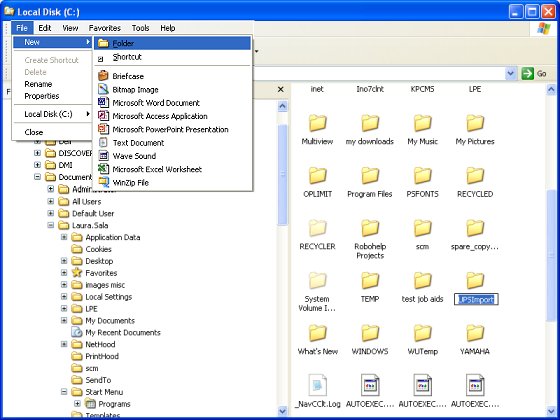
On the C-drive of the UOWS station, create a folder called "UPSImport." For the procedure steps, click here.
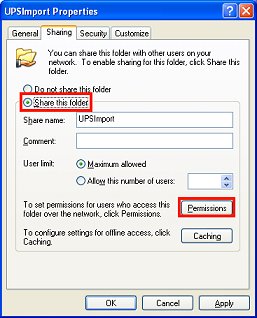
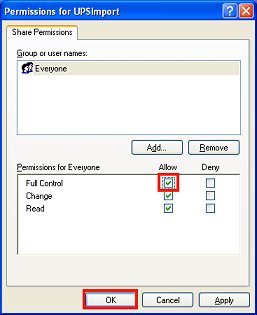
Share the UPSImport folder you just created, giving everyone "Full Control." For the procedure steps, click here.
(COM or PPS users with UPS WorldShip Integration)
Use the following procedure to create the file layout for the file that will update UPS Online WorldShip (UOWS) station with shipping information from your Eagle for Windows (E4W) system.
On the C-drive of the UOWS station, create a folder called "UPSImport." For the procedure steps, click here.
Share the UPSImport folder you just created, giving everyone "Full Control." For the procedure steps, click here.
![]()
You may choose to use different security settings based on your Windows Networking setup. Domain users in particular may want to specify that only certain users can write to this directory. Regardless of how you set up the share, the Windows user account that is active on the Eagle for Windows client machine must have Read and Write or Read and Change privileges on the UPSImport folder without being prompted for a password.
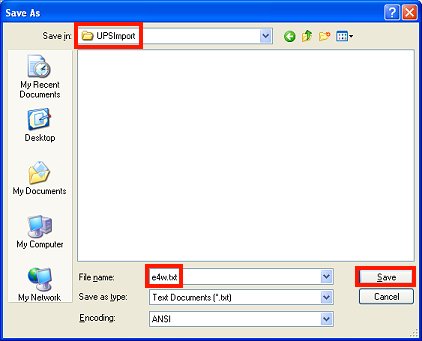
Open Notepad (click Start, point to Programs, point to Accessories, point to Notepad). Create two empty text files, one called e4w.txt and the other called upsows.txt. For the procedure steps, click here.
Do one of the following:
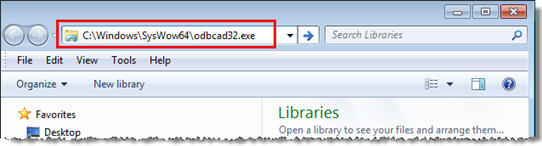
If you use Windows 7 or 8, then from Windows Explorer, enter C:\Windows\SysWow64\odbcad32.exe.
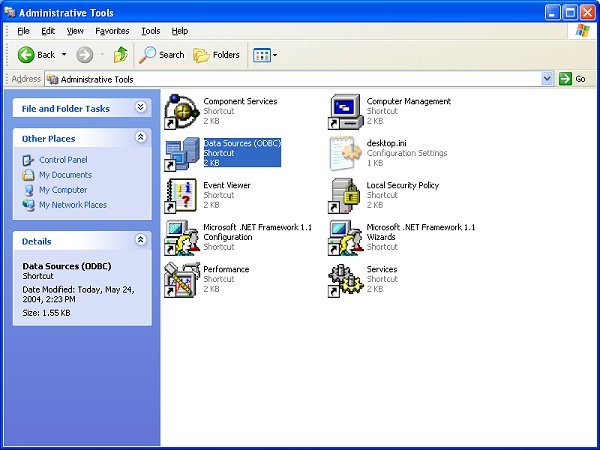
If you use Windows 2000 or Windows XP, then In Control Panel, open the "ODBC Data Source Administrator" applet. For the procedure steps, click here.
Click the "System DSN" tab at the top of the "ODBC Data Source Administrator," and click the "Add" button on the right. The "Create New Data Source" dialog displays.
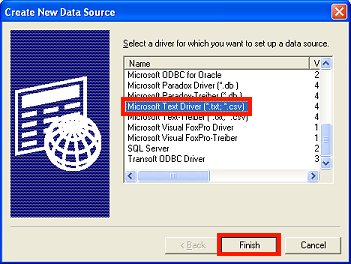
Select the "Microsoft Text Driver (*.txt, *.csv)" entry in the list by clicking it, then click the "Finish" button.
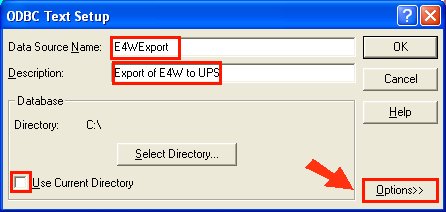
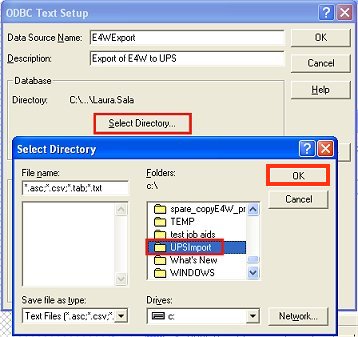
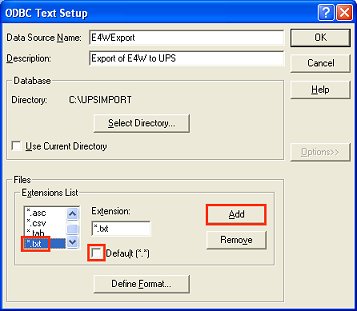
In the "ODBC Text Setup" dialog that displays, type "E4WExport" into the "Data Source Name" field, and type "Export of E4W to UPS" in the "Description" field. Un-check the "Use Current Directory" box. Do not click OK; instead, click the Options button.
Click "Select Directory" and specify the folder you created in step 1 as the database directory (UPSImport). Then click OK.
Un-check the "Default (*.*)" checkbox. Select "*.txt" in the Extensions List by clicking it, and click Add. Do NOT press OK yet.
Click the "Define Format" button, and do the following in the dialog that displays:
In the "Tables" list, click E4W.txt.
If checked, un-check the "Column Name Header" checkbox.
Change the "Format" by selecting "Tab Delimited" from the drop down list.
Ensure "Rows to Scan" is set to 0 (zero).
Set the Characters to "ANSI" by selecting the corresponding radio button.
Select Char from the "Data Type" drop-down list.
Enter 255 in the "Width" text box.
Enter "OrderNumber" in the Name field.
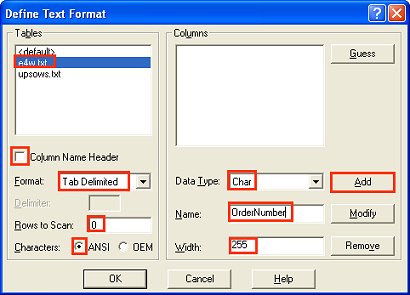
Press Add. The name "OrderNumber" is added to the list of columns.
Continue adding the names listed below by simply typing over the previous entry, and pressing Add. For example, to add "Company," place your cursor in the Name field and type Company over OrderNumber and click Add. To add "Attention," place your cursor in the Name field and type Attention over Company (the previous entry). It is crucial that the columns be added in the order specified below. If you make a mistake, click a column name to select it and use the "Modify" or "Remove" buttons as needed. Integration will not function correctly if these mappings differ from the definition in this topic.
Company
Attention
Street
Address2
Address3
Country
Zip
City
State
Phone
FAX
ServiceCode
CustomsDescriptionOfGoods
Ship Via Shipper Name
Email Address
![]()
Do not add the last four fields, Timestamp, Terminal, Store, and User, because there are no corresponding fields in UPS Worldship.
When you are finished entering all of the names from the above list, your screen should look similar to the following example. Do Not Press OK Yet.
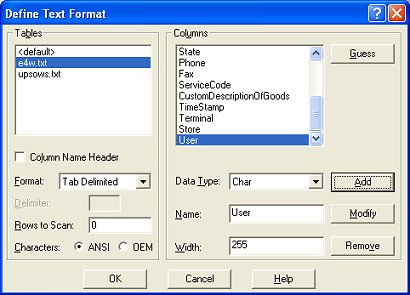
Verify that the names are set up correctly. If you made a mistake, click a name in the Columns list to select it and use the "Modify" or "Remove" buttons as needed. When all names are correct, click OK.
![]()
You may get an error message at this point similar to this: "failed to save table attributes of (null) into (null)." Ignore this error and click "Ok" on the error box. This is a confirmed bug in Microsoft ODBC. It is documented in Microsoft Knowledge Base article # 235889. This error message does not indicate a failure in saving column names.
Your column names may or may not be capitalized. The ODBC manager will sometimes force all column names to upper-case. If this occurs, it is not indicative that something is wrong.
Proceed to the topic "Create the UPS File Layout for Importing to E4W."