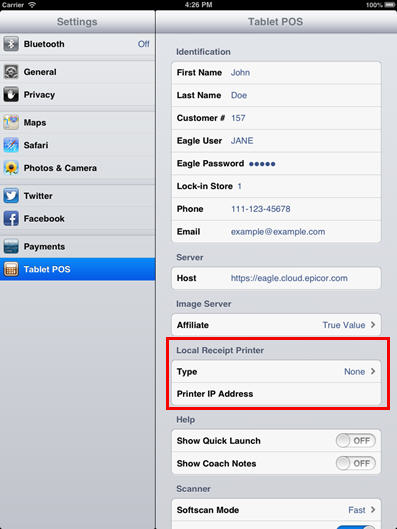
In Settings, tap Tablet POS on left side of screen. The following screen displays.
In the Local Receipt Printer section, tap the Type field. The following screen displays.
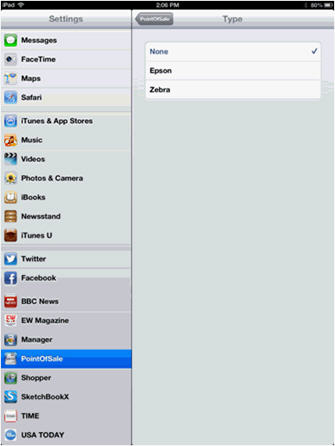
In the Type section, select Epson (usually P60 II), Zebra (usually QL320), or None (usually the printer that is set up for Eagle). Note: Epson and Zebra both need WiFi access and receipt paper.
Tap the back button at the top of the screen to return to Tablet POS.
In the Local Receipt Printer Section, tap the Printer IP Address field. The following screen displays.

In the Printer IP Address field, enter the IP address for your wireless printer.
Tap the back button at the top of the screen to return to Tablet POS.
At the bottom of the screen, tap the gear icon, and then select Printer Setup.
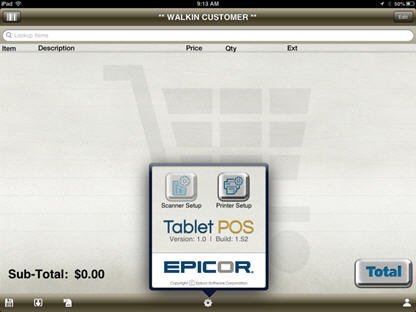
The printer setup Local Discovered Printers screen displays.

Select Test to test the printer. If you have a different local printer than the one listed in the IP field, you can change it and select Save.