Import Eagle GL Entries to QuickBooks: Set Up Translation Table
You must set up the Chart of Accounts translation table in Eagle to define how each Eagle account translates to the QuickBooks account.
Before you begin, note the following:
- If the Journal Entry file contains an account that is not set up in the translation table, the Eagle account number will be used for importing to QuickBooks, and will be added as a Bank account. Once that happens, you must create and post a manual QuickBooks Journal to move the transaction to the correct account.
- QuickBooks™ does not allow more than one A/R or A/P account in a journal entry. If your company has multiple A/P and/or A/R accounts, set up the additional accounts as sub-accounts of the A/P and A/R main accounts.
- The QuickBooks™ conversion program summarizes all entries to Eagle Accounts Receivable based on your Store-A/R Account in the Set up G/L Passoff (GLSET) window. All entries to Accounts Payable are summarized in the A/P account set up in A/P Control File (ACON).
- If you use sub-accounts in QuickBooks™, enter the name of the account in the translation table in this format: ‘Main Account:Sub Account.’ Example: ‘Office Supplies:Postage’
- From the Eagle Browser, type GLSET in the Launch bar, and press Enter. The Set Up G/L Passoff window displays.
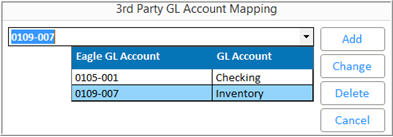
- Click Misc, and select 3rd Party G/L Account Mapping.
- In the dialog that displays, Click Add.
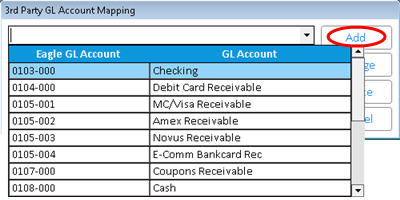
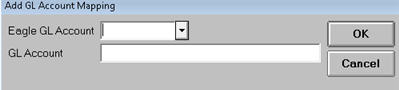
- In the next dialog, use the drop-down button to select the Eagle GL Account. In the GL Account field, enter the QuickBooks account exactly as it appears in QuickBooks. Then click OK.
- Once you have added translations, the dialog becomes populated with them. You will also use this dialog for changes and deletions.