Use the following procedure to set up the printer (in MPS), the options (in Options Configuration), and defaults (per customer in Customer Maintenance) that apply to the Enhanced FAX application.
In Network Access at the Function prompt, type MPS and press <Enter>.
Decide which printer number you will use as the Fax Network Printer. At Printer Number, type that number and press <Display>.
At Printer Type, type E and press <Change>. A message, Record changed, displays at the bottom of the screen.
Press <Next Screen> to display the next screen of MPS.
At Server IP Address, type the IP address of the PC with the Adobe PostScript driver installed. To determine the IP address, do the following:
From the Windows desktop, click Start and then click Run.
In the Run dialog, at Open, type CMD and click OK. A DOS window displays.
At the C:\> prompt, type IPCONFIG and press Enter. The IP address displays.
At Printer, type E4WFAX (same name used when installing the PostScript driver). Or, if you selected an existing Network Printer that already has a name, leave the existing name. If you use an existing Network Printer, make sure that printer’s Listener is on the same PC that has the PostScript driver installed.
Press <Change>. Press <End> to exit MPS.
Activate the Eagle Listener program. To do this:
From the Eagle Browser, click Utilities. Click Network Configuration.
Click the check box for "Is this PC a Network Printer Server?" to place a check mark in the box.
Click Apply. Click Start Listener.
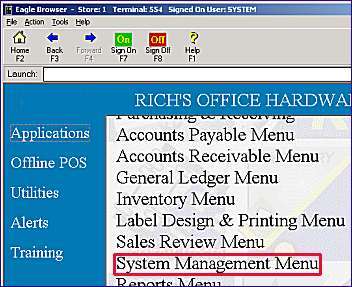
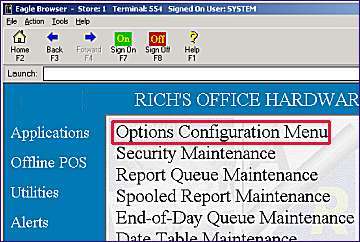
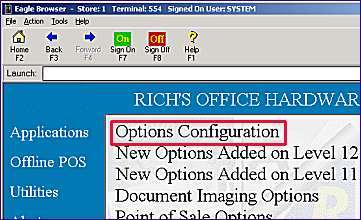
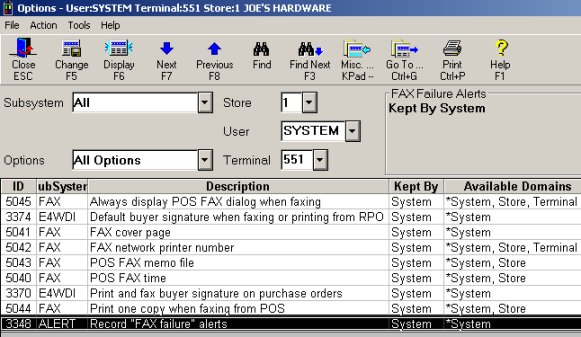
Open the Eagle Browser and Display the Options Configuration window.
Set the Subsystem field to ALL and set the Options field to All Options. Click Display. Double-click the Description column header to display the options in alphabetical order. Review all of the following options that apply to Enhanced FAX and set the Current Value column to the desired setting for your business.
(ID# 5045) Always display POS FAX dialog when faxing
(ID# 3374) Default buyer signature when faxing or printing from RPO (Signature Capture users only)
(ID# 5041) FAX cover page
(ID# 5042) FAX network printer number
(ID# 5048) Include store name on pre-printed laser forms for Fax
(ID# 5043) POS FAX memo file
(ID# 5040) POS FAX time
(ID# 3370) Print and fax buyer signature on purchase order (Signature Capture users only)
(ID# 5044) Print one copy when faxing from POS
(ID# 3348) Record "FAX failure" alerts
Click Change to save your entries.
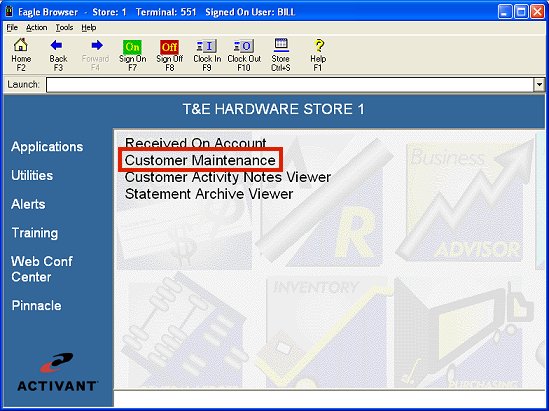
Display the customer whose defaults you want to set up. Click the Misc tab and locate the Fax POS/Stmt field.
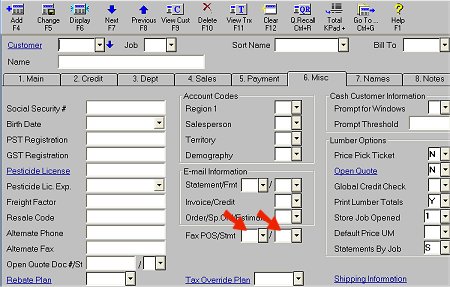
If this customer will receive faxed POS documents automatically, enter A, O, or Y in the first box of the Fax POS/Stmt field. Otherwise, leave the default of N.
If this customer will receive faxed statements, enter Y in the second box of the Fax POS/Stmt field.
Click Change to save your entries.
Repeat steps 2 through 5 for each customer that you will FAX to at POS or from the Statement Report (RSM).
After completing all of the procedures in this topic and the Installing Enhanced FAX topic, the last step before using Enhanced FAX is to enable an option to indicate that setup is complete. You must complete all the setup steps before enabling this option. Do not set this option to Yes before completing the setup steps. If you do, faxing will not work from some applications.
Open the Eagle Browser and display the Options Configuration window.
At Subsystem, select ALL. At Options, select FAX - FAX Configuration.
Locate the option Enhanced Fax Setup is Completed (ID# 5046). Set this field to Y.
Click Change.