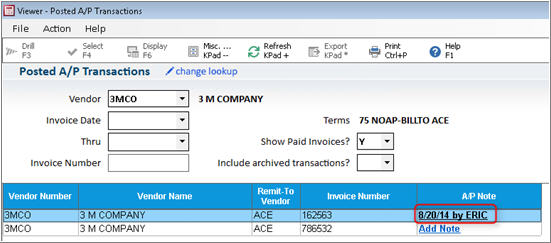
You can attach A/P Notes to Accounts Payable transactions from any of the following windows: New A/P Transactions (ATMU), the ATMU Grid Viewer (accessed by clicking the Viewer button), Posted A/P Transactions (AVIQ), or A/P Invoice Maintenance and Payment (APMU). You can use A/P Notes to record information about specific transactions in order to help you manage your A/P accounts. To add a note, you simply click the Add Note hyperlink and type your note. Once you have added a note to an A/P transaction, the hyperlink no longer says "Add Note," but instead displays the date of the note and the user who entered it. This means that you can tell at a glance which transactions have a note, when the note was written, and who wrote it.
Note the following about A/P Notes:
They have no length limit; you can type as much text as desired.
They are forever linked to a specific Vendor/Store/Voucher Number. There are no purges in place that will unlink the note. If you delete a document, and then re-add that document number, the old note will reattach itself to the new document.
They follow the transaction into the A/P Transaction archive.
They cannot be printed, nor are there any viewers, reports, or utilities that will give you a list of documents with notes attached.
They can only be added once a voucher has been created (once it has been assigned a voucher number). If you are manually creating a voucher in back office (in New A/P Transactions-ATMU) you will not be able to add a note to the voucher until you’ve added/created the voucher.
Multistore: A/P Notes are only created in the store for which the document exists. For example, if the document exists in store 1, you cannot create a note for store 2 for this document.
A/P Notes cannot be added to A/P Check transactions in Posted A/P Transactions (AVIQ) because notes are linked to Vendor/Store/Voucher, and A/P check transactions are not assigned Voucher Numbers.
The following security bits control the A/P Notes feature:
Bit 820 - Ability to view A/P transaction notes
Bit 821 - Ability to add/change/delete A/P transaction notes. Note: if a clerk has this security bit, they must also have bit 820.
Display the appropriate transaction in one of the following A/P screens: New A/P Transactions (ATMU), Posted A/P Transactions (AVIQ) or AP Invoice Maintenance and Payment (APMU).
Do one of the following:
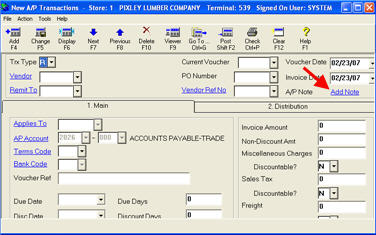
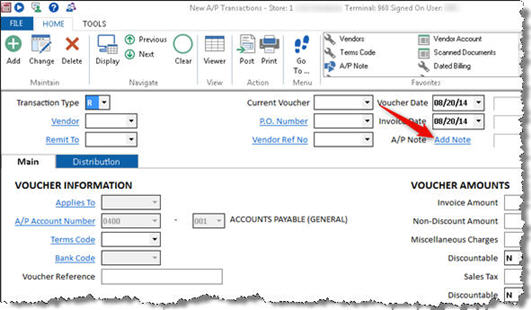
If you are adding a note in New A/P Transaction (ATMU), display an existing voucher or add/create a voucher then click the Add Note hyperlink located in the Header section of the window. (Alternatively, you can click GoTo and select Add A/P Note.)
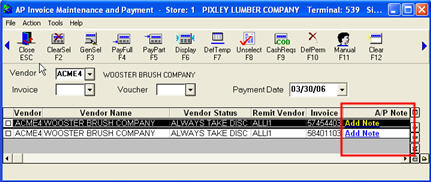
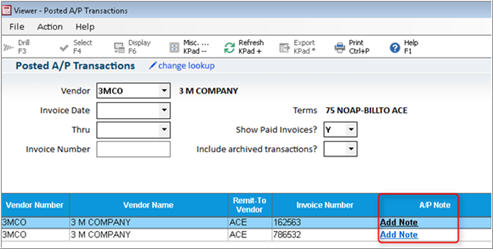
If you are adding a note in Posted A/P Transactions (AVIQ) or AP Invoice Maintenance and payment (APMU), click the Add Note hyperlink for the appropriate transaction in the A/P Note column, which is located in the grid (note: you may need to scroll to the right to see the A/P Note column).
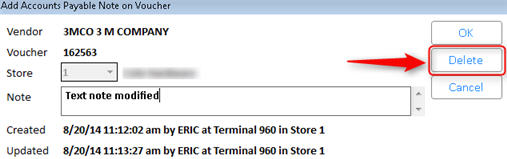
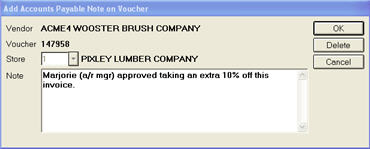
In the dialog that displays, enter the note and click OK.

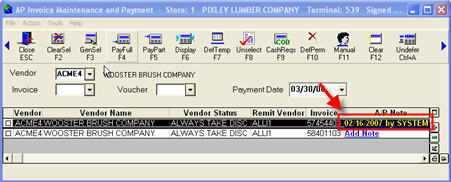
Notice that the Add Note hyperlink has been replaced with a hyperlink showing the date and user who entered the note. This is important because you'll know at a glance that the transaction has a note attached to it, who wrote it, and when.
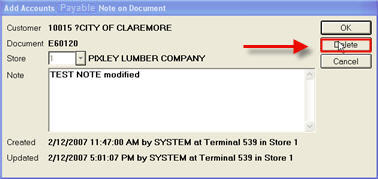
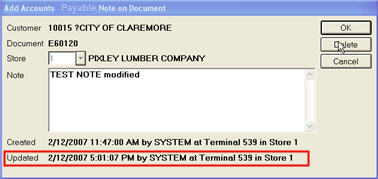
To update an existing note, simply click the hyperlink showing the date and user (as shown in step 3 above), enter your changes in the dialog that displays, and click OK.
Now when the note is displayed, it will indicate when it was updated, and by whom.
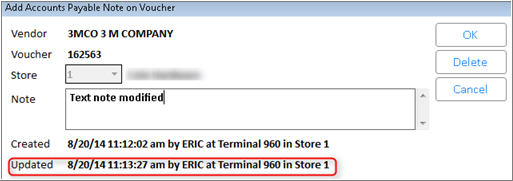
To delete a note, simply click the hyperlink showing the date and user (as shown in step 3 above), and click Delete in the dialog that displays.