Flex Reports: Accounts Receivable
Flex (flexible) reports are reports that you can use to report on Accounts Receivable (A/R) information. There are two types of flex reports:
-
Pre-built. These are flex reports that are already defined and are included with your software. CUSTOMER and PTDROLL are two examples of pre-built flex reports.
-
User-defined. These are flex reports that you create and save on your system. You determine what fields to include on the report and in what order the fields print on the report.
![]()
Additional information about A/R flex reports is available in legacy online help. In Network Access, when MFR or RFR is displayed, press <Shift><Help>. From the Menu that displays, select Screen Help for an overview of the function and select Field Help for a definition of each field on the screen.
1
Create a user-defined flex report
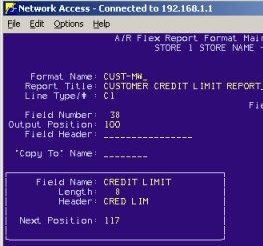
In Network Access use MFR to create a flex report.
-
Determine which fields you want to include on the report and in what order.
-
In MFR, the name you enter in the Format Name field is the flex report name you'll use to run the report.
-
The name you enter in the Report Title field will print at the top of the report.
-
Lines C1, C2, C3, C4 are for customer information. Lines T1, T2, T3, T4 are for transaction information.
-
The system indicates the next output position available after you add a field to the report. Use this number or add 2 or 3 to this number to allow for extra blank between fields.
-
There is a total of 132 character spaces that you can allocate to the fields you add to each line on the flex report.
-
Clear the Field Header field each time before adding a new field to the report definition.
2
Run a user-defined flex report
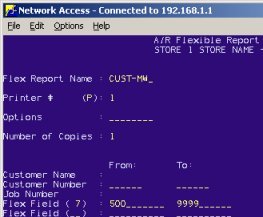
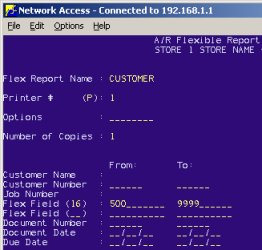
In Network Access use RFR to run a user-defined flex report.
-
At Flex Report Name, use the name you entered in MFR in the Format Name field.
-
(Optional) Include your own flex field From/To. To do this, enter the field number in the Flex Field and then the values you want to select by in the From and To fields. For example, use Flex Field #7 (Over 90) and then enter 500 in the From field and 9999 in the To field to only select customers that have balances over 90 days and more than $500.