
Inventory Import
This job aid describes how to use a saved Map file to import a data file with item Information to your Eagle system, the Flexible Inventory Load window (FIL). The Map file would have been previously created and saved in the Inventory Import Designer window. Once the item changes are in FIL, you can work with them as you would any item records (change, or delete records).
![]()
Commas do not import via Inventory Import; they are converted to question marks ("?"). If the data you're importing contains commas in the item description field, Epicor recommends you globally change the commas to some other character (such as a space or semi-colon) before importing.
1
Display Inventory Import dialog
-
From the Eagle Browser, click Data Import Menu, then click Inventory Import.
-
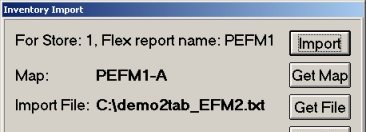
Click Get Map to display the Load Mapping dialog. Click to highlight the map that you will use with the data file. Click Open. The dialog closes and you are returned to the Inventory Import dialog.
-
The Import File field is automatically filled in with the file (and location) used when the map was first created and saved. If this is not the file you want to use, click Get File to display the Open dialog. From this dialog, locate the data file with the item changes, click to highlight it, and then click Open. The Open dialog closes and you are returned to the Inventory Import dialog.
2
Import the data to FIL and check the log
-
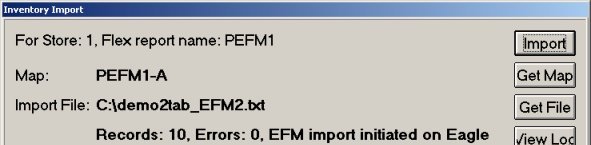
Click Import. A progress bar displays the status of the import. Then a dialog displays when the import is complete, with the number of records written to FIL and if any errors were found.
-
Check the Miscellaneous Log to verify the import completed successfully. You must check the log even if the previous dialog indicated no errors. From Network Access at the Function prompt, type SHOWLOG and press <Enter>. Press <Down Arrow> until Miscellaneous Log is highlighted and press <Enter> to display the log. Scroll until the most recent entries display. Review the log entries to verify that the import to FIL was successful.
-
If you received an error, use the following information to troubleshoot the problem.
-
"Flex Name XXX exists and is set to contain adds. Please change." This error means when you created the map file, you did NOT check the "File contains adds" box, and the value in the "Adding New Items" field in the corresponding flex name in Flexible Inventory Load is set to Y. To correct the problem, place a checkmark in the File Contains Adds field, or use a different flex name.
-
"Flex Name XXX exists and is not set to contain adds. Please change." This error means when you created the map file, you checked the "File contains adds" box, but the value in the "Adding New Items" field in the corresponding flex name in Flexible Inventory Load is set to Y. To correct the problem, remove the checkmark in the File Contains Adds field, or use a different flex name.
-
If the Import dialog indicates that errors occurred, as shown here,
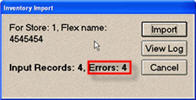
click View Log to view the error log. Scroll to find the entries for the most recent import and review the error messages.
3
Review the data and update the Inventory file
-
Use Flexible Inventory Load (FIL) and the Flexible Inventory Load Report (RFL) to review the data. Use RFL to print an edit list of the data, do not use Option F. In FIL you can make changes to individual items or delete records.
-
After reviewing the data, run RFL with Option F to finalize the data and update the Inventory file.