
Add a New SKU
The following steps show you how to create new SKUs. To quickly and easily load information for a new inventory item, use the Load tab on the Inventory Maintenance screen.
This task is performed from the Eagle Browser.
1
Adding new SKUs
-
From the Eagle Browser, click Inventory Menu , then click Inventory Maintenance.
-
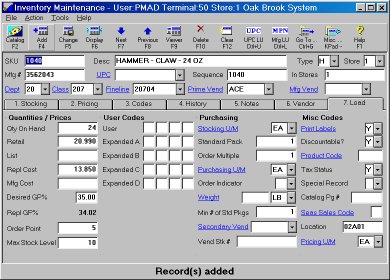
Click the Load tab.
-
The only information you must provide is the department code and In Stores (if multistore). However, other pertinent item information includes:
-
SKU
-
Description
-
Mfg #
-
Dept, Class, and Fineline
-
Primary vendor and Mfg vendor
-
Qty on hand
-
Retail and Repl cost
-
Discountable
-
Tax status
-
Location code
-
To add the SKU to inventory once you fill out all of its information, click Add. If you do not enter a SKU, the system will automatically assign one.
2
![]()
When you create a department SKU (i.e., F for Fasteners), select N in the Keep stock info and Keep prices boxes on the Codes tab. Setting these two fields to N:
-
Keeps the quantity on hand from reaching a negative number
-
Tracks sales history when you type N in the Keep prices box
-
Keeps these SKUs from appearing on the Price Exception report