ENAP: Electronic Receipt Posting (ERP)
Use this job aid to receive invoices from ENAP. The process, called Electronic Receipt Posting or ERP (also referred to as Electronic Invoicing), allows you to automatically add the items you've ordered from your vendor to a blank PO on your Epicor Eagle™ system. You can complete this process as soon as the invoice information is available from ENAP, before the merchandise arrives at your store.
Set up steps must be completed before you can receive electronic invoices from ENAP. Refer to the Epicor Software Corporation document, Electronic Receipt Posting (ERP) ENAP for information.
1
Create a PO header
You must create a PO header for each invoice you will download with ERP. Only create the PO header, do not post any lines (SKUs) to the PO. The line items are added automatically when you receive the invoice using ERP.
-
From the Eagle Browser, click Applications, then click Purchasing and Receiving.
-
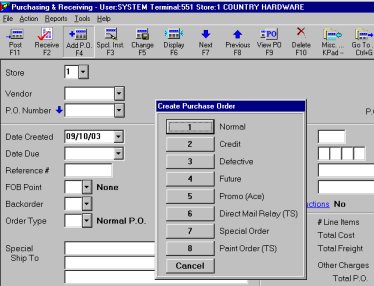
From the Tool bar, click Add PO and then click Normal.
-
Enter the required information, Buyer's ID and Vendor. For PO Number, you can enter a number a or let the system assign a number. Click OK. The PO is created and the posting screen displays.
-
Exit the Purchasing and Receiving window.
2
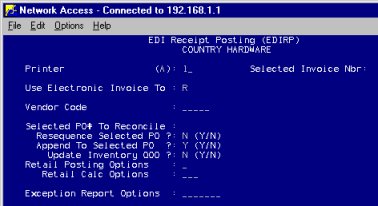
Receive the electronic invoice
-
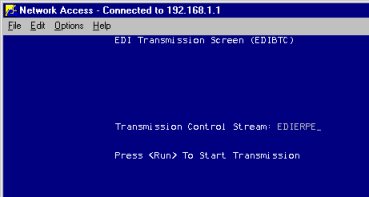
From Network Access at the Function prompt, type EDIBTC and press <Enter>.
-
At Control Stream Name, type EDIERPE and press <Run>. Press <End> to exit.
-
Once the transmission completes, review the log. From Network Access at the Function prompt, type ASYMSG and press <Enter>.
-
Press <Next> or <Prev> to display the section of the log with ERP information.
-
Look for the following message to indicate a successful transmission:
EDIPARSE : mm/dd/yy hh:mm:ss : END EDI TO TRIAD TRANSLATION