Use the following procedure to use the Bin Label Changes Viewer, which contains a list of items that need a bin label because they have changed (i.e. their description or manufacturer part number has changed) or they are new (just been added to inventory). In the Bin Label Changes Viewer, you can view item changes, delete item change records, or change their status to "printed" or "not printed."
This procedure assumes you've already set up the Item Change file. If you haven't, click here for the setup procedure.
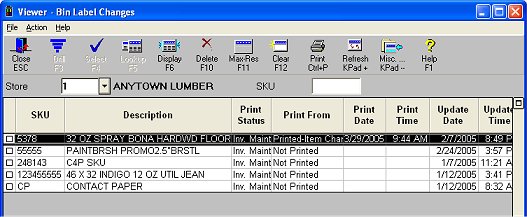
From the Eagle Browser, click Label Design and Printing Menu, then click Bin Label Changes Viewer. The Bin Label Changes Viewer displays. You can scroll to the right to see which fields changed and various other information about the items in the grid.
(Optional) Multistore users: to view item changes in another store, enter the store number in the Store field and press Enter to refresh the grid.
(Optional) To locate a particular item in the grid, enter its SKU number in the SKU field, and press Enter to refresh the grid.
(Optional) You can mark items as Printed or Not Printed, as necessary. For example, you may want to mark items as Not Printed if you had a problem printing labels and now you want to reprint them, or you may want to mark items as Printed if for whatever reason you don't want to print bin labels for some items.
To change Item Change records from "printed" to "not printed" or vice versa, click the checkbox next to the appropriate items, then click Misc, and select "Change the Status of All Checked Rows to Printed," or "Change the Status of All Checked Rows to Not Printed", as appropriate.
(Optional) if you want to delete an Item Change record, click on it so that it's highlighted, then click Delete.