
(Pharmacy users only)
The following procedures use the Inventory Import Tool. For more information about this application, see the Inventory Import topics.
Run Item Code Update (RICU) to remove the H from all items in your last FSA update. This ensures that the H is added back in to only products which are currently eligible for FSA.
Log onto the SIGIS website at www.sig-is.org
Download the latest SIGIS list of FSA items. Epicor recommends you download in XML format (due to the next step) .
Open the file in XML, add a column, and copy "H" into the column for every health benefits item, and copy "R" for pharmacy items.
Save the file as a comma separated file (CSV).
If this is your first time importing FSA records, go to the next section entitled "Importing FSA Records for the First Time." If you have imported FSA records before, skip to the section "Ongoing Procedure for Importing FSA Records."
From the Eagle Browser, click Data Import Menu, then click Inventory Import Designer.
At Import File type, select Comma Delimited.
Leave SKU Options Blank.
At Import Options, do the following:
Select UPC Code from the drop-down box.
At Flex Name, enter SIGIS.
Un-check the box next to File contains Adds, and place a checkmark at Ignore First Record.
Click Map Field (F6), type an "S" for SKU, and press Enter. Use Start Position 2 and End Position 12, and click OK.
Click Map Field (F6) again, type a "U" and press down-arrow to locate the User Code position you will use. Then click OK.
Click Open (F3). Locate and select the SIGIS list that you saved on your PC, and click Open.
Click Output (F10). Make sure there is a check mark at the Ignore First Record box. The UPC codes, and the letter H or R, display at the bottom of the screen for the first ten items on the list.
Click Import (F11). In the dialog that displays, click the Import button. An Import Status bar displays in the center of the screen. Wait until the import finishes (approximately 5 minutes).
When the Import is complete, the screen displays the number of records read and errors. The errors are items that it could not find with that UPC Code or items that did not exist in the Inventory file.
Click Cancel. This step downloads the records into Flexible Inventory Load (FIL). Use FIL to view/modify the imported data.
When you are satisfied with the data, finalize it by running the Flexible Inventory Load Report (RFL) with option F.
If at any time an item becomes ineligible for FSA, be sure to remove the H from its User Code.
From the Eagle Browser, click Data Import Menu, then click Inventory Import. The Inventory Import dialog box displays.
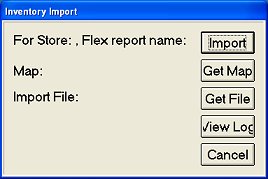
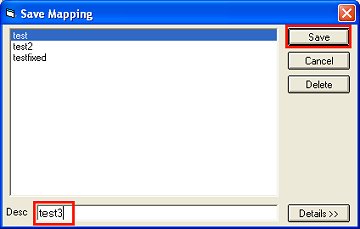
Click Get Map, select the map file you saved for importing FSA items (see step 9 above), and click Open.
Click Get File, locate the FSA file to be imported, and click Open.
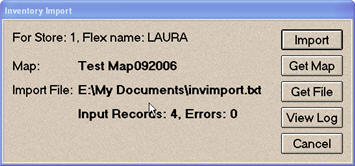
Click Import. As the import executes, a progress bar displays. In a moment, the total number of records imported displays in the last line of the dialog box.
Use Flexible Inventory Load (FIL) to view/modify the FSA data. When you are satisfied with the data, finalize it by running the Flexible Inventory Load Report (RFL) with option F.