Now that the PAD data has been downloaded, backed up, and deleted the from the Eagle system, you need to establish the dates for the next purge. It is recommended that you run the data purge on a yearly basis.
To complete the fourth step:
From the Eagle Browser, click System Management Menu, and then click Archive Manager.
On the Archive Manager menu, click Make PAD (F5).
Click 4th Step.
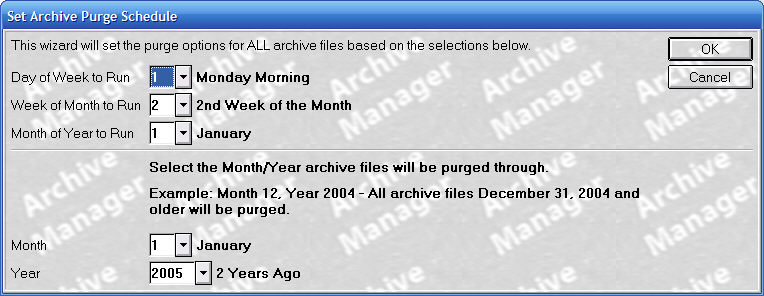
The following screen displays where you can prepare the settings for your next purge.
In the Day of the Week to Run field, select the day of the week on which you want the purge to run
In the Week of the Month field, select the week of the month on which you want the purge to run.
In the Month of Year to Run field, select the month of the year on which you want the purge to run.
For example, if you want to run the purge on a Monday of the second week of January, your screen would look like this:
In the Month field, select the month that the files will be purged through.
In the Year field, select the year that the files will be purged through.
The purge will now include all information in the range you've just created. It will include information between the date the purge runs, and the month and year selected in the bottom half of the screen.
If the information is correct, click Yes.
If the information is not correct, click No, and enter the correct information.
The next purge will run on the date you just entered.