When the system runs the purge, it collects the archived data and gathers it into the PAD file. Ultimately this file will be copied to your PC, and then deleted from your Eagle system. You need to specify when the system should run the purge application. On the Set Archive Purge Schedule, the top half of the screen represents when the purge should run. The bottom half of the screen is where you specify the month and year through which the information should be purged.
To set the purge schedule and PAD files to include:
From the Eagle Browser, click System Management Menu, and then click Archive Manager.
On the Archive Manager menu, click Set Up (F4).
Click Set Archive Purge Schedule.
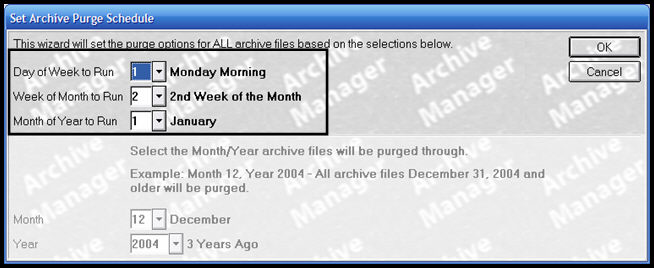
In the Day of the Week to Run field, select the day of the week on which you want the purge to run.
In the Week of the Month field, select the week of the month on which you want the purge to run.
In the Month of Year to Run field, select the month of the year on which you want the purge to run.
For example, if you want to run the purge on a Monday of the second week of January, your screen would look like this:
In the Month field, select the month through which the files will be purged.
In the Year field, select the year through which the files will be purged.
All files dated earlier than the month and year you specified will be archived and deleted from your Eagle system.
When the Set Archive Schedule - Are You Sure? prompt displays, take one of the following actions:
If the information is correct, click Yes.
If the information is not correct, click No, and enter the correct information.