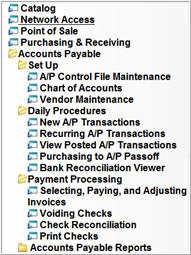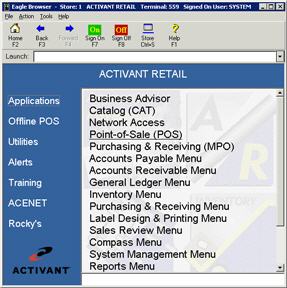
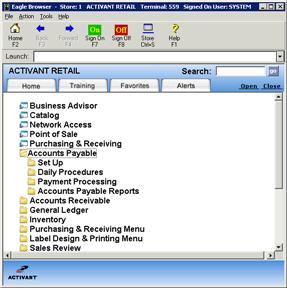
The following procedure explains how to start using an alternate version of the Eagle Browser called Version 2. Unlike Version 1, which is the traditional text-style format of Eagle Browser, Version 2 is a folder-style format.
Version 1 Version 2
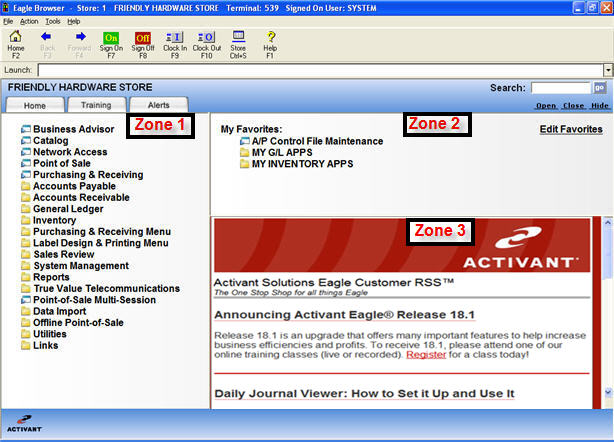
In addition, Version 2 allows you to add two additional "zones" to the main page of the Browser, one on the top right, and the other on the bottom right. These zones give you quick access to other pertinent business information directly from the Eagle Browser. For each zone, you can select to display a web site, Eagle Alerts, Favorites, or Links.
Set option 137 "Eagle Browser version to use" to Version 2 in Options Configuration. Note that changing this option affects all stores and all terminals.
To see the change to Version 2, you must close and re-start the Eagle Browser.
If desired, you can divide the opening page of Eagle Browser Version 2 into different areas, or zones. The main zone is your list of applications, just like in the standard Eagle Browser. The other two zones can display a website, Eagle Alerts, or Favorites.
Below is a sample Browser showing three zones: the main zone (list of applications), Favorites, and a Web Page.
Display the Options Configuration window.
Set up Zone 2 in options 164 and 165. This zone displays in the upper right of the Browser.
Set up Zone 3 in options 166 and 167. This zone displays in the lower right of the Browser. Note: you must set up a Zone 2 in order to have a Zone 3.
![]()
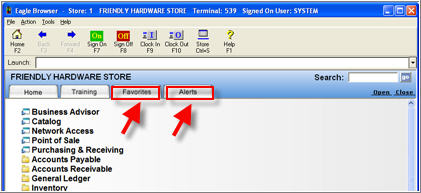
If you choose not to set up zones, then Alerts and Favorites display as tabs.
Favorites can display as a zone or as a tab, depending on your setup. Use the procedure below if you wish to set up Favorites.
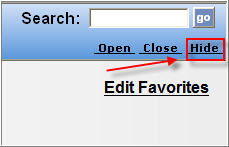
Click the Edit Favorites button, located in the Favorites zone, or on the Favorites tab if you didn't set up Favorites as a zone. The Favorites Maintenance window displays.
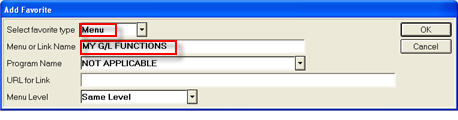
Menus (folders) help you organize your favorites, just like in Internet Explorer when you create a folder for your Favorites. To create a menu, select Menu from the drop-down list. In the Menu or Link Name field, enter a name for the menu. For example, you could enter "MY G/L FUNCTIONS" or "MY WEB SITES" (Tip: you may want to use all caps for menus for easy identification when making changes to your Favorites structure).
To Add a program, do the following:
Click Add, and select Program.
Skip the "Menu or Link Name" field.
In the Program Name field, use the drop-down arrow to select the program you want to add.
In the Menu Level field, select Same Level.
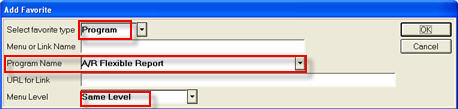
Click OK.
If you created a Menu in step 2, this Program will display within that folder in your Favorites List. If you didn't create a Menu, this Program will display independently in your Favorites list.
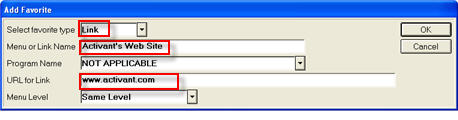
To add a Link, do the following:
Click Add, and select Link.
In the "Menu or Link Name" field, enter a name for the link. For example, you could enter "Epicor's Web Site."
Skip the Program Name field.
In the "URL for Link" field, enter the URL. For example you could enter www.activant.com.
In the Menu Level field, select Same Level.
Click OK.
If you created a Menu in step 2, this Link will display within that folder in your Favorites List. If you didn't create a Menu, this Link will display independently in your Favorites list.
Repeat steps 2, 3, and 4 as needed.
Review your Favorites structure in the Favorites Maintenance window. If you created menus (using step 2 above), notice that the Programs and/or Links are indented under the Menu(s) that contain them.

To make changes to your Favorites structure, click the checkbox next to the entry you want to change in the Favorites Maintenance window. Click Change, and make the desired changes. You can also use the Line Up and Line Down buttons to move a highlighted entry to a different location in the Favorites structure.
![]()
Any Favorites you set up are tied to your User ID. This means that when you sign on to a different terminal as the same user, your Favorites display.
Now that you have finished setup, you can use the various features of the Eagle Browser Version 2:
You can launch an application from Zone 1. Notice that the Browser uses dynamic nested menus that allow you to drill down to menu items and remain on the same screen.
Depending on your setup, from Zones 2 and 3 you can launch an application, view a web site, or view Eagle Alerts.
You can click a tab to view the information contained on that tab. For example, click the Training tab to view the Training Browser.
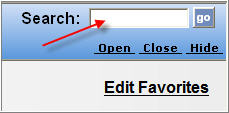
You can use the Search field in the upper right corner to quickly find a function in the menu by keyword. For example, if you search on "Statements," you’ll get a list of all the functions with "Statements" in their description (Printing Financial Statements, A/R Statements Report, etc.).
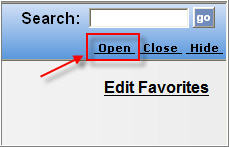
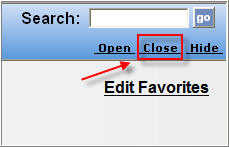
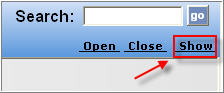
You can use the Open, Close, Hide, and Show links (located below the Search field).