Use the following procedure to create and save an Options Template that you can apply to other stores, users, or terminals.
Display the options you want to include in your template. Do this by using the fields in the header area (Subsystem, Options, Store, User, and Terminal) and/or by using the "filter" feature to narrow down the options that display in the grid.
Click the checkbox (or use the down-arrow and spacebar to place checkmarks) for each option you want to include in the template. Or, if you want to include all displayed options in your template, right-click on the checkboxes column and click Select All. Only those options with a checkmark next to them will be included in the template. If you check an option by mistake, simply click on the checkmark to remove it.
![]()
If checkboxes are not visible, right-click on any column heading, and click Check Boxes.

Change the Current Value of any options in the grid to reflect the settings you want the template to have. Be sure to click Change to update the record.
Click Misc. A dialog box displays. Click Maintain Options Template. The Maintain Options Template dialog box displays.
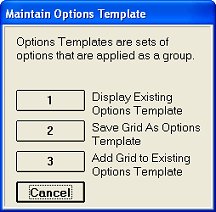
Select "Save Grid As Options Template."
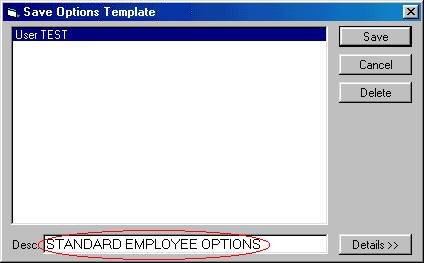
In the Save Options Template dialog box that displays, enter a description in the Desc box that describes the template, and then click Save.
Proceed to the topic "Applying Options Templates" to use the template you just created.
![]()
You can create a template using a smaller set of options by selecting a Classic Eagle function name in the Options field, such as MSR.