You can add, modify, delete, or remove options from an Options Template, Click one of the following to go to the procedure steps:
Modify or Remove Options from a Template
Display the options you want to add to a template. Do this by using the fields in the header area (Subsystem, Options, Store, User, and Terminal) and/or the "filter" feature to narrow down the options that display in the grid.
Click the checkbox next to the options you want to add to a template. (Note: you can also use the down-arrow key and spacebar to place or remove checkmarks.)
Note: if checkmarks are not visible, right-click on any column header, and click Check Boxes.
From the Misc menu, select Maintain Options Template. Then select Add Grid to Existing Options Template. The Add to Options Template dialog box displays.
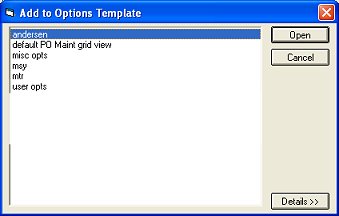
Select the template to which you want to add the options, and click Open. A confirmation message displays at the bottom of the Options Configuration window.
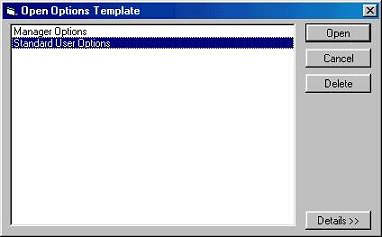
From the Misc menu, select Maintain Options Template. Then select Display Existing Options Template.
In the Open Options Template dialog box that displays, select the template you want to modify, and click Open.
The template you selected displays in the grid. Another dialog box displays information about modifying the template. Once you have read the information, click OK.
Do either of the following to modify the template:
modify existing options in the template by changing the value in the Current Value column.
remove options from the template by clicking on the checkmark to the left of them (this removes the checkmark).
Note: if checkmarks are not visible, right-click on any column header, and click Check Boxes.
Save the changes you made to the template, as follows:
Click Misc, and select Maintain Options Template.
Select Save Grid as Options Template. The Save Options Template dialog box displays.
Select the template you're saving, and click Save. In the Overwrite? box, click Yes.
From the Misc menu, select Maintain Options Template. Then select Save Grid as Options Template.
In the Save Options Template dialog box that displays, select the template you want to delete, and click Delete. (Note: you cannot delete a pre-defined template that came with the system.)
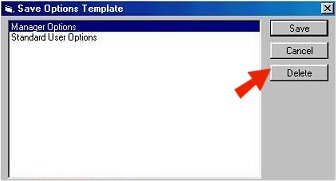
Click Yes to confirm the deletion. Then click Cancel to close the Save Options Template dialog.
![]()
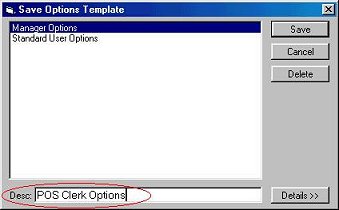
Rather than overwriting an existing template, you can save your changes as a new template. In the Save Options Template dialog box, instead of selecting an existing template from the list, simply type a new name in the Desc box, and click Save.