Use the following procedure to assign security roles to the various users in your business. This procedure assumes you have already set up roles from templates or from scratch.
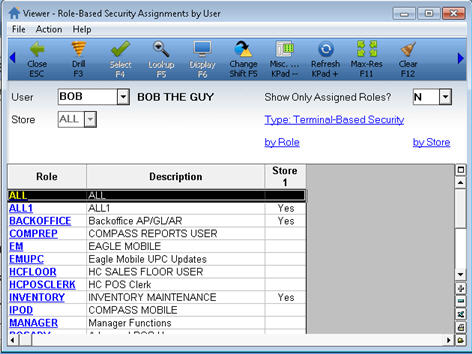
Display the Role-Based Security Assignments by User viewer. Below is an example of the viewer for both single store and multistore.
Single store
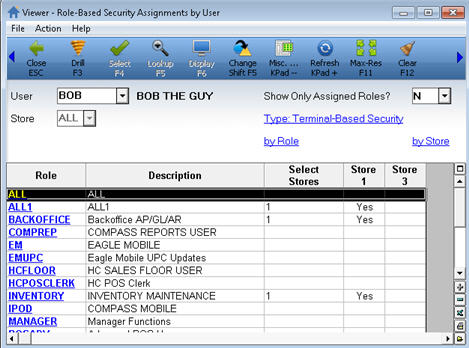
Multistore
In the User field, use the drop-down list to select the user to which you want to assign roles (alternatively, you can type the name of the user in this field). Click Refresh.
In the grid, click in the blank boxes to assign roles to the user. Notice as you click, the word Yes displays in the box. In the single store example above, the user Bill has been assigned the roles "APMANAGER" and "GEN." In the multistore example, the user Bill has been assigned the roles "APMANAGER" and "GEN" in stores 1, 2, 3, and 6.
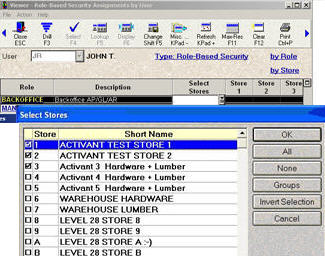
Multistore users only: You can save time by selecting multiple stores in the Select Stores column. This column is initially hidden, so you must right-click a column heading and "select columns to view" to display it. You can add this column to your default view if desired. Click here for more information about saving views. Once the Select Stores column is displayed, click in that field, then click the arrow to the right. In the dialog that displays, you can manually place a checkmark in the desired stores, or use the buttons on the right. Click here for more information about the buttons. When you're finished selecting stores, click OK. The dialog closes.
Click Change.
![]()
If you entered a user that doesn't exist, you will be prompted to add the user when you click Change.