Set up additional transfer constants in the POS Preferences dialog. These determine if transfer constants display on the screen when creating a transfer and if transfer customer accounts should not display in the drop-down lists in POS.
Display the POS Posting screen. For information about entering POS, click here.
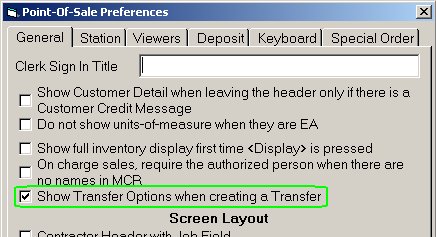
From the Tools Menu, click Options to display the Point-of-Sale Preferences dialog. If not already displayed, click General to display the fields on the General tab.
Locate the option "Show Transfer Options when creating a Transfer." This option determines if the following dialog displays when creating a transfer:

The options in this dialog default to your settings in Options Configuration. Update Sales History defaults to Update Inventory Sales History at From-store in Options Configuration. Update To Store Cost defaults to On Transfers Update Inventory Cost at To-store in Options Configuration.
If you want the dialog to display when creating a transfer, allowing you to change the update options, click the box to display a checkmark in the box. If you do not want the dialog to display, leave the box blank.
Click the Station tab. If you coded your transfer accounts when setting them up in Customer Maintenance (MCR), you have the option to exclude the transfer accounts from displaying in the drop-down lists in POS. This helps to prevent a regular POS transaction from using a transfer customer account. In the Account Code boxes, enter your code(s) for transfer accounts.
Click OK to save any changes you made and close the dialog.