(iNet 1.0 users only)
Epicor Software Corporation™ provides an FTP client for uploading iNet images known as a "zero footprint FTP client" that does not require you to download software onto your PC because it runs in your Internet browser. To use the FTP client, your browser must be capable of running JAVA applets. The image servers and corresponding upload components are available at the following address: http://imgX.triadinet.com, where X represents the number of the iNet image server that is storing your images (such as 1, 2, 3, etc.). Your iNet implementation coordinator will provide you with the image server number during your installation.
Use the following instructions to upload images using the Web Upload method.
Logging In
Using JAVA-enabled Internet Explorer 5.5 or higher, or Netscape 4.5 or higher, navigate to http://imgX.triadinet.com (where X represents the number of the iNet image server that is storing your images, such as 1, 2, 3, etc. Your iNet implementation coordinator will provide you with the image server number during your installation.)
In the User Name field, enter your Epicor customer number.
In the Password field, enter the password assigned to you by Epicor.
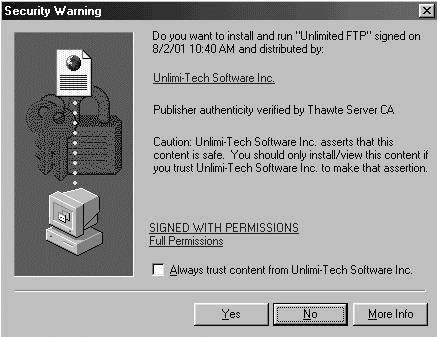
Click the Sign In button. The following screen displays:
Click Yes. In a moment, the transfer dialog box displays:
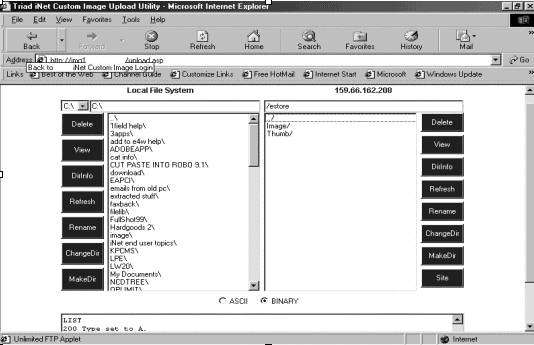
Important! If you see a gray box instead of the transfer dialog box above, you need to download Java Virtual Machine from Microsoft. It is available for download at the following web address: http://www.microsoft.com/java/vm/dl_vm40.htm
Uploading Files
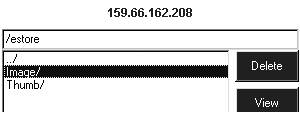
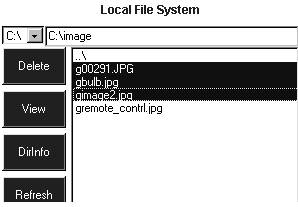
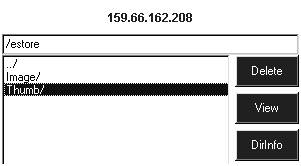
The left side of the transfer dialog box represents your local system, while the right side represents the iNet image server. Remember that files beginning with "g" go in the "Image" directory, and files beginning with "t" go in the "Thumb" directory.
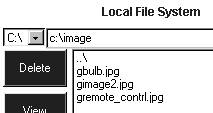
On the Local File System (top left side of the transfer dialog), use your mouse to select the drive that holds the images you want to upload (The default is c:\).
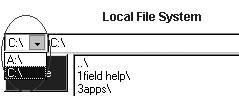
In the text box to the right of the drive you selected, type the name of the directory that holds your custom images (e.g. c:\image) and press <Enter>. A list displays of the existing images / thumbnails in the local directory you selected.
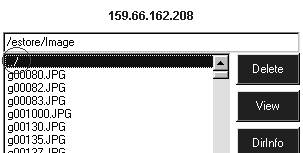
Double click the "Image" directory on the iNet image server (right side of the transfer dialog) to upload item images. If you have previously uploaded images, a list of existing images displays.
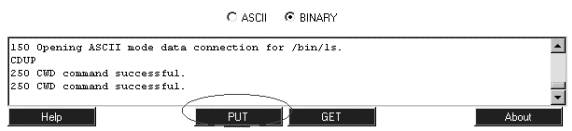
Using your mouse, select the files you want to upload from the Local File System (left side of the transfer dialog). The file selection process works the same as in a Windows application. For example, you can use your shift or control keys to determine how many files you select.
To start the transfer, click the "PUT" button at the bottom center of the page. A dialog box displays, notifying you of the status of the transfer.
Double click the ../ in the iNet image server (right side of the transfer dialog.
To upload thumbnails, double click the "Thumb" directory on the iNet image server (right side of the transfer dialog). If you have previously uploaded thumbnails, a list of existing thumbnails displays.
Repeat steps 4 and 5 above to select and upload the thumbnails.
Close your browser window after your file transfers have completed.