Using Advanced Order Entry to Transfer All Items
(Advanced Order Entry users only)
Use the following procedure if you want to use the Advanced Order Entry feature to transfer an entire order from another location. You would use this method when all the items on the order are stocked in a different location. For example, a customer is ordering lumber, but you only stock commodity items like lumber in your central warehouse; therefore, you would transfer the entire order from that location.
The transfer the system automatically generates is status "R" (request). A "transfer notice" prints at the From-Store to alert the store about the transfer.
-
From the POS window, display the Header screen.
If the Posting Screen is displayed, press Customer and then header to display the Header Screen.
-
In the Cust # box, type the customer’s account number, if applicable.
-
If the cursor goes to the Job # box, type or select the job number you want to use.
-
(Optional) Enter any special shipping instructions in the Special Instruct field. Any special instructions you enter will print in the body of the transfer notice, beneath the last item listed on the document.
-
Click  .
.
-
Click Menu, then click Source Order from Transfer.
-
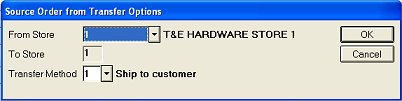
In the dialog box that displays, select the From Store and Transfer Method.
-
-
From Store — This field defaults to the store indicated in option #5455 "Default store for Auto-Transfer's 'From Store" in Options Configuration. To select a different store to transfer from and/or to view availability of the item by store, use the down-arrow key.
-
Transfer method — This field allows you to select where you want the From-Store to physically ship the merchandise. The Transfer Method you select prints on the Auto-Transfer Request document under each line item, prefaced by the words "Ship Via." The item is underlined on the sales order, to emphasize that Store XX is shipping this merchandise.
-

If you select either "Ship to Customer" or "Hold for Will Call," the customer's name and address information from the order will print on the transfer notice. If you're using a "cash" customer, you'll be prompted to enter the customer's name and address.
-
Click Post to go to the Posting screen.
-
Add items to the order as you normally would, then total and save the order. Alternately, you may choose to invoice the order at this time.
Note: if your system is set up to update inventory cost upon transfer completion (if the option "On Transfers Update Inventory Cost at To-Store" is set to A, B, or R), Epicor Software Corporation™ recommends you don't invoice the order at this time, but rather wait until the transfer has been completed. Otherwise, you risk costs being updated incorrectly at the To-Store.
-
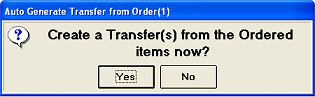
In the Auto Generate Transfer from Order? box, select Yes to create the transfer now, or No if you want to create it at a later time. (Note: If you invoiced the order in step 10, the system will generate a transfer automatically; thus, the "Auto Generate Transfer from Order" box will not display.)
When the system generates the transfer, it uses the default transfer customer number for the selected store (you set up the default account in Customer Maintenance under the GoTo option "Maintain Auto Transfer customer link"). The transfer contains the order number as a cross-reference. The "transfer notice" automatically prints in the From-Store, and also contains the order number.
-
When the From-Store has completed the transfer, invoice the order.
Trademark Information