Views: Export Data to a File
Viewers display information in a grid format (a series of rows and columns). You can customize views to specify the data that displays. To further work with the data, you can also export the data to a file and work with it in other software applications (for example, Microsoft Excel). This job aid describes how to export the data from a view to a file. Various file formats are available, including Microsoft Excel (.xls) and comma-delimited text file (.csv).
Information about working with views is found in the online help topics. Open the General Info About All Applications book, and then open the Using Grids/Views book to display a list of topics.
1
Display the data in a viewer
-
Work with any of the available viewers to display the data that you want to export to a file.
-
Manipulate the viewer until the data that you want to export is displayed.
-
If you export a grid that includes check boxes, only the selected rows are exported.
2
Export the data
-
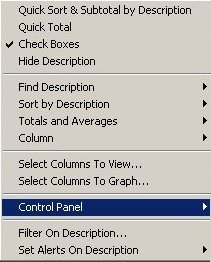
Right-click any column header to display a menu of choices.
-
From the menu, point to Control Panel.
-
A menu displays that includes the export choices.
-
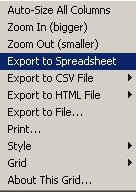
Select an export option. The export options are defined below.
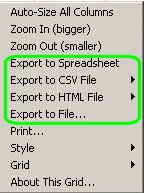
Export to spreadsheet
This option starts Microsoft Excel and exports the data to an Excel spreadsheet.
If you select this option and Excel is not installed on the PC, the data is exported and saved in a file, usually located in the C:\3apps\Temp folder.
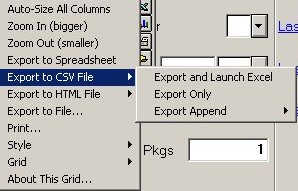
Export to CSV file
This option displays two choices initially: Export and Launch Excel, or Export Only. Data is exported in CSV (Comma-Separated Values) format.
Once you've exported the data, if you point to this option again, a third option displays, Export Append. Select this option if you want to append the exported data to the previous export.
If you select the Export only option, the data is exported and a dialog displays with the results, including the file name and location. Click OK.
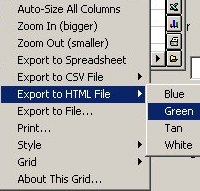
Export to HTML file
Point to this option to select a color template for the HTML file (Blue, Green, Tan, White). The exported data then displays in a browser window, with the color you selected.
To save the file, click Save As from the File menu.
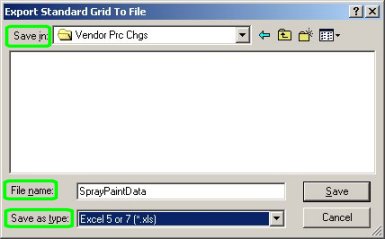
Export to file
Displays the Export Standard Grid to File dialog. Like other Save dialogs, use this dialog to indicate a file name, the location to save the file, and the file format type.
After filling in the dialog, click Save.